52 Week Mini Art Card/Tag Challenge

Saturday 31 December 2022

Visible Image "Chandelier Set" Card


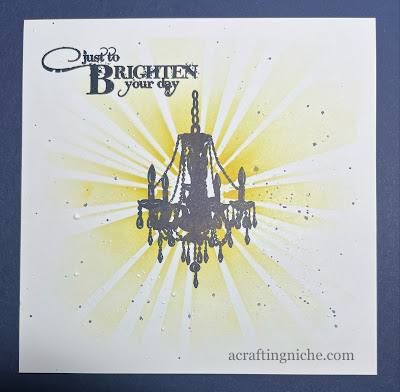
I picked up an old Visible Image stamp set from ebay recently, so decided to make a quick card using it. 

I used the Visible Image "Strobe" stencil with two shades of Archival Inks "Chrome Yellow" and "Sunflower", fading it out towards the edges of the card.

Using Versfine Clair "Twilight" Dark Blue ink I stamped the chandelier and the sentiment, both are from the Visible Image "Chandelier Stamp Set".

I added splatters of "Chipped Sapphire" Distress Oxide ink and also white paint to add a little more interest.

Happy New Year 2023


I just wanted to take this opportunity to thank you for visiting, reading and commenting on my little blog of makes.  I really do appreciate every interaction.

Wishing you and yours a very Happy 2023.  Sam xxx

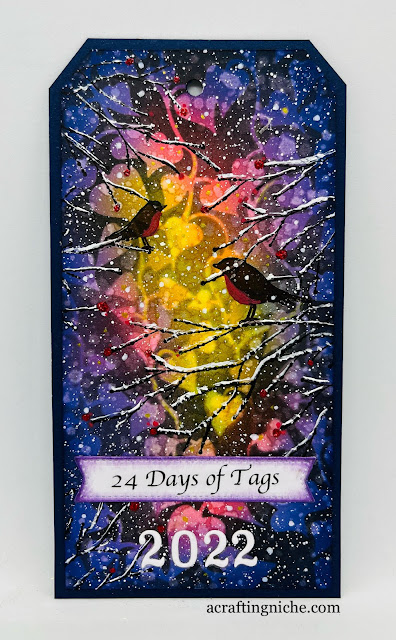
Tag Book Front Cover - Karen Telfer's "24 Days of Tags 2022"


Today, I have made a front and back cover for my tag book which holds the tags made for the Karen Telfer's "24 Days of Tags 2022" challenge.  I secure them all together with a book ring, so that I can flip through the tags easily. 

The back cover is plain, but I wanted the front to be vibrant.  I took inspiration from a demo I saw by Lavinia Stamps Emma-Jo's tag 12.  Here is the link if you want to take a look.

I've used the following shades of Lavinia Stamps Elements Inks:  Dark Denim, Della Blue, Violet Chalk, Graphite, Confette and Sundance.

I have also use the Lavinia Stamps "Ivy Stencil", their "Gip" stamp and their "Bird Collection" with Versafine Clair inks". Nocturne, Twilight, Acorn and Pinecone.

Other products I have used are a red Posca pen, Xmas Red Stickles, Dr Ph.Martin's Bleed Proof ink for the snow on the branches and the flakes in the air.

I printed the "24 Days of Tags" on the computer and printed then die cut into shape.  The 2022 were also die cut through the Big Shot.

Day 19 of Karen Telfer's "24 Days of Tags 2022"


This is my Day 19 Tag of Karen Telfer's "24 Days of Tags 2022" challenge.  If you would like to take part, have a look at Karen's youtube for Day 19 here.   Karen based her tag on "Count Your Blessings", I've used the "New Year" for my theme, using the same process.

I've used two stencils by Funky Fossil Designs to make this tag.

First, using the Funky Fossil "Birthday Celebrations Words Stencil, I chose to heat emboss the word "Celebrate.  I masked off the other areas of the stencil and used a Finger Dabber to apply the Wow! Clear Embossing Ink through the stencil.  I then coated it with "Wow! Super Fine Metallic Silver" Embossing Powder and heat set.

I used the same process and products through the Funky Fossil "Fireworks Stencil" too.

Using different shades of Distress Oxide inks through the "Fireworks" stencil, I was able to build the background.  Starting with the lighter shade of Squeezed Lemonade, Mowed Lawn, Blue Print Sketch and Festive Berries.

Around the edge of the tag I added a layer of "Tumbled Glass" Distress Oxide Ink and tehn on the very edge, I added a coat of Versafine Clair "Warm Breeze" ink.

I then mounted the tag onto navy blue card and cut to shape.  Using a metallic silver glitter gel pen, I added a glitter border and also added touches of sparkle to the fireworks.

I cound some sticky backed gems which I adhered to the middle of some of the firework bursts.

I went on to my computer and printed out the words Happy New Year 2023 in red ink.  I cut each word down and inked the edges of the rectangles using Versafine Clair "Twilight" dark blue ink.  Using foam pads, I stuck the words on to the tag.

Day 18 of Karen Telfer's "24 Days of Tags 2022' Challenge


Back to tagging along with Karen Telfers "24 Days of Tags 2022" challenge and this is my interpretation of her Day 18 tag.  You can find Karen's tutorial on this link.

I splattered white paint on to the background of a kraft tag blank, tearing a section from a book for the background detail and stuck it to the tag.  I used "Tea Dye" Distress Oxide Inks to colour the white leaves and then stuck them into position.

I used "Walnut Stain" Distress Oxide Ink around the edges of the tag.

In my box of stash, I found some small beige coloured flowers which I glued into position, adding white pearl sticky dots to their centres.

Using green and white Bakers Twine, I wrapped it around the tag, before tying into a bow.

So really all the elements on this tag are bits and bobs that I have rescued over the years and kept for that "just in case moment".

I found a couple of white paper roses with a wire stem.  I wrapped the stems around a narrow paint brush to create the spiral and then slid it off the handle and glued them into position.

Friday 30 December 2022

Visible Image "Ahead of our time" Birthday Card


I've taken a look at birthdays coming up in January and decided I had better get making some card.  I've started with the most difficult one that I find to make for:  Teenage Boys! 

I used stampb by Visible Image for the main area of the card, using the silhouette stamp that could be Churchill from the "Ahead of our time" stamp set.  Stamping it in Versafine Clair "Nocturne" black ink and then coating it in Wow! clear embossing powder and heat setting.

I then used a brick wall stamp from the Visible Image "Teenage Kicks" stamp set and stamped the wall in Versafine Clair "Shady Lane" green ink in multiple positions.

Once dry, i gave the whole image a light wash using "Antique Linen" Distress Oxide ink and then wafted the heat gun over it to dry.  Using a blending brush and "Aged Mahogany" Distress Oxide ink, I coloured over the bricks and background to give a warmer background.  I edged the tag with "Tulip Red" Versafine Clair ink.

Using Versafine Clair "Nocturne" black ink, I stamped the flying birds to the right of the hat (they are also part of the "Ahead of our time" stamp set.  Using the same ink and the verse from the Visible Image "Happy Birthday" stamp set, I multi stamped part of the verse down the left hand side of the card. I also edged the card in the black ink.

I then added some white and black splatters using Posca Pens.

Finally, after mounting the card, I added a Simon Says Stamp sentiment from thier "Tiny words - Birthday" stamp set, again stamped in "Nocturne" black ink


Day 17 of Karen Telfers "24 Days of Tags 2022"


This is my Day 17 tag for Karen Telfer's "24 Days of Tags 2022" challenge.  If you would like to see Karens demo of her Day 17 tag, you can find it here.  This tag has a theme of "Reflections".

For my tag, I used the Lavinia Stamps "Fip" fairy figure, stamped in Versafine Clair "Nocturne" black ink and coloured with Van Goch Pastel pencils.  Around the edge of the tag, I have used a blending brush with "Tumbled Glass" Distress Oxide Ink.

Thursday 29 December 2022

Day 16 of "24 Days of Tags 2022" with Karen Telfer


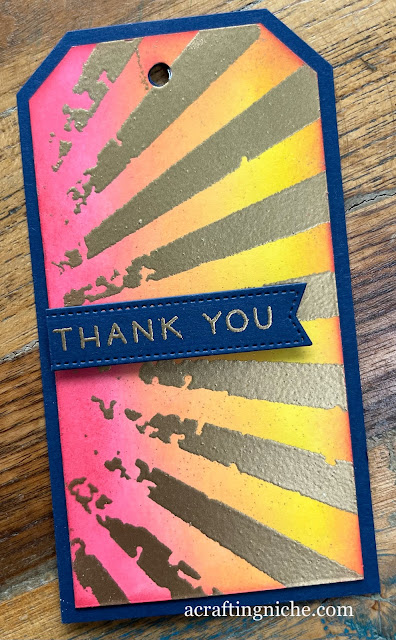
After a fews days break over Christmas, Karen Telfer is back with her "24 Days of Tags 2022" challenge.  You can find her yDay 16 outube demo here.

This is my tag, based on Karens tutorial.  I have used the following Distress Oxide Inks:  Festive Berries, Spiced Marmalade and Mustard Seed for the background, edging the tag in Candied Apple. 

After running the heat gun over the surface, I used Wow! Clear Embossing Ink through the Tim Holtz/Stampers Anonymous "Rays" stencil.  I then coated the tag in Wow! "Rich Gold" Embossing Powder and heat set.

I used a sentiment from a Lawn Fawn set called "Simply Sentiments" with the same embossing powder and then die cut the sentiment into a banner shape.


Wednesday 28 December 2022

Funky Fossil Designs "Tree Silhouette" Winter Tag


Hi, how was your Christmas?  Mine wasn't quite what we were expecting with a huge disappointment, as we ended up spending it alone instead of having a houseful of family with us.  So today, I decided to dust myself down and ease myself back in to what I love doing, crafting, by making this winter tag scene.


I started with a plain white tag, using Funky Fossil Designs "Blending Brushes" and four shades of Archival inks, I created the background colour.  Starting in the middle of the tag with "Pink Peony", then "Coffee" then "Acorn" finally on the very edges I used "Plum.

Using Versafine Clair "Acorn" brown ink, I stamped the Funky Fossil Designs "Tree Rings" stamp. I then added a few splatters of black Posca Pen as I felt it needed some darker areas.

I decided at this stage, I wanted the edges of the tag a little darker, so used Versafine Clair "Chianti" dark red ink with a finger dauber to darken the edges.  While the ink was out, I stamped the "Enjoy the ride" sentiment, which is part of the Funky Fossil Designs "Small Print #2" stamp set.

I used dark green card and the Funky Fossil Designs "Tree Silhouette" die set with my Big Shot to cut the tree shapes, glueing into position.

Finally, I added some white paint to the branches of the trees and also added some splatters to the ski to provide the look of snow.

Thursday 22 December 2022

Lavinia Stamps "Laurel Stencil" gift tag


I followed Lavinia Stamps, Emma Jo's "Jolly Holly" tag tutorial, making this tag.

I loosely followed the tutorial, choosing some different Element Inks for the background colour, the same Lavinia "Laurel Leaf stencil", but the same colours of Posca Pens.

I used a stamp from the Lavinia "Heartfelt Verse" stamp set with Wow! Silver embossing powder and heat set.  I then die cut the sentiment and stuck it on to the tag.  

I really like the look of this tag and can see me replicating it for male and female birthday gift tags.

Wednesday 21 December 2022

Day 15 or Karen Telfer's "24 Days of Tags 2022"


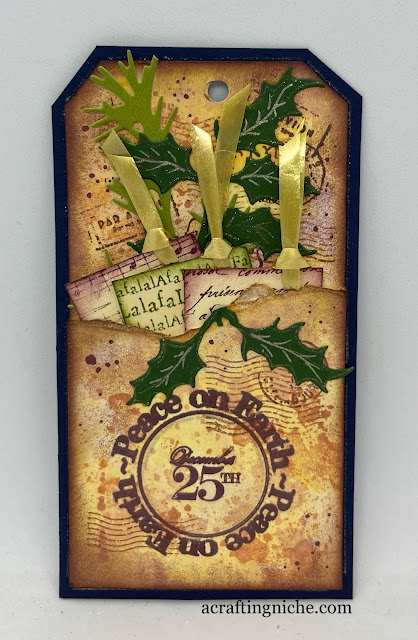
Tag 15 of the Karen Telfer's "24 Days of Tags 2022" challenge is all about "vintage and pockets".  Here is Karen's demonstration of how she made her tag. 

I definitely went off piste with this tag, using different colours, but it does have a pocket and it does have a vintage vibe.

For the background colour, I used the following Distress Oxide Inks:  Antique Linen, Tea Dye, Wild Honey, Rusty Hinge and Vintage Photo.

For the stamping, I have used three shades of Versafine Clair inks:  Acorn, Chianti and Shady Lane.

On the small tags in the pockets I have used A7 Funky Fossil Designs stamps:  Fa La La, Face the Music and Vintage Script.

The die cuts are Sizzix/Tim Holtz  "Holiday Greens" Die Cuts.

I've used a number of stamps from my stash that I've had for years and I have no idea who made them.

Lavinia Stamps "Robin in the snow" Christmas Tag


Covid is still taking it's toll on me, the coughing hasn't eased at all, so I made a tag to distract me.

For the background, I started blending three Distress Oxide Inks, starting with "Tumbled Glass" then at the top to just over half way down I used "Blueprint Sketch" then finally at the top third, I used "Prize Ribbon".  Blend until the joins between the colours are seamless.

Using Versafine Clair "Acorn" brown ink, I stamped the Lavinia Stamps "Fern Branch" in first and second generation stamping.

Using a fan paint brush and water, I splattered water droplets over the top half of the tag, blotting the surplus off with a kitchen roll.

I used Dr. Ph. Martin's white bleed proof ink and a really fine paint brush to add snow to the branches.

I then stamped the bird, which is part of the Lavinia Stamps "Bird Collection".  I stamped in second generation stamping, again using "Acorn" brown ink.  I then added extra colour to the bird using Derwent Inktense water colour pencils.

I then moved on to the Lavinia Stamps "Small Lanterns" which I stamped in Versafine Clair "Twilight" dark blue ink.  

Using a white Posca Pen, i coloured the area within the lantern between the candle and the glass.  Once dry, I used a yellow and orange Posca Pen to add colour.  (By using the white Posca pen first, means that the colour doesn't distort).  I then used Pastel Pencils in white and a very light yellow to add light rays from the lantern.

I used a Simon Says Stamp sentiment from their "Tiny Words - Christmas" stamp set, stamped in Versafine Clair "Twilight" dark blue ink.  While the ink was out, I inked up the edges of the tag.

Finally, using a white gel pen, I added a few snowflakes to the area around the branches.

Tuesday 20 December 2022

Spellbinders "Wreath DCS-011" Christmas Card


I've been coughing the past couple of days and sadly have tested positive for Covid!  To be honest at this moment I could cry.  I have made so many plans for Christmas, it will be the first time we will have spent Christmas with the Grandchildren and it was to be at our house too.  I'm really not sure if they'll be coming or not.  It all hangs in the balance. 

I have attempted to occupy my mind by making a card.  I've used the Spellbinders "Wreath DCS-011" cling stamp, stamped in a fade out ink and coloured with Derwent Inktense Water Colour Pencils, applied with a brush.  I've also used a 2B pencil for extra detail.

The sentiment is part of a Stampin' Up stamp set called "Winter Memories" and is stamped in two shades of Versafine Clair "Tulip Red" and then "Chianti" ink, die cut into a banner and adhered to the card using foam pads.

Finally, I added splatters to replicate snow, using Dr Ph. Martins Bleed Proof white paint and a fan shaped brush.

Lavinia Stamps "Stag Tag"


I saw the Lavinia Stamps Emma Jo "Stag Tag" tutorial, it's number 8 in a series of 12, and decided to give it a go. 

I used three Elements Inks:  Blue Atoll, Red Emperor and Dark Denim for the background colour with the Lavinia Stamps "Stag" sticker, which is in the Sticker Stencil pack 4 set.

I used a Wow! Clear embossing ink pad and the Wow Super fine "Metallic Silver" embossing powder and heat set using the Lavinia Stamps "Winter Magic" stamp.

I added splatters to the background using a fan brush and water.  I also added dots of silver glitter pen around the stag, in the background and also edged the tag in silver too.

Finally, I used a white gel pen and "Ruby Red" Liquid Pearls to create hanging baubles from the antlers.

Monday 19 December 2022

Day 14 of "24 Days of Tags 2022" with Karen Telfer


This is my Day 14 tag of the "24 Days of Christmas 2022" with Karen Telfer.  Here is Karen's tutorial for Day 14 if you want to join in.

Once again, I have loosely followed Karen's instructions, using the same ink colours of Blue Prink Sketch and Chipped Sapphire Distress Oxide Inks.  Stamping the figure in Versafine Clair "Nocturne" ink and the star in Versafine Clair "Cheerful" yellow ink.  I have stamped the words in third generation Versafine Clair "Twilight" dark blue ink.

I've used three Lavinia Stamps for this tag, "Rory" from the "Rory and Darcy" stamp set, the "Mini North Star" and the "Christmas Words" stamp.  I also added some "Waterfall" stickles to the wings of Rory.

Sunday 18 December 2022

Day 13 of "24 Days of Tags 2022" with Karen Telfer


Here's my Day 13 Tag of the "24 Days of Tags 2022" with Karen Telfer.  You can see Karen's tutorial for this tag here.

I loosely did the same as Karen.  I used a cake and the sentiement stamp by Visible Image from the set called "Blow Out The Candles".  Stamping the cake on the tag, colouring it it, creating a mask of the cake. 

Then creating the bokeh look, I used a Funky Fossil stencil called "Bokeh Builder" and using various shades of Distress Oxide Inks and I used lots:  Tumbled Glass. Scattered Straw, Shaded Lilac, Twisted Citron and Kitch Flamingo.  Around the edge, I used another Distress Oxide ink:  Seedless Preserve and then used Versafine Clair "Purple Delight" ink to edge the tag.

While the mask was in place, I sprinkled water droplets over the tag which created another bokeh look.

Stampers Anonymous "Pressed Foliage CMS376" Christmas Card


I've continued to play with the Stampers Anonymous "Pressed Foliage CMS376" cling stamp making this embossed Christmas card.

 I used a dark navy blue card, dusted the surface with an antistatic bag then used Wow! Clear Embossing Ink to stamp the leaf, which is part of the Stampers Anonymous "Pressed Foliage CMS376" cling stamp set.  When I was sure all areas were inked, I coated the card with Wow! Super Fine Metallic Silver embossing powder and heat set. I then mounted the square of card on a piece of white card.

Using a larger piece of white card, I put it between the Sizzix/Stampin' Up "Softly Falling" embossing folder and ran it through the Sizzix Big Shot.

I then layered the stamped image on to the dry embossed surface and mounted it on to a navy blue card blank.

Finally, using Versafine Clair "Twilight" dark blue ink, I stamped the Simon Says Stamp sentiment, "Gladd Tidings Of Great Joy", which is part of their "Tiny Words - Christmas" stamp set.

Tim Holtz, Stampers Anonymous "Pressed Foliage CMS376" Card


I feel like it's ages since I made a card, as I've been making the tags, so I addressed that this morning making this card using a handful of Stampers Anonymous/Tim Holtz products. 

Using Versafine Clair "Twilight" ink, I stamped the leaf, (Part of the Stampers Anonymous "Pressed Foliage CMS376" stamp set), I then stamped the leaf again on a Post-It note, cut around the leaf and used that as a mask to cover the leaf on the card.

I used three Archival Inks (Pink Peony, Violet and Forget-me-not) through the Stampers Anonymous "String Layering Stencil THS103".  I thought the colour looked too vibrant, so I dulled it down by using "Watering Can" Archival Ink through a section of another Stampers Anonymous stencil (THMM101, sorry I don't know what it's called).  This produced the more muted look I was after.

Removing the paper mask, I coloured the leaf using three shades of Derwent Inktense Water Colour pencils (two blues and one green), applied with a brush.  I went around some of the edges of the leaf using a 2B pencil as I wanted it to stand out a little more. I then splattered fine dots of white paint across the surface of the card and added a few dots of black Posca Pen too.

Finally, using Versafine Clair "Morning Mist" grey ink, I stamped the "Just for you" sentiment, which is part of the Lavinia Stamps "Heartfelt Verse" stamp set. 

Saturday 17 December 2022

Day 12 of "24 Days of Tags 2022" with Karen Telfer


Today has been one of "those" days!  So it has been nice to come home and unwind with a bit of easy crafting.

Here is my Day 12 tag of the "24 Days of Tags 2022" with Karen Telfer.  You can find her Day 12 tutorial here if you want to have a go yourself. I would have posted info and a photo of my tag earlier but I have been waiting for the Glossy Accents to dry and become clear.  I know from experience, if I start handling wet Glossy Accents I always manage to drop it or put my finger in it, so I have left it alone.

I decided to do the background of my tag slightly different to Karen's by making it tonal, going from dark to light.  I used two shades of Distress Oxide Inks "Scattered Straw" and "Rusty Hinge" blending one colour in to the other.


Over the top of the blended tag, I placed the Lavinia Stamps "Charming" stencil, spritzed water side down, gently pressing mopping up any surplus water.  Once the stencil was lifted, it left a bleached pattern of the stencil on the tag.  I set it aside to dry.

When I receive an order from Lavinia Stamps, I keep the chocolate wrappers with various images of their stamps on them.  I guess it's the hoarder in me.  You never know when you may need something and today was the day I needed one of the wrappers.


I used a one inch circle punch to cut the sweet wrapper into a disc.  I then cut a piece of card using the same punch and stuch the two discs together with the image on the top. I inked the edge of the disc with Versafine Clair "Acorn" brown ink.  By this time the tag was dry, so I used the same ink to edge the tag and then stamped the verse vertically using the Lavinia Stamps "Talk to the moon" stamp.

I mounted the punched disc on to the tag using a foam pad, then coated it in Ranger "Glossy Accents" and set aside to dry.

Day 11 of "24 Days of Tags 2022" with Karen Telfer


Here is my Day 11 tag for the "24 Days of Tags 2022" challenge, organised by Karen Telfer.  You can see Karen's video tutorial here.

I used six different shades of Distress Oxide inks:  Twisted Citron, Cracked Pistashio, Crushed Olive, Mowed Lawn, Rustic Wilderness and Forest Moss to create this tag. I don't quite remember in what order I used them, sorry for the vagueness.

I used three Lavinia Stamp stencils on this tag, using the "Dynamic" stencil to create the bleached pattern look on the background of the tag and the "Pebbles" and  "Ambiance" stencil to create the pattern on the holly.

I edged the tag and holly in two shades of Versafine Clair inks, first using Rain Forest, then on the very edge Twilight.  The "Nadolig Llawen" sentiment from the Lavinia Stamps "Welsh Words" stamp set was also stamped in "Twilight".

I used bakers twine, silver thread and two red jingle bells, to replicate berries to decorate the top of the holly.

Thursday 15 December 2022

Day 10 of "24 Days of Tags 2022" with Karen Telfer


It's Day 10 of "24 Days of Tags 2022" with Karen Telfer.  I've just noticed that there are only ten days till Christmas Day!  That's a bit scary!

Here's Karen Day 10 demo, showing how to sprinkle Brusho granules on to a stencil and get a print of the coloured pattern.

Lay a couple of sheets of kitchen roll onto your work surface and place your stencil on top of it, I used the Lavinia Stamps "Dynamic" stencil. 

Have a couple of sheets of kitchen paper at the side with your tags on it, so that you are ready to print the pattern.

I used "Seagrass" and "Lemon" shades of Brusho, sprinkled lightly... and I mean lightly on to the top of the stencil.  Then I spritzed the surface with water. I flipped the stencil over and placed it inky side down on the tags/kitchen paper at the side.  Using a cloth or another piece of kitchen paper, gently press down to ensure even distribution of the ink.  Lift the stencil and you should have a really nice design.  There is likley to be plenty of inyness left on the stencil, so you can repeat the process and get another print, this one will be lighter than the first.


I really like the pattern results.  It reminds me of marbelling.

I gave the tags a blast of the heat gun, deciding which print I would work with I inked the edges of the tag with "Crushed Olive" and then "Mowed Lawn" Distress Oxide Ink.  I then inked a very fine edge of "Twilight" Versafine Clair ink.

Using Versafine Clair "Nocturne" black ink, I stamped the Lavinia Stamps fairy called "Briar Rose" and the "Just for you" sentiment, which is part of the Lavinia "Heartfelt Verse" sentiment stamp set.

Using the torn edge of a piece of copy paper and Versafine Clair "Morning Mist" grey ink, I created the landscape to ground the fairy.

Returning to Versafine Clair "Nocturne", I stamped foliage using the "Mini Leef Creeper" stamp and the "Foliage Set". I used Versafine Clair "Morning Mist" to stamo the foliage from the "Flower Collection" stamp set.

I added touches of colour to the flowers using a yellow and white Posca Pens, adding a touch of glitter to the fairy wings using "Crystal" Stickles.

Lavinia Stamps - my take on Emma Jo's Tag 3


Last night I didn't feel well.  Nothing I could put my finger on, just feeling a bit meh and cold.  I was in bed before 9:30 but of course, by midnight I was wide awake and saw every hour till 5am so decided to get up and craft.  I'm definitely not feeling right.  Hopefully, it will improve as the day goes on.

To pass the time, I watched a Lavinia Stamps tag tutorial by Emma Jo,  so thought I would give it a go. It's a bright and vibrant tag.  I didn't throw as many products as mine as Emma Jo did as I was working with a smaller tag.

I didn't use the same inks as Emma Jo as I didn't have them.  Instead I used Dylusions "Pure Sunshine" and "Postbox Red" spray inks, then gave it a blast of the heat gun to dry the surface.

I then used "Henna Elements Inks" through the Lavinia Stamps "Dynamic" stencil, keeping the design to the right hand side, again I gave it a blast of the heat gun to ensure it was dry for the next step.

I ran an anti-statitic bag over the surface of the tag.  Using Wow! Clear Emossing Pad and the Lavinia "Heartfelt Verse" "Just For You" sentiment stamp, I stamped and then coated the stamping with Wow! Rich Gold Embossing Powder and heat set.

I repeated the process with the "Winter Berries Stamp", I stamped across the bottom of the tag and up the sides, then heat set.

Where the berries were on a dark stencilled area, I first coloured the berries in white Posca Pen, waited for them to dry and then coloured with the shade I wanted, using a glittery yellow, green, and red Posca Pen to colour the berries.  

I inked the edges of the tag using Versafine Clair "Shady Lane" green ink. I then mounted the tag on to a piece of green cardstock.

Finally, using a gold metallic pen I edged the tag and added some gold dots around the stamped berries.

Wednesday 14 December 2022

Papertrey Ink "Wreath for all seasons" Christmas Tag


When I made my Day 8 tag yesterday, part of the "24 Days of Tags 2022" challenge by Karen Telfer, I actually made two tags, with similar Distress Oxide ink backgrounds and the same Woodware sentiment.

Rather than the tag hanging around, I decided to ink it up using Versafine Clair "Rain Forest" and "Tulip Red" ink and the Papertrey Ink stamp set called "Wreath for all seasons".  I've had this stamp set for a number of years and each Christmas I have to use it in one way or another, so this is the result.

Day 9 "24 Days of tags 2022" with Karen Telfer


Today is Day 9 of the "24 Days of tags 2022" challenge with Karen Telfer. The prompt is "sunshine", a reminder that not everywhere in the world has the cold wintery spell the UK is experiencing at the moment.

I used three products from Funky Fossil Designs to create this tag. I used four shades of Archival Inks to create the sunshine background:  Chrome Yellow, Buttercup, Sunflower and Tiger Lily through the Funky Fossil "Checkered Sun Stencil.

For the little bird, I used the Funky Fossil stamp set called "Christmas Characters", stamped in Versafine Clair "Nocturne" ink and coloured with Derwent Inktense pencils.

The sentiment, also stamped in Nocturne black ink is part of the Funky Fossil "It's Christmas" stamp set.

Finally, I added splatters using an orange and white Posca Pens and edged the tag in Versafine Clair "Summertime" orange ink.

Sparkle "Celebrate" Penny Black Inc. "Sweet Wishes 30-104" Card


In the past few weeks, I have seen two tutorials by two different people but creating a very similar sparkly card.  They were by Marion Emberson and Amy Wilson.  I didn't have the same products that either of these used, so improvised making my own version.


I placed two dollops of white Gesso on my glass mat.  On one dollop, I added "Midnight Blue" Cosmic Shimmer Pixie Powder.  On the other, I added "Purple Violet" Cosmic Shimmer Pixie Powder. I mixed each pile till the Pixie Powder merged with the Gesso to turn it the appropriate colour.


Using a paint brush, loosely held, I stroked the brush up and down in the blue mix across the white card from left to right.  I then did the same with the now lilac coloured mix.  I decided it needed something else, so also added some strokes of Gesso to blend the brush strokes. I used my heat gun on a gentle heat to dry the surface.

This is the ideal time for you stamp a sentiment and mount your card, as it will take ages for the glue to dry later.. lesson learnt from experience! I used the word "Celebrate" from the Penny Black Inc "Sweet Wishes 30-104" clear stamp set, stamped in Versafine Clair "Morning Mist" grey ink.  I like the idea that this card could be used for birthday, Christmas or New Year purposes.


I applied Cosmic Shimmer Acrylic Glue, very informally across the card, in the same up and down motions as the gesso mix, but keeping it closer to the the central area.  
Finally, I added a selection of glitter, Iced Diamonds and sequins to the glue area and then set aside to dry.

Tuesday 13 December 2022

Day 8 of "24 Days of Tags 2022" with Karen Telfer.


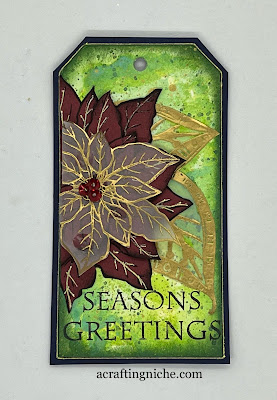
This is my Day 8 tag, part of the "24 Days of Tags 2022" challenge with Karen Telfer. Today was all about smoothing and splattering.  Here is her video tutorial if you want to have a go yourself.

I followed Karen's instructions for the base colours, but didn't have the same flowers and leaves that she used, so rummaged around and came across three Woodware sets of stamps that would work well.  They were "Leaf Quartet", "Poinsettia" and "Seasons Greetings".

I used Wow! Rich Gold Embossing powder on the vellum and heat set it on a low setting.  It took a while but I got there in the end.  I added touches of metallic gold pen to the poinsettia leaves and also edged the tag in gold too.

Visible Image 'Bring on the beers" Birthday Card


Having a birthday at this time of year is rubbish.  I should know, I have my birthday sandwiched  between Christmas and New Year. 

For my friends who have a birthday in December, I try to ensure I have made a card in advance.  There is nothing worse than receiving what is clearly an "after thought card", usually purchased from a garage or an "open all hours" type shop.  Birthdays are special and need to be kept that way, regardless of age.

So here is a card I have made for a male friend ,who actually shares the same birthday as myself.  I've used Visible Image products for this card.

I used an "Ink on 3" Fade out ink pad to stamp the beer glass, which is part of the Visible Image "Bring on the beers" stamp set.  Colouring the image with Derwent Inktense Water Colour Pencils and a 2B pencil.  I then stamped the glass of beer on to a post it note, cut around the shape and then popped it over the top of the coloured image, to use as a mask.

I used three shades of Distress Oxide Inks (Antique Linen, Weathered Wood and Scattered Straw) with a blending brush through the Visible Image "Strobes" stencil.

Finally, I stamped the "Cheers' sentiment, also part of the "Bring on the beers" stamp set in Versafine Clair "Morning Mist" grey ink.

Monday 12 December 2022

Funky Fossil Designs "Festive Phrases" Kraft Christmas Card


I've made another quick make Christmas card, using Kraft card, a couple of dies and a stamp set.

I cut the Funky Fossil Designs "Leafy Circle" wreath die, sadly now retired and then die cut a circle a little larger than the die cut, sticking the die cut on to the circle.

In the middle of the circle, I added some white Pan Pastel to lighten the area.  I then splattered white paint over the kraft/die circle to look like snow flakes.

Once dry, I stuck the craft circle of card on to a piece of white card.

Using Versafine Clair "Tulip Red" ink, I stamped the sentiment, which is part of the Funky Fossil Designs "Festive Phrases" stamp set, which actully has a considerable reduction on the original price at the moment.

Lavinia Stamps "Owl in a snow storm" tag


Today, there isn't a new tag prompt from Karen Telfer.  So I decided I would make another version of the Day 7 tag.  I followed the same colouring for the background, but changed the stamping.

Stamping in Versafine Clair "Nocturne" black ink in both first and second generation stamping, using Lavinia Stamps "Large Owl" and "Gip".

I chose to stamp the Lavinia "Fir Cone Branch" in Versafine Clair "Pine Cone" dark brown ink.

I added snow to the branches and splatters to create the snowflakes using Dr Ph.Martin's bleed proof white paint, using a metallic gold pen for the eyes of the owl.


Here are the two Day 7 tags together.

Funky Fossil Designs "Tree Silhouette Dies" Christmas Card


Good morning.  It's a bright and sunny one here on Anglesey, but it is also bitterly cold and the icy roads look lethal, so I don't intend venturing out of the house today. 

It appears I have made an icy looking card that matches the weather, amazing how the mind works.  It wasn't intentional.

I've used products from Funky Fossil Designs , two of which I purchased recently and have been keen to work with.

I started by using the Funky Fossil "Herringbone Stencil" over a white piece of card, securing the top with a piece of low tack masking tape, to hold the stencil in position.

Through the gaps in the stencil, I lightly applied three shades of Archival Inks (Pink Peony, Shadow Grey and Forget-me-not) using the Funky Fossil blending brushes, blending out towards the edges of the card, but not to the very edge... if you know what I mean!

I used a torn edge of copy paper and a finger dabber, with two shades of Versafine Clair inks (Warm Breeze and Morning Mist), to create the snowy landscape for the trees.

Using the Funky Fossil "Tree Silhouette Dies" I cut a selection of tree shapes in white card.  I arranged the tree shapes on the card, cutting some of the tree trunks shorter to get different heights and then stuck the trees in to position.

I splattered white paint on to the surface of the card to replicate snow flakes.

Finally, using Versafine Clair "Morning Mist" grey ink, I stamped the "Snow is falling" sentiment, which is part of the Funky Fossil "Christmas Small Print" stamp set.  


Sunday 11 December 2022

Day 7 of "Karen Telfer's 24 Days of Tags Challenge 2022"


It's hard to believe that I have made a whole week of tags, part of Karen Telfer's "24 Days of Tags 2022" challenge.  If you would like to take part, here is her tutorial fon her Facebook Group.

I've more or less followed Karen's instructions to the tee.  I added an extra embossed "Fir Cone Branch" and added snow laying on top of the fence posts. I also decided to leave out the snowflakes.  I liked it as it is.

The stamps used are by Lavinia Stamps, using their "Pheasant" and "Fir Cone Branch" stamps. The pheasant was stamped in Versafine Clair "Nocturne" black ink.

For the embossing I used the Wow! Clear embossing ink pad, Wow! White Embossing Powder and an antistatic bag.

Distress Oxide Inks used on the tag were:  Mustard Seed, Candied Apple, Tumbled Glass and Blue Print Sketch.

For the snow, I used Dr Ph. Martin's paint to splatter and paint the snow on the fence post.

It's interesting when following the tutorial of somebody else, as sometimes, I find myself saying to myself that "I would do it this way"! and working against my natural grain sometimes seems very strange.  An example of this was stamping/embossing the fir cone branch.  If it were me, I would have used clear embossing powder and stamped and embossed first thing, before any ink hit the page.  So I guess what I am saying is that we all work in different ways, some may work better than others, but we all get to the same destination in the end.

Saturday 10 December 2022

Funky Fossil Designs "Blooming Wreath' Birthday Card


I'm a little bit over making Christmas things, so to ring the changes I made a pretty floral card, using the now retired "Blooming Wreath" stamp set by Funky Fossil Designs. 

I stamped the wreath in a "Fade Out ink" and coloured the image with Derwent Inktense Water Colour Pencils, applying the colour with a fine paint brush.

The sentiment is part of another stamp set by Funky Fossil Designs, called "Small Print", stamped in Versafine Clair 'Morning Mist" grey ink.

Day 6 of "24 Days of Tags 2022" challenge with Karen Telfer


It's Day 6 of the "24 Days of Tags 2022" challenge created by Karen Telfer.  Here is the link to Karens Day 6 tag tutorial, if you would like to tag along with the challenge too.

I didn't have the moon mask that Karen used, so improvised using a Lavinia Stamps "Moon Mask" and colouring using Van Goch Pastel Pencils.

Like Karen, I used the Visible Image "Christmas Eve" stamp set.  Stamping Santa & sleigh in Versafine Clair "Nocturne" black ink.

I used the medium size tree from the same Visible Image stamp set, stamping in two shades of Versafine Clair Inks:  "Morning Mist"grey ink for the trees in the distance and "Nocturne" black ink for the trees in the foreground.

Finally, I added white splatters, using Dr Ph. Martin's Bleed Proof White Ink from the fan shaped paint brush to replicate a snow storm.

For the coloured background of my tag, I used a selection of blues and purple Distress Oxide inks, edging the tag in Versafine Clair Nocturne.

Funky Fossil Designs "Baroque" stencilled Card


I came across a piece of white card in my stash of an odd size.  Too big to bin, too small for a card itself.  It wasn't even wide enough to make an ATC, so I decided to make a quick card by creating a stencilled central panel, balanced out by a co-ordinating piece of cardstock.

I used "Garden Patina" Archival Ink through the Funky Fossil  Designs "Baroque" stencil ensuring that the main design was in the centre of the piece of card.  I found some cardstock in a similar shade to the ink and mounted the stencilled panel on top of it.  I then adhered this panel on to my white card blank.

Using Versafine Clair "Morning Mist" grey ink, I stamped the sentiment which is part of a stamp set by Funky Fossil Designs called "Small Print 2" on a small off-cut of white card, cut it to size then mounted it on a piece of the same cardstock used for the stencilled panel and adhered into position.

This card really was a quick make.  Even taking into account the time looking for an appropriate stencil, cardstock and stamp, it took a maximum of ten minutes.  I love cards like this!

I forgot to mention, we had a smattering of snow in the evening.  It was interesting to see Rosie re-enacting Bambi's first steps, as she skidded her way around the then frozen snow.  I'll leave you with that image!

Friday 9 December 2022

Day 5 of "24 Days of Tags 2022" with Karen Telfer


I can't believe how quickly these days are passing, Day 5 of the challenge already!  

How are your Christmas preps going?  I should have been busy doing some of my festive chores today, but some how the day has drifted away and now it is nearly time for tea and I don't seem to have accomplished much at all.

I'm happy to say, I have completed the tag for Day 5 of Karen Telfer's "24 Days of Tags 2022" challenge!  Here is the link to Karen's demo if you want to "tag along" too.

I've used the bones of Karen's demo, but made a few changes.  First I stuck a sheet of patterned paper on to my tag for the background design rather than leaving it plain.

I then inked the edges of the tag and splattered "Festive Berries" Distress Oxide Ink on the tag.

while the tag was drying, I cut lengths of ribbon, (Karen used paper and stuck embellishments to hers). Then stuck the lengths of ribbon on to the tag in an informal Christmas tree style.

At the top of the tree, I found a pretty glittery heart shaped button to pop on top of the tree.

Finally, using "Festive Berries" Distress Oxide Ink I stamped the "Fa La La" sentiment, which is part of a Funky Fossil Designs stamp set called "Christmas Small Print".

Funky Fossil Designs "Foresty" Christmas Card


This morning, I played with some Funky Fossil Designs stamps that I had purchased recently. 

I started by blending four shades of Elements inks on a piece of white card.  Starting with the lightest to the darkest:  Sundance, Russet Orange, Confetti and Mulberry.

I then used the new Funky Fossil "Forestry" stamp with Versafine Clair "Twilight" dark blue ink to stamp the tree image.

Using Versafine Clair "Nocturne" ink and the Funky Fossil "Woodland Silhouette Mini's" set, I stamped the stag. I added to the outline of the stag using a white gel pen and a white pastel pencil.

At this stage, I decided to cut the image down from a rectangel to a square.  I then mounted it onto black card and then on to a white card blank.  Finally, stamping the "Winter Wonderland" sentiment, which is part of the Funky Fossil "Christmas Small Print" stamp set.


Thursday 8 December 2022

Stampers Anonymous "Forest Floor CMS-422" Christmas Card


This evening, I made this Christmas card using stamps from two sets of Stampers Anonymous stamps.

The first thing I did to make this card, was to stamp the "Fir Cone Branch" in Versfine Clair "Acorn"brown ink.  I then stamped the image again on to a Post-it note and fussy cut around the image.

I positioned the post-it mask of the branch over the stamped image on the card, then stamped the pine tree branch in Versafine Clair "Shady Lane" green ink. Both stamps are part of the Stampers Anonymous "Forest Floor CMS-422" cling stamp set.

I used a wash of "Tumbled Glass" , light blue, Distress Oxide Ink and lightly coloured the area around the image.  I wafted my heat gun over the surface to accelerate the drying process.

Using Derwent Inktense wate colour pencils, I coloured the fir cones in using a paint brush.  I used the pencils themselves to colour the pine needles.  

Using a white Posca Pen, I tapped it over the surface of the card to create the impression of snowflakes.

Once dry, I stamped the 'Merry Christmas" sentiment, which is part of the Stampers Anonymous "Mini Holidays CMS142" cling stamp set, stamping it in Versafine Clair "Pine Cone" ink,

Finally, I used a gold glimmer gel pen to add touches to the fir cones.

Day 4 "24 Days of Tags 2022" with Karen Telfer


It's Day 4 of the "24 Days of Tags 2022" challenge by Karen Telfer.  You can see Karen's youtube video instructions here if you would like to take part. 


This is the tag that I made. On the video above, you can see the glitter on the vellum flowers.

I went a bit roque with the embellishments that I used as I didn't have the same items in my stash. For the flowers, I used a Spellbinders die set called "Timeless Heart" to cut the vellum flowers.  I didn't have anything sparkly, so improvised by using a very old glittery embossing powder which is absolutely rubbish at embossing, but it was ok this time as I applied it with glue!

I also didn't have any gold or silver cord.  I say didn't... but I do, I just don't know where I have put it!  Sound familiar?  Anyway, I did find a string of small silver stars, just enough to stick a line of it down the right hand side of the tag.

The sentiment is from a Woodware stamp set called "Peace Dove".  Instead of stamping in Versafine Clair "Nocturne", I opted to used "Twilight", which is a dark blue ink, as I felt it worked better with the colour of the tag.  I inked the edges of the tag using the same ink.  

Finally, I found some sticky backed gems, which had lost their sticky back, so I glued them to the middle of the flowers.


Wednesday 7 December 2022

Day 3 of "24 Days of Tags 2022" with Karen Telfer


How December is starting to fly! 


After making the third tag of Karen Telfer's "24 Days of Tags 2022" challenge, I decided to put the Christmas tree up.  This tree is usually in the craft room, we deliberately chose one that didn't have to wide a base, so that it took less space, but as the three Grand Children will be here for the first Christmas with us, I decided to put it in the lounge, so they have plenty of carpet area to play with their new toys.

I've not managed to decorate the rest of the house yet.  I'll leave that excitement for another day!

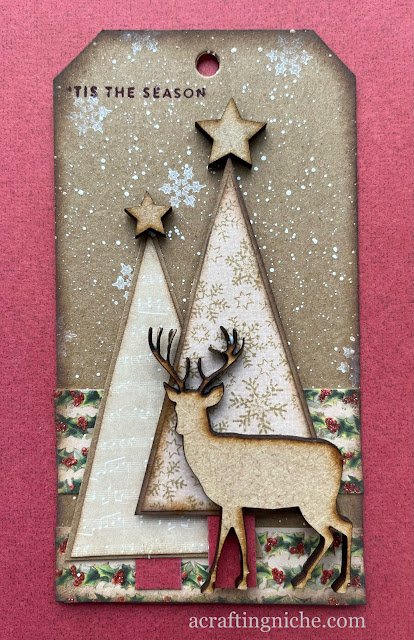
Anyway, returning to the tag.  Tag three is about using patterned paper on kraft card.  Here's is Karen's demo if you would like to take part.

I more or less followed Karen's instructions.  It was nice to use some of my patterned paper as it seems ages since I delved in to that drawer and used some.

I have an old picnic hamper that holds my Funky Fossil MDF shapes, so I had a rummage in there finding some stars and a stag, so decided to use them.  

Using Versafine Clair "Chianti" dark red ink, I stamped the "T'is the Season" sentiment, which is part of a Simon Says Stamp set called "Tiny Words - Christmas".  You may notice I like using these small sentiments on my cards and tags.  I want it to speak but not shout... if you know what I mean.

Right, I need to go and hoover all the glittery bits on the carpet and tidy up a little.  I'll catch you for tag four tomorrow.

Tuesday 6 December 2022

Lavinia Stamps "Mistletoe" Christmas Card


I've made another quick Christmas card this afternoon, using a Lavinia stamp and stencil. 

For the central area, I used a stitched edge die cut square and stamped the Lavina Stamps "Mistletoe" on to it using Versafine Clair "Rain Forest" ink.  I used the same ink to stamp the small sentiment, which is part of the Simon Says Stamps "Tiny Words - Christmas" stamp set.

I then used two shades of Distress Oxide inks (Mowed Lawn and Rustic Wilderness) through the Lavinia Stamps "Feather Leaf stencil".

I then matted and layered the pieces on to a card blank.

Day 2 of "24 Days of Tags 2022" with Karen Telfer


This is my Day 2 tag. Here's the link to Karen's demonstration. Using the gel plate, Element Inks, Brusho, Distress Oxide Inks and a Lavinia Stamps "Sticker Stencil" and the Lavinia Stamps "Background Script" stamp.


Here's a little vidoe so that you can see the glitter on the tree.

I followed Karen's instructions all the way to decorating the tree, when I went off piste by placing the stencil back in place, giving the tree a slight spritz of water then sprinkling some Irridescent Gold "SprinkleIt" over the area, then left to dry.  I then added sequins and dots of Liquid Pearls.