It's a grey and rainy day here on Anglesey, so an ideal time to craft! I hope the weather is kinder to you where ever you are.
I used three shades of Distress Oxide Inks, using Squeezed Lemonade, Blueprint Sketch and Wilted Violet. for the area where the feather would be. I then used Squeezed Lemonade through the Lavinia Stamps "Splendour" stencil for the background patter. Edging the card in the same yellow Ink.
I used Versafine Clair "Twilight" dark blue ink to stamp the feather by Lavinia Stamps called "Indian Flourish". I used sections of the same stamp to stamp the border. I stamped the sentiment, part of the Lavinia Stamps "Heartfelt Verse" stamp set and inked the edge of the card in "Twilight" dark blue ink too. To finish, I added detail to the feather using a gold coloured gel pen.
Today, I have had a play with a couple of the stamps from the recent release by Lavinia Stamps.
Using Versafine Clair "Acorn" brown ink, I stamped the new Lavinia "Shadow Pods" and the "Shimmer Pods".
In the background, I used two shades of Ranger Archival Inks, using Chrome Yellow and Sunflower colours through the Lavinia "Honeycomb" stencil. I then added some depth of colour to the bottom left hand corner by using "Fired Brick" Distress Oxide Ink.
I used Derwent Inktense pencils and a gold coloured gel pen to colour the pods and drew in some grass too.
Finally, using Versafine Clair "Acorn" brown ink, I stamped the sentiment, which is also by Lavinia Stamps and is part of their "Heartfelt Verse" stamp set.
Today is the first time I have stamped "Oscar" one of the stamps in the recent release by Lavinia Stamps. I was so impressed with the detail of the stamp I decided to make the card in only black and grey tones.
I stamped Oscar in Versafine Clair "Morning Mist" grey ink. I then used the torn edge of a piece of paper with Versafine Clair "Morning Mist" grey ink to create the landscape. Adding extra shading/shadows and grass tufts using a 3B pencil.
Finally, I used Versafine Clair "Nocturne" black ink to stamp the sentiment, which is part of the Lavinia Stamps "Heartfelt Verse" stamp set.
I used a cream coloured card for the base of this card. Stamping the Lavinia Stamps "Sunflower 1" in Versafine Clair "Shady Lane" and "Summertime" inks.
I then lay the Lavinia Stamps "Red Brick Stencil" over the top of the card and used three shades of Ranger Archival Inks, using: Cornflower Blue, Leaf Green and Orange Blossom through the stencil.
I used one of the Lavinia "Hill Masks" to ground the sunflower using Versafine Clair "Shady Lane" green ink. I used the same ink to add tiny areas of text on the wall area using one of the Lavinia "Spirit Signs" stamps. I then stamped the sentiment using one of the greetings from the "Heartfelt Verse" set of sentiment stamps.
I coloured the sunflower using various shades of Distress Oxide inks. Adding finishing touches with a gold coloured gel pen and a Posca pen.
Today, I've been playing with the Sizzix / Tim Holtz Vault Pillow Box Thinlit die set, making this gift pouch.
I used an off cut from a Lavinia Stamps patterned paper pad to make the pillow box. Cutting two pieces, and using double sided sticky tape to secure the two pieces together. The ends are kind of scored in the cutting process so fold over easily.
I tied a piece of organza ribbon round the pillow, with a die cut label saying "With Love", stamped in Versafine Clair "Twilight" dark blue ink. The "With Love" stamp is part of a Lavinia Stamps set called "Heartfelt sentiments".
In my head I am thinking these little pillows will be really handy come halloween or even making 24 as an alternative advent calendar.
Today, is Day 78 of the Tiffany Johnson Creative #100daysartplay challenge. There is a new prompt for the coming week of "Inks".
For this card, I used the Lavinia Stamps "Wild Vine" stamp with two shades of Versafine Clair Inks, stamping in the new "Avocado" shade and the existing colour of "Shady Lane".
I used a blending brush with the "Avocado" ink to add some colour around the edges of the card, leaving the central area white for the sentiment. I used the Lavinia "Just For You" stamp which is part of their 'Heartfelt Verse" stamp set.
Using a Q-tip/cotton bud, I added dots of the new Versafine Clair "Lilac Blush" ink, to create the look of wisteria trailing from the vine.
As soon as I opened my pack of new Lavinia Stamps, the "Dragons Thorn" stamp shouted at me to be paired with a crow. So who am I to not go with it.
I went for a very clean and simple card to highlight the strong design detail of the stamp used for the branch, stamping in Versafine Clair "Nocturne" black ink.
The stamps I used were the new "Dragons Thorn", "Crow Set" and a sentiment from the "Heartfelt Verse" stamp set.
The challenge for 2024 is weekly. I will provide you with a prompt/theme each Sunday morning through out the year. The challenge is very relaxed. You can do as much or as little as you like. You can create cards, tags, Artist Trading Cards (ATC's) or index cards, the choice is yours. You just go with what ever is in your head at the time. You can stamp, get inky, use patterned papers, texture, embellish it is all down to you.
There is a dedicated private Facebook Group, with a lovely bunch of people who are already sharing their makes from previous challenges. You can find the group by clicking this link. I'd love you to join in.
The Crafting Niche 52 Week Mini Art Card/Tag Challenge 2024:
The prompt for Week 5 is "Paint Play"
*****
This is my Week 5 tag. There are so many different ways paint can be used, so I enjoyed having the freedom to "see what happens" making this tag. It's unusual for me as my tags tend to be more structured but I went a little out of my comfort zone making this one.
I used a plain white tag and three shades (a light and medium green and a turquoise) of Cosmic Shimmer Iridescent Shimmering Water Colour Paints. I used them with a little water and allowed the paint to run down the tag. I used a Tim Holtz hand held blowy tool (sorry I don't know what the correct term for it is, but I'm sure you'll know what I'm talking about) to blow the paint down and across the tag. After each colour, I used the heat gun to dry the paint before I used more.
I then used gold and white paint to create fine splatters across the surface using a fan shaped paint brush and tapping the paint off the brush on to the tag.
Once dry, I mounted the tag on to a teal coloured card and then stamped the sentiment, which is part of the Lavinia Stamps set called "Heartfelt Verse" stamped in Versafine Clair "Twilight Ink".
Here's a photo of the first five tags of the challenge that I have made. All very different in theme and techniques.
You may recall, earlier in the month I went on a Canal Art / Signwriting Masterclass. Since then I have had a little practice with the techniques I learnt, using the paint supplies I have in my craft stash.
This morning I couldn't sleep, so decided to get up and have a painting session making this card. It is a far cry from Canal Art, I think I'd call it more "Folk Art Style". I have a lot more practicing to do to get the brush to work in my favour, but I enjoyed the calming process of painting.
I used a selection of paints I already had, some with more success than others. I mainly used Tim Holtz Distress Paints with some Paperartst chalk paints (which were less of a success, the white isn't solid enough, but lesson learnt).
For the sentiment, I used a stamp from a Lavinia Stamps set called "Heartfelt Verse" stamped in Versafine Clair "Glamorous" pink ink.
After the epic amount of stamping of my previous card, this one is more minimal, opting for a clean and simple look.
I masked off three sides of the card, to protect from inky marks.
I've used three shades of Ranger Archival (Majestic Violet, Cactus Flower and Vibrant Fuchsia) through the Lavinia Stamps "Red Brick Stencil" to create the panel of colour.
Using Versafine Clair "Nocturne" black ink, I stamped the Lavinia Stamps "Fairy Dandelion" and the sentiment, which is part of the Lavinia Stamps "Heartfelt Verse" stamp set.
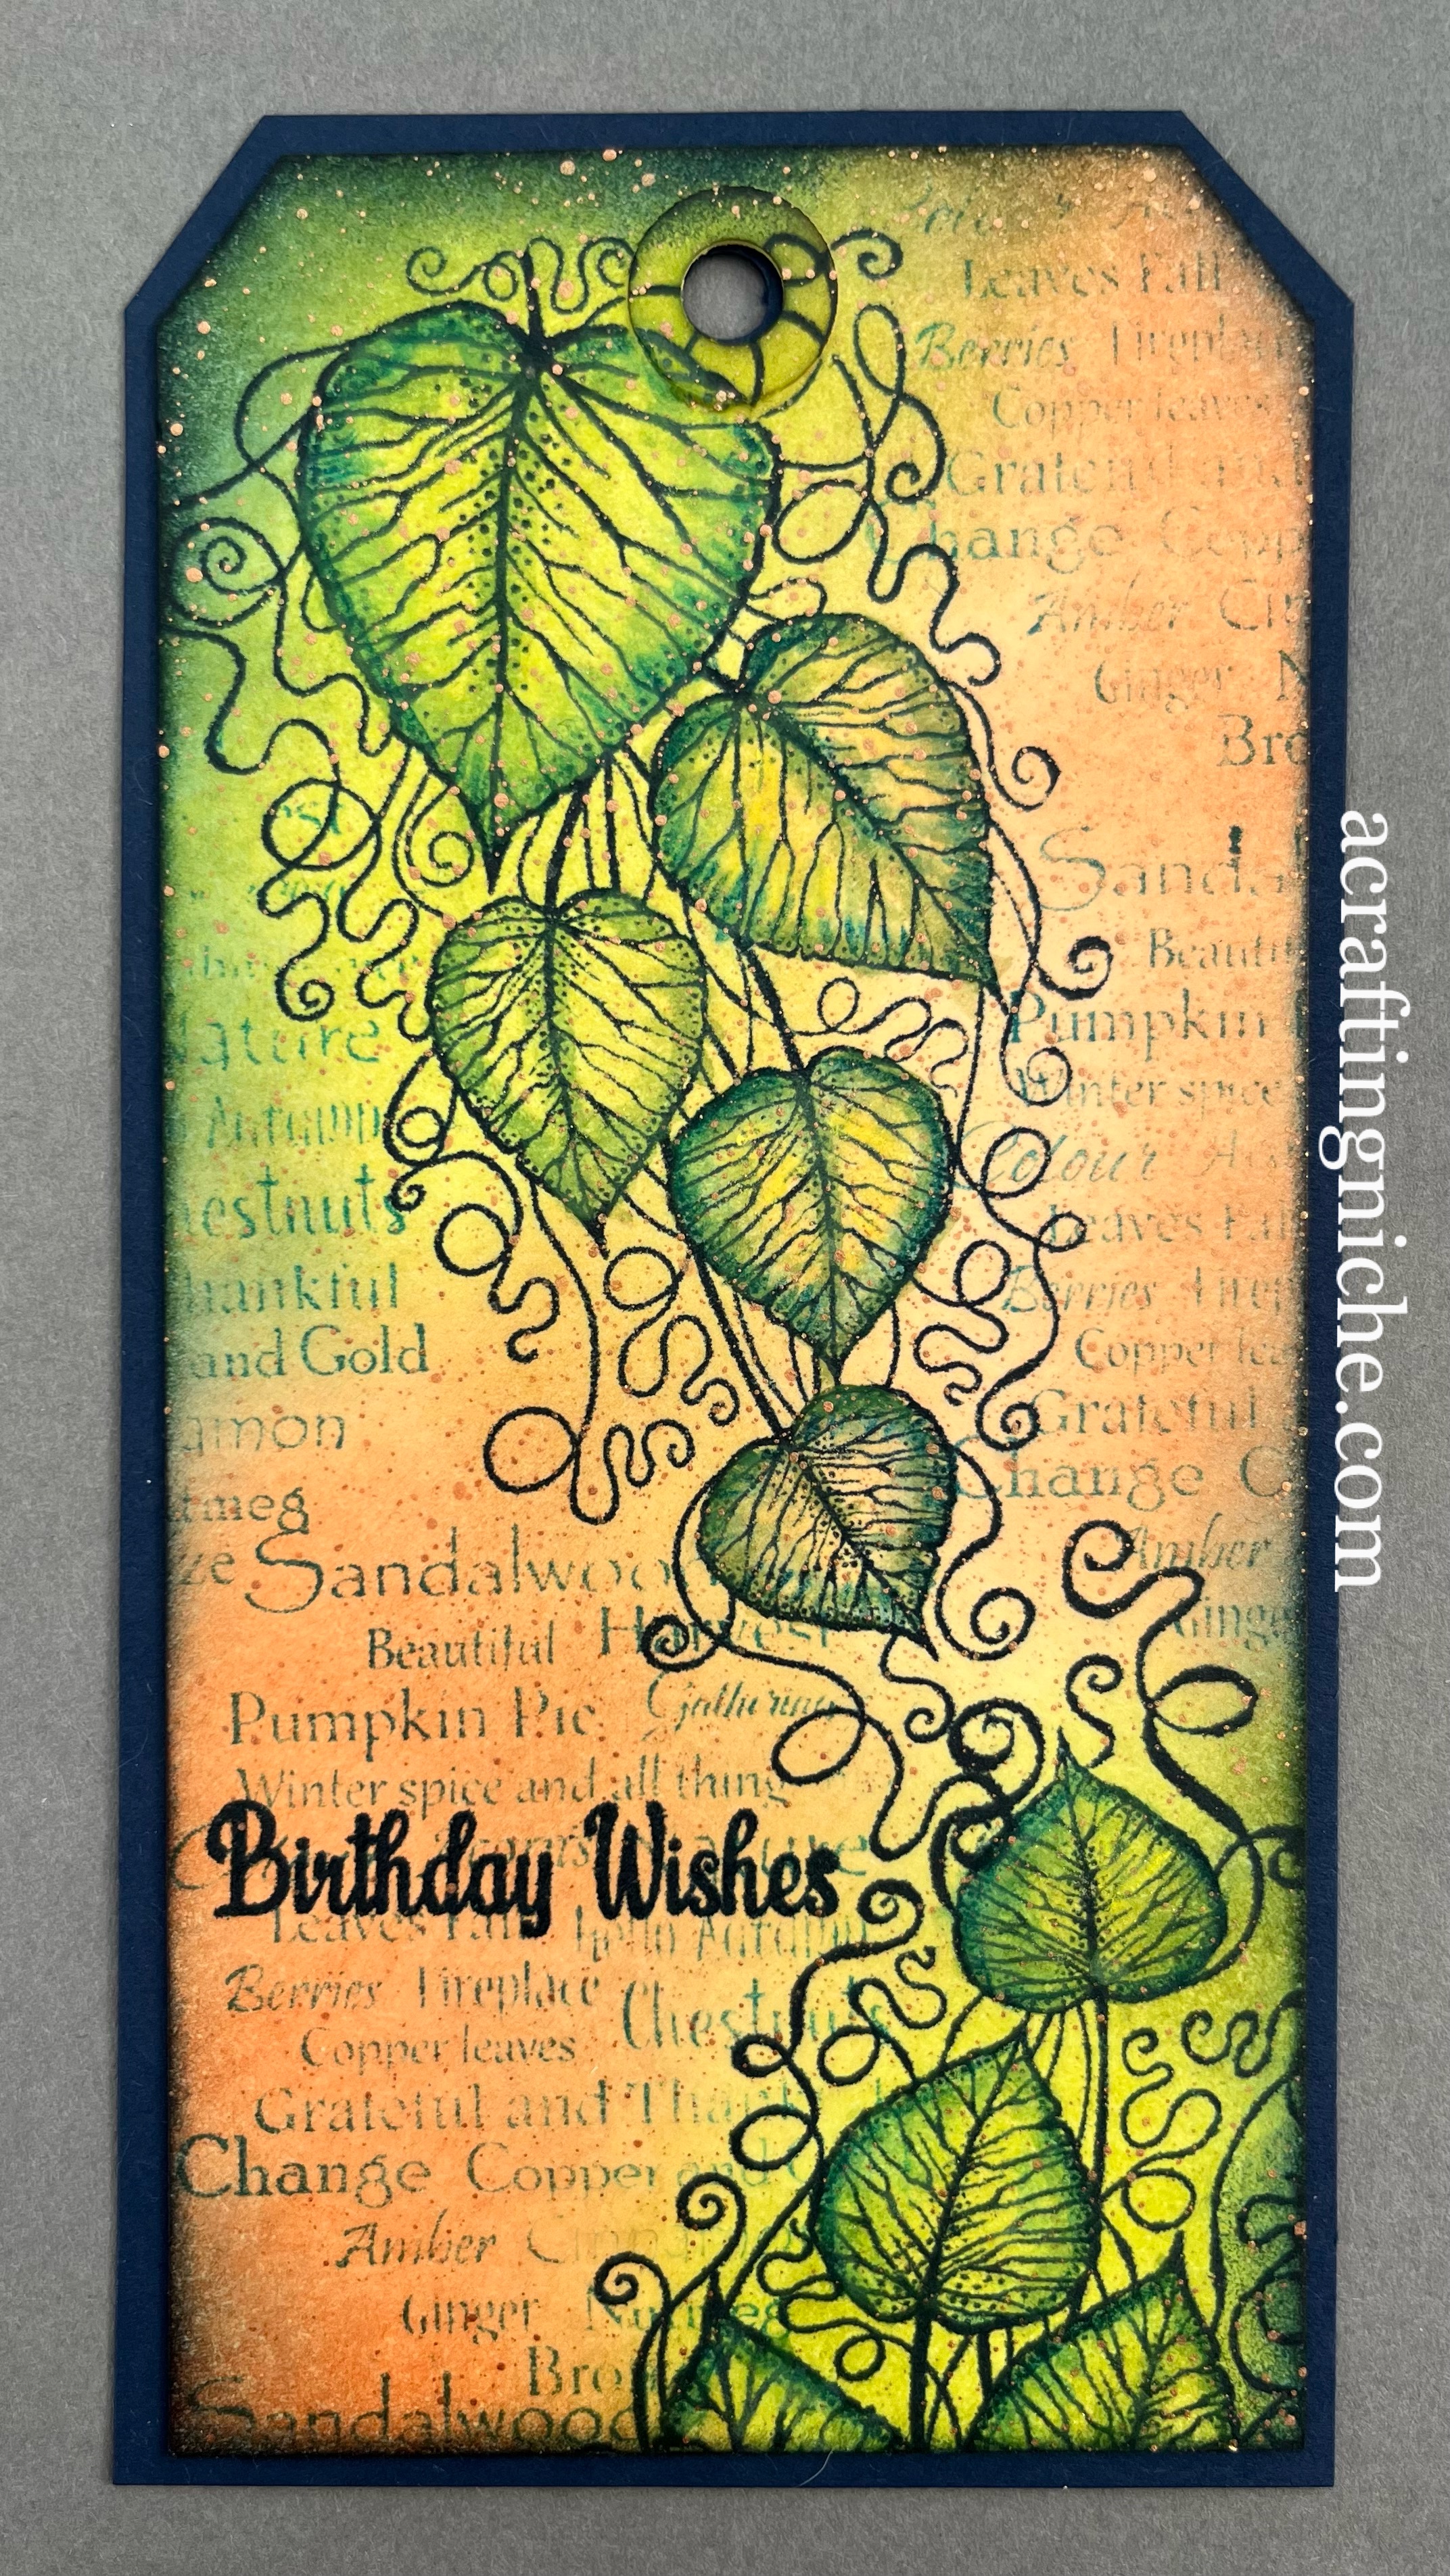
Over at Lavinia Stamps this weekend, Tracey Dutton, Jo Rice and Sarah Anderson had a craft off, making a tag using the new Lavinia Stamps "Forest Leaf" stamp, so that prompted me to have a play too, making this tag.
I used a manila coloured tag for the base then used two shades of green and two shades of orange Ranger Archival Inks. The colours I used are: Prickly Pear, Fern Green, Monarch Orange and Bright Tangello.
Using Versafine Clair "Twilight" dark blue ink, I stamped the "Forest Leaf" stamp in the top left corner and then again in the bottom right corner. While the "Twilight" ink was out, I inked the edges of the tag.
I used Versafine Clair "Warm Breeze" turquoise ink to stamp the "Winter Spice" verse over the peachy/orange coloured areas.
I then used Versafine Clair "Twilight" to stamp the sentiment, which is part of the Lavinia Stamps "Heartfelt Verse" stamp set.
I then started to colour the leaves using Derwent Inktense pencils, applied with a paint brush. I gave the lighter areas of the leaves a few brush strokes of "A Wink of Stella" to give some shimmer to the leaves.
I then used some copper coloured metallic paint and a fan shaped paint brush, tapped to produce tiny splatters of colour across the tag. I gave the surface a waft of the heat gun to ensure it was fully dry, before mounting the tag on to some dark blue card.
Another card using some of the new Lavinia Stamps.
I made a circlur gel plate background using Distress Inks, I used Squeezed Lemonade, Picked Raspberry, Blueprint Sketch and another, but I don't recall the colour.
Once the background was dry, I stamped the Lavinia Stamps new "Eve" fairy in Versafine Clair "Monarch" purple ink.
I then used a couple of the new Lavinia "Small Pine Trees" stamp set, stamping them in first and second generation stamping using Versafine Clair "Morning Mist" grey ink.
Masking off the bottom area, I added some white ink, I used Hero Arts "Hero Hues in Unicorn" applied with a finger dabber to give the impression of a light snowfall on the ground.
I coloured the fairy using gel pens and Derwent Inktense Pencils. I added white to the trees using a gel pen too.
I lightly masked the fairy and then splattered white paint to replicate snowfall.
Finally, in the bottom left hand corner, I stamped "Just for you" which is part of the Lavinia "Heartfelt Verse" sentiment stamp set.
Moving away from pumpkins today, I thought I would use of the quieter, less obvious stamp sets which is part of the new release from Lavinia Stamps, using the "Flower Pots" set.
I used two lengths of low tack tape to provide an area I could stencil through. I lay the Lavinia Stamps "Waffle Stencil" over the card and used "Violet" Archival Ink to create the patterned horizontal band across the card.
I stamped the new Lavinia "Flower Pots" in Versafine Clair "Morning Mist". While the ink was out, I also stamped the "With Love" sentiment, which is part of the Lavinia "Heartfelt Verse" stamp set.
I stamped the lavender (also part of the flower pots set) in Versafine Clair "Shady Lane" for the stems and "Monarch" purple for the flower heads. I then stamped the green foliage in the other post using Versafine Clair "Verdant" green ink.
I coloured the flower pots using "Burnt Orange" Derwent Inktense pencil, applied with a paint brush.
Finally, moving on to the grounding of the pots, I used a paint brush to paint "Lost Shadow" Distress Oxide Ink. I added a touch of 2B penil right below the pots for a little depth of shadow.
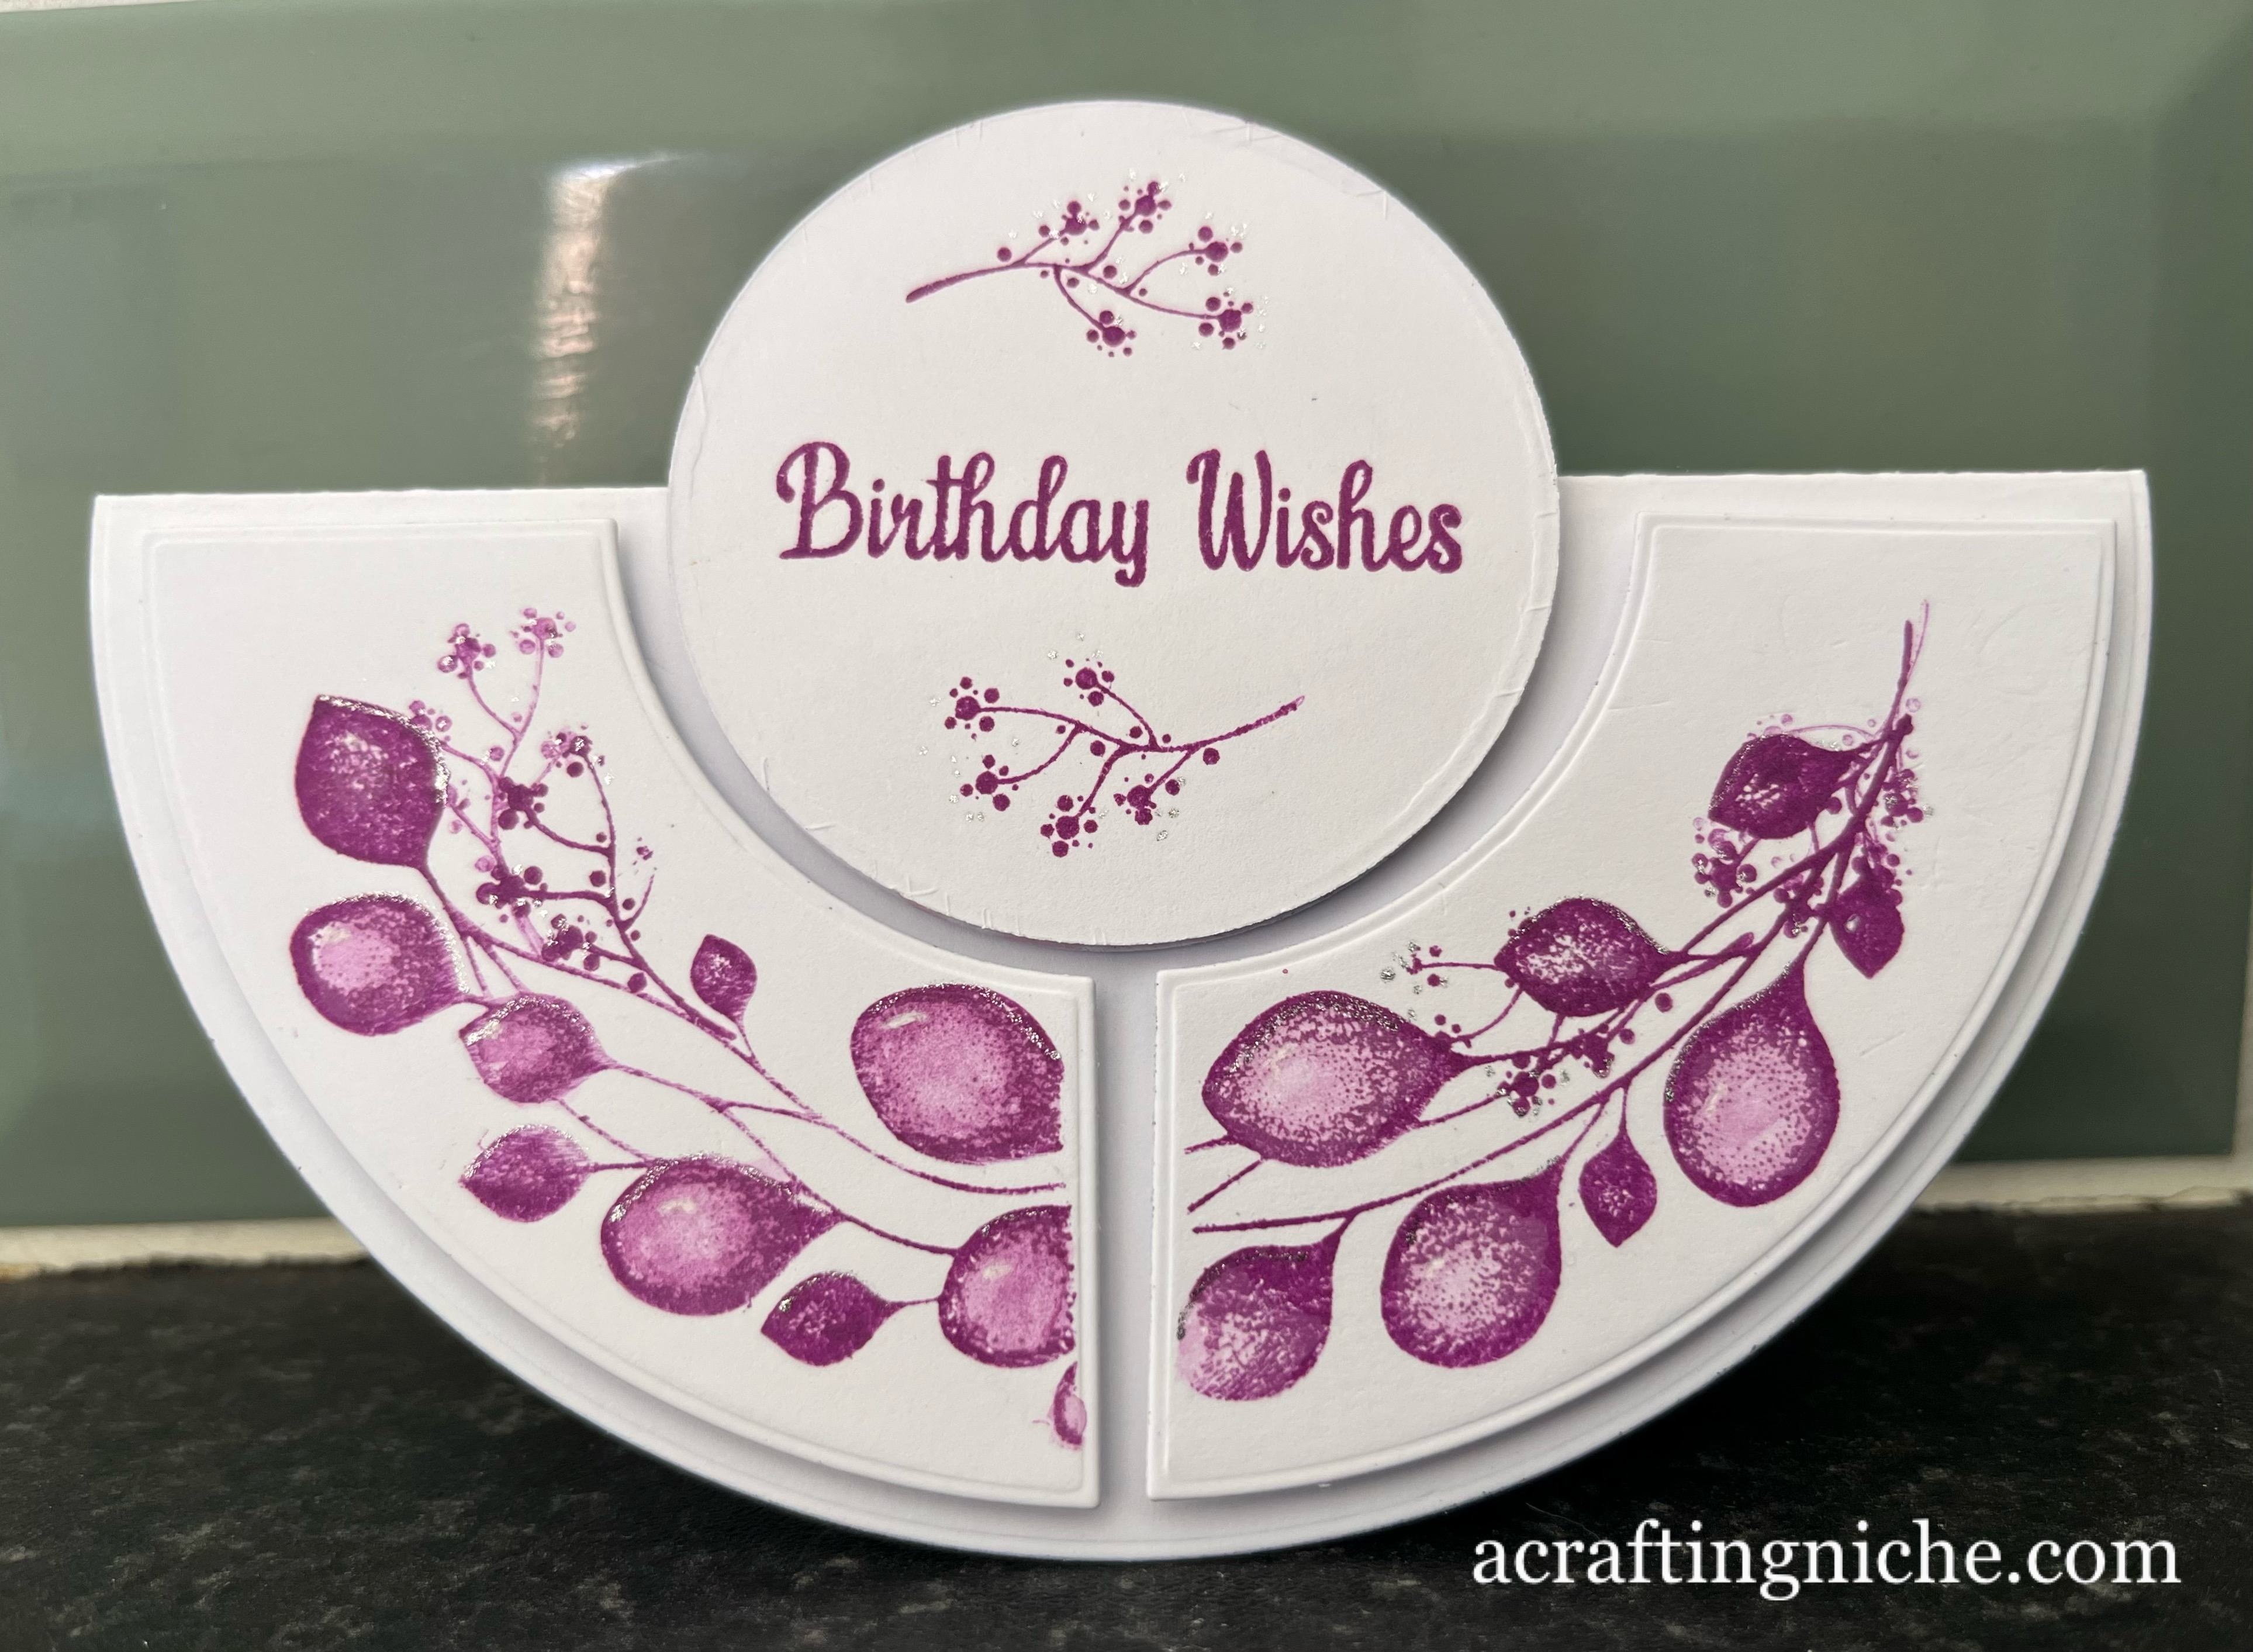
I used a die today that has been in my stash for at least a couple of years and had never been used. I decided to address that today!
Using a 300gsm white card, I die cut the four shapes, the large circle for the background, the smaller circle for the sentiment and two sections of the half circle using the Crealies NL "Modern Patchwork" die set.
I then folded the large circle in half using a bone folder to give a nice crisp edge.
I then moved on to the stamping of the die cut pieces. I added a touch of Herma removable glue on the reverse to hold them into position on my stamping platform. I used the magnets as well as I wanted to be sure there was no movement.
I used Versafine Clair "Purple Delight" ink to stamp the Lavinia Stamps "Floral Wreath" stamp and the birthday greetings, which is part of the Lavinia "Heartfelt Verse" sentiment stamp set. I coloured the wreath using Derwent Inktense "Thisle" pencil.
Once the ink was dry, I added foam pads to the back of the die cuts and placed in position.
Finally, I added touches of white gel pen to areas of the berries on the wreath to replicate where the light would catch, I also added areas of silver glitter using a gel pen to give a little sparkle to the card.
Here's a quick card I made this morning using a couple of Lavinia Stamps.
I started with a 5x5 card blank. In the bottom right hand corner I started to stamp the Lavinia Stamps "Lavender" using Versafine Clair "Shady Lane" for the stems and "Purple Delight" for the flower heads. I multi stamped in both first and second generation stamping.
I lay the Lavinia Stamps "Waffle Stencil" over the top of the stamping, applying "Shadow Grey" Archival Ink through the stencil with a blending brush, keeping the stencil design close to the stamping and fadeing out towards the top and the left.
To ground the stamping, I used "Mowed Lawn" and "Weathered Wood" Distress Oxide inks, slightly diluted and applies with a paint brush. When dry, I used a 2B pencil to make the area a little darker in the shadow areas.
Recently, Lavinia Stamps have released a new product called "Dinkles", they're a little similar to Brusho but are a fine powder, rather than being granular. Initially, I thought "I'm not going to buy these'! But of course I got sucked in and orderd the set. They have been sat on my craft desk for almost a week waiting to be used, so today was the day that I gave them a try.
I wasn't quite sure what I was going to do with the Dinkles or how I was going to use them, so decided I would spritz a piece of card with water (both sides so that it didn't curl), then poked holes into the lids of the Dinkles, like I did with the Brusho all those years ago and then gently tapped a little of the powder out. I used two colours "Amethyst" and "Magenta".
Initially, I put a very tiny bit of powder onto the spritzed surface, but knew I wanted a little more colour, so added another spritz of water then tapped a little more powder on. I then used my heat gun to dry the surface.
Once the card was dry, I ran an anti-static bag over the surface then stamped the Lavinia Stamps "Indian Flourish" feather on to the card. I quickly coated the stamped image with Wow! Silver Embossing Powder and heat set.
I cut the card down to an appropriate size and then added a stamped sentiment, using the Lavinia Stamps "Heartfelt Verse" stamp set in Versafine Clair "Charming Pink" ink.
After making relatively clean cards in the past day, this evening I have gone all out to fill all the white space. It's one extreme to another!
I started with a Brusho background I had made a while back. I rubbed an anti-static bag over the surface of the card then stamped the Lavinia Stamps "Feather" and a sentiment from the "Heartfelt Verse" stamp set in Versafine Clair Medieval Blue. I immediately coated stamped images in Wow! Clear Embossing Powder and heat set using a heat gun.
I used "Bright Tangelo" Archival Ink through areas of the Lavinia "Elegance" Stencil. I then used "Cobalt" Archival Ink through the Lavinia Stamps "Waffle" stencil, trying not to overlap the stamped images, so each were allowed to breathe and highlight the design of each stencil.
Finally, I inked the edges of the card using Versafine Clair "Medieval Blue" ink, then mounted it on to a dark blue card before placing on a card blank.
I'm still playing with the new Lavinia Stamps. I seem to be swinging from one busy card, to a quieter design. With this card, I have used a selection of old and new stamps.
To make this card, I started by stamping the wreath, using Versafine Clair "Shady Lane" green ink to stamp the left and right "Wreath Flourish Stamps". I then coloured the leaves, by painting with Derwent Inktense water colour pencils.
I then filled in the cetral wreath area using "Coffee" Archival Ink through the new Lavinia "Waffle Stencil" with a very small stencil brush.
Next I used the new Lavinia "Rose Set" for the roses, stamping in Versafine Clair "Chianti" which is a dark red ink. I then coloured the roses using Derwent Inktense Water Colour Pencils, applied with a brush.
I decided more foliage was needed, so added some using the Lavinia "Flower Collection" and "Foliage Set" stamped in Versafine Clair "Shady Lane" and "Acorn" ink. I added touches of gel pen to replicate tiny flowers.
Finally, I stamped the "Just For You" sentiment, which is part of the Lavinia "Heartfelt Verse" stamp set, stamping in Versafine Clair "Morning Mist" grey ink.
I have made a super sparkly card and the photograph just doesn't do it justice, so I've made a little video clip to share its full beauty.
I started this card by heat embossing the Lavinia Stamps "Star Cluster" using Wow! clear embossing powder.
Using a clending brush and "Blueprint Sketch" Distress Oxide Ink, I gently blended the colour from the edges towards the middle, going very lightly over the heat embossed stars so that the colour was hardly visible. I then gave the stars a light rub with a soft cloth to remove any ink that may have settled on the surface.
Using a fan shaped paint brush and a little bit of water, I added splatters to the area around the star cluster, then blotted with a piece of kitchen roll. This gives a lovely delicate detail to the background, without it being too obvious. I then gave it a quick blast with the heat gun to ensure the surface was dry.
I stamped the Lavinia Stamps "Darcy" figure in Versafine Clair "Twilight" dark blue ink.
I then used the Lavinia "See a fairy, make a wish" verse with Versafine Clair "Twilight" ink, stamped in second generation to add text to the area around Darcy and the Star Cluster.
I used a piece of torn copy paper and Versafine Clair "Twilight" ink with a finger dabber to ground Darcy and to create the impression of the landscape behind her.
I used a gold shimmer gel pen to outline Darcy. I then used a silver glitter gel pen and a white Signo pento add a few dots of white and silver to the star cluster and to the wing area of Darcy.
I edged the card using "Chipped Sapphire" Distress Oxide Ink and then mounted on to a dark blue card then on to a white card blank.
Using a Quickie glue pen, I added a few dots of glue then added a very light sprinkle of Lavinia Holographic silver glitter. Finally adding a few holographic silver stars I've had in my stash forever.
You know when you need to write a little bit more on a gift card, but you don't want a full size card and a standard gift card is too small? That was the situation I was in, so I made this in-between size card which is ideal for the job.
I started by lining up three rows of masking tape and then lifting the middle strip to reveal a line of white card.
I used three shades of archival inks, starting on the left hand side using "Shadow Grey". In the middle I used "Sky Blue" and on the right hand side "Leaf Green", ensuring each colour blended seamlessly into the next. I then removed the two remaining strips of masking tape.
Using Versafine Clair "Shady Lane" green ink in first and second generation stamping, I stamped the Lavinia Stamps "Maple Leaf" and the "Mini Maple Leaf".
I used Versafine Clair "Morning Mist" grey ink to stamp the "Just For You" sentiment which is part of the Lavinia Stamps "Heartfelt Verse" stamp set.
Finally, using a gold shimmer type gel pen and a white gel pen, I added details to the leaves and dots around the foliage.