52 Week Mini Art Card/Tag Challenge

Showing posts with label Versafin Clair. Show all posts

Tuesday, 2 September 2025

Tracy Evans Boutique Designs "Quirky Birds" Card


I received a small order from Tracy Evans Boutique Designs today,  The orders are always dispatched so fast and are beautifully packaged.  Anyway, I wasted no time in having a play.


I used a piece of Papermill Direct 300gsm Super smooth white card for the base, covering the card with "Tumbled Glass" Distress Oxide ink bordered in "Mermaid Lagoon" Distress Oxide Ink. I then used the "Mermaid Lagoon" ink through the Tracy Evans "Snippet Stencil Fronds - SS5".

I then used Versafine Clair "Blue Belle" ink to stamp the Tracy Evans "Take Flight - TE9" stamp. I made pink and white splatters across the surface using Posca Pens.

On a white piece of card, I stamped the Tracy Evans "Quirky Birds - TE10" bird uisng Versafine Clair "Charming Pink" ink. I fussy cut the bird and stuck it on to the card

Sunday, 13 April 2025

52 Week Mini Art Card / Tag Challenge 2025 - Week 15


The Crafting Niche 52 Week Mini Art Card/Tag Challenge 2025:

This is a weekly challenge. I provide you with a prompt/theme each Sunday morning through out the year.  The challenge is very relaxed.  You can do as much or as little as you like.  You can create cards, tags, Artist Trading Cards (ATC's) or index cards, the choice is yours. You just go with what ever is in your head at the time.  You can stamp, get inky, use patterned papers, texture, embellish it is all down to you.

There is a dedicated private Facebook Group, with a lovely bunch of people who are already sharing their makes from previous challenges.  You can find the group by clicking this link.  I'd love you to join in.

The prompt for Week 15 is "Easter"

I started with a piece of patterned paper in quite muted tones with birds and flowers on.  I then used a hand cut stencil, from using an oval die on card and "Pink Peony" Ranger Archival Inks t create an Easter Egg background over the patterned paper.

Next, using "Leaf Green" Ranger Archival Ink and a torn edge of copy paper, I created the layered landscape at the base of the tag.

I then used the Lavinia Stamps "Mini Pipin", the "Shrooms", "Thyme" and the "Rosemary" stamp with Versafine Clair "Nocturne" black ink to stamp the images in first and second generation stamping.

I added extra detail using a white gel pen and pink Posca Pens, finally adding a "Happy Easter" sticker to the tag.


Thursday, 12 September 2024

Engagement Card (inspired by Manja Nelan)


We received some wonderful news a few days back, that our younger son and his girl are now engaged.  We are absolutely thrillled for them.

I am really not in crafting mode at the moment, due to packing up for a house move.  My crafting mojo seems to have been replaced by all things moving!  So I was really struggling with ideas for a card to make.

I remembered seeing a card on the Lavinia Stamps facebook group that I thought was very clever, so I searched for it and found the one I was looking for, it was by Manja Nelan from 2021, so I decided to give it a go.  The card above is inspired by Manja's card.

Using Versafine Clair "Nocturne" black ink, I stamped the two Lavinia Stamps trees, they're called "Tree of courage" and "Tree of hope".

I then found my Visible Image "Love is love" stamp set, with two profiles.  I stamped them on to a piece of card and then fussy cut the face profiles. I used a pencil to lightly draw around the profiles on the edge of each tree.  I then used the central area between the stamped face image as a stencil, colouring and blending the face with "Fern Green" Ranger Archival Ink.  I've shown a photo of what I mean.


I used the same ink with a blending brush and a Lavinia Stamps "Hill Mask" to create the land that the trees are based on.

Next, I used a fine liner black pen to add extra branches to fill in the empty areas of the faces. I  then used a brown Derwent Inktense pencil with a paint brush to colour the tree trunk and some of the thicker branches. I added gold coloured dots within the tree branches too.

Finally, using Versafine Clair "Nocturne" black ink I stamped the word "love" between the foreheads, using part of one of the "Heartfelt Verse" sentiment stamps from Lavinia Stamps.  I used the same ink to stamp the word "Congratulations" which is part of a Clarity Stamps stamp set called "Entwined Sentiments".  I mounted the card on to a piece of dark green card and then on to a 8x8" card blank.

Sunday, 18 August 2024

52 Week Mini Art Card / Tag Challenge 2024 - Week 34


The Crafting Niche 52 Week Mini Art Card/Tag Challenge 2024:

This is a weekly challenge. I provide you with a prompt/theme each Sunday morning through out the year.  The challenge is very relaxed.  You can do as much or as little as you like.  You can create cards, tags, Artist Trading Cards (ATC's) or index cards, the choice is yours. You just go with what ever is in your head at the time.  You can stamp, get inky, use patterned papers, texture, embellish it is all down to you.

There is a dedicated private Facebook Group, with a lovely bunch of people who are already sharing their makes from previous challenges.  You can find the group by clicking this link.  I'd love you to join in.

The prompt for Week 34 is "Hot Colours"

*****

This is the tag that I have made for the Week 34, with a prompt of "Hot Colours". Starting with a white tag, I secured the Clarity Stamps "Squiggly Round Stencil" over to the left side of the tag using low tack tape.

Then I graduated four shades of Ranger Archival Inks, using blending brushes from left to right.  The colours I have used are Carnation Red, Cactus Flower, Tiger Lily and Buttercup.

I used Versafine Clair "Nocturne" black ink to stamp the Clarity Stamps sentiment (part of their "Quotes Set 1 - One Day At A Time" stamp set), in the middle of the tag.

Finally, I mounted the tag on to red card and then added three dots of black Ranger Enamel Accents.

Wednesday, 27 March 2024

Folk Art Style hand painted card


This is a little card I made by painting folk art flowers using three shades of Decoart Americana Arcylic Paints, using Avocado, Snow (Titanium) White and Pebble.

I mouted the card on to a piece of green card and then on to a kraft card blank and then used Versafine Clair "Morning Mist" grey ink to stamp the Simon Says Stamps sentiment.

Monday, 11 March 2024

Lavinia Stamps "Dragons Thorn" Crow Card


As soon as I opened my pack of new Lavinia Stamps, the "Dragons Thorn" stamp shouted at me to be paired with a crow.  So who am I to not go with it.

I went for a very clean and simple card to highlight the strong design detail of the stamp used for the branch, stamping in Versafine Clair "Nocturne" black ink.

The stamps I used were the new "Dragons Thorn", "Crow Set" and a sentiment from the "Heartfelt Verse" stamp set.

Saturday, 16 December 2023

Stampers Anonymous festive tag


I felt the urge to use my Tim Holtz / Stampers Anonymous stamps, so made this gift tag. 

Starting with a cream coloured tag I used Versafine Clair "Pinecone" dark brown ink to stamp the pine cone branches which is part of the Tim Holtz / Stampers Anonymous stamp set called "Forest Floor CMS422. Then using Versafine Clair "Chianti" dark red ink, I stamped the berries which is from the same stamp set.

I used "Library Green" Ranger Archvial Ink through the Tim Holtz / Stampers Anonymous "Gingham Layering Stencil - THS134".

I then used "Plum" Ranger Archival Ink through the Tim Holtz / Stampers Anonymous "Flourish Layering Stencil. - THS032"

I stamped the sentiment, part of the Tim Holtz / Stampers Anonymous "Cozy Christmas - CMS444" stamp set using Versafine Clair "Chianti" dark red ink.

I used a red Posca Pen and a white gel pen to colour the berries.  I used Derwent Inktense pencils to colour the fir cones then edged some of the cones using a gold shimmer gel pen.

I edged the tag using "Ground Espresso" Distress Oxide Ink and then mounted it on to a piece of red card. Drawing around the tag itself with a gold shimmer gel pen.


Sunday, 10 December 2023

Daisy B "Dapper Gent" Birthday Card


Here's a card I made for a male friend.  I'm not happy with it for a couple of reasons, but maybe that is me being a bit picky - One of them being the sentiment isn't quite central, no idea how I managed that!  I doubt very much that he will notice.  My Hubby didn't when I showed him.

For the male image, I used a stamp by Daisy B called "Dapper Gent" stamped in Versafine Clair "Morning Mist" grey ink then coated with Wow! clear embossing powder and heat set. I then stamped the image again on a piece of paper, fussy cut it and used it as a mask for the stamped area, while I worked on the background.

With the mask in position I used "Chrome Yellow"  Archival Ink through the Visible Image "Strobes" stencil.

I then used "Shadow Grey" Archival Ink through the Visible Image "Halftone" stencil.

Next I used "Orange Blossom" Archival Ink throguh the Tim Holtz / Stampers Anonymous "Chevron Shifter Layering Stencil - THS127".

Then I used "Cobalt" dark blue Archival Ink with the Tim Holtz / Stampers Anonymous "Grime - THS130" stencil, edging the card with the same colour.

Removing the mask, I coloured in the stamped area of the male, using a paint brush to apply "Tattered Rose" Distress Oxide Ink for the skin and "Faded Jeans" Dsitress Oxide Ink for the clothing.

I used a silver glitter gel pen to go over the outline of the male and also added some dots of sparkle to the background too.  I then mounted the card on to a 7x7" card blank

I used Versafine Clair "Twilight" dark blue ink to stamp the sentiment, which is part of the Daisy B stamp set called "Men Sentiments".


Monday, 13 November 2023

Day 3 Tag of Karen Telfer's "24 Days of Tag Challenge 2024"


This is my Day 3 tag of Karen Telfer's "24 Days of Tags 2023" challenge.  I'm happy to say I am up to date... for now!

I really enjoyd making this tag, in fact I may well make more to go on Christmas gifts in different colour way stencils by Funky Fossil Designs for the background, using "Snow Crystal" and "Snow is falling" with "Blueprint Sketch" Distress Oxide Ink.

Over the top I stamped two different snowflake stamp sets by Lavinia Stamps using Versafine Clair "Twilight" dark blue ink.  I used the same ink to stamp the Simon Says Stamp sentiment, part of their "Tiny Words - Christmas" stamp set.

Saturday, 2 September 2023

Sweet Poppy Stencils "Honeysuckle Flourish" card


Sweet Poppy Stencils have released some fabulous new stamps and stencils in the past few days.  It would have been rude of me not to show interest in them and buy a couple - wouldn't it?

My stencil order arrived today, so I wasted no time in making a card using one of the new stencils.

Starting with a piece of white card, I lay the new Sweet Poppy "Honeysuckle Flourish" stencil over the top and secured with low tack tape. Through the stencil, I used Antique Linen, Saltwater Taffy and Picked Raspberry Distress Oxide Inks for the flowers and "Iced Spruce" Distress Oxide for the stems and foliage.

Removing the stencil, I replaced it with the Sweet Poppy "Floral Trellis Stencil", applying "Shadow Grey" Archival Ink through the stencil with a blending brush.

Once the stencil was lifted, I added touches of Van Goch Pastel Pencils to the flowers to add a little depth of colour, then went over the flowers with "A Wink of Stella" which provides a lovely subtle gold shimmer.

Using Versafine Clair "Morning Mist" grey ink, I stamped the two sentiments, both are part of the Sweet Poppy "Hugs & Kisses" stamp set. Finally, mounting the card on to dark grey card and then on to a card blank (the finished card is slightly smaller than A5, so quite large).

Thursday, 31 August 2023

Lavinia Stamps "Everlee on the swing bed" tag


More early morning play, this time a tag using Lavinia Stamps.

I used a manila coloured tag for the base, adding "Saltwater Taffy" and "Weathered Wood" Distress Oxide Inks, layering the colours, then drying then laying more colour on top, to get some depth.

Once dry, I used Versafine Clair "Shady Lane" green ink to stamp the Lavinia Stamps "Medium Swing Bed".  I used the same ink to stamp the "Mystic Swirls" and also to ink the edges of the tag.

Next, I used Versafine Clair "Morning Mist" grey ink to stamp the Lavinia "Star Cluster" around the swing bed.  I was then able to stamp the fairy "Everlee" using Versafine Clair "Twilight" dark blue ink.

I added touches of silver glitter pen, gold shimmer pen and finally dots of "White Opal" Ranger Liquid Pearls to areas of the swirls.

Tuesday, 1 August 2023

52 Week Mini Art Card/Tag Challenge - Taster tag for August 2023


52 Week Mini Art Card/Tag Challenge

To start getting us in the mood for making tags in 2024, I thought I would initially provide you with a prompt on the 1st of the month, between now and the start of the challenge in 2024, so just one tag a month for the time being.

You can use any size of tag for this challenge.  The tags that I use meaure 8cm across and have a length of 16cm.  They can be purchased from Craft Obsessions for £5.75 for a pack of 50 tags.  Alternatively use any tags you may already have or perhaps cut and make your own tag bases.  The choice is yours.

The prompt for the August 2023 Tag Taster is "Circles".

I hope you enjoy this taster.  I hope you enjoy the challenge.  I'd love to see what you make.  You can share your tag within the "Crafting Niche - 52 Week Mini Art Card/Tag Challenge" group over on Facebook, here is the link.

Sam x

*********

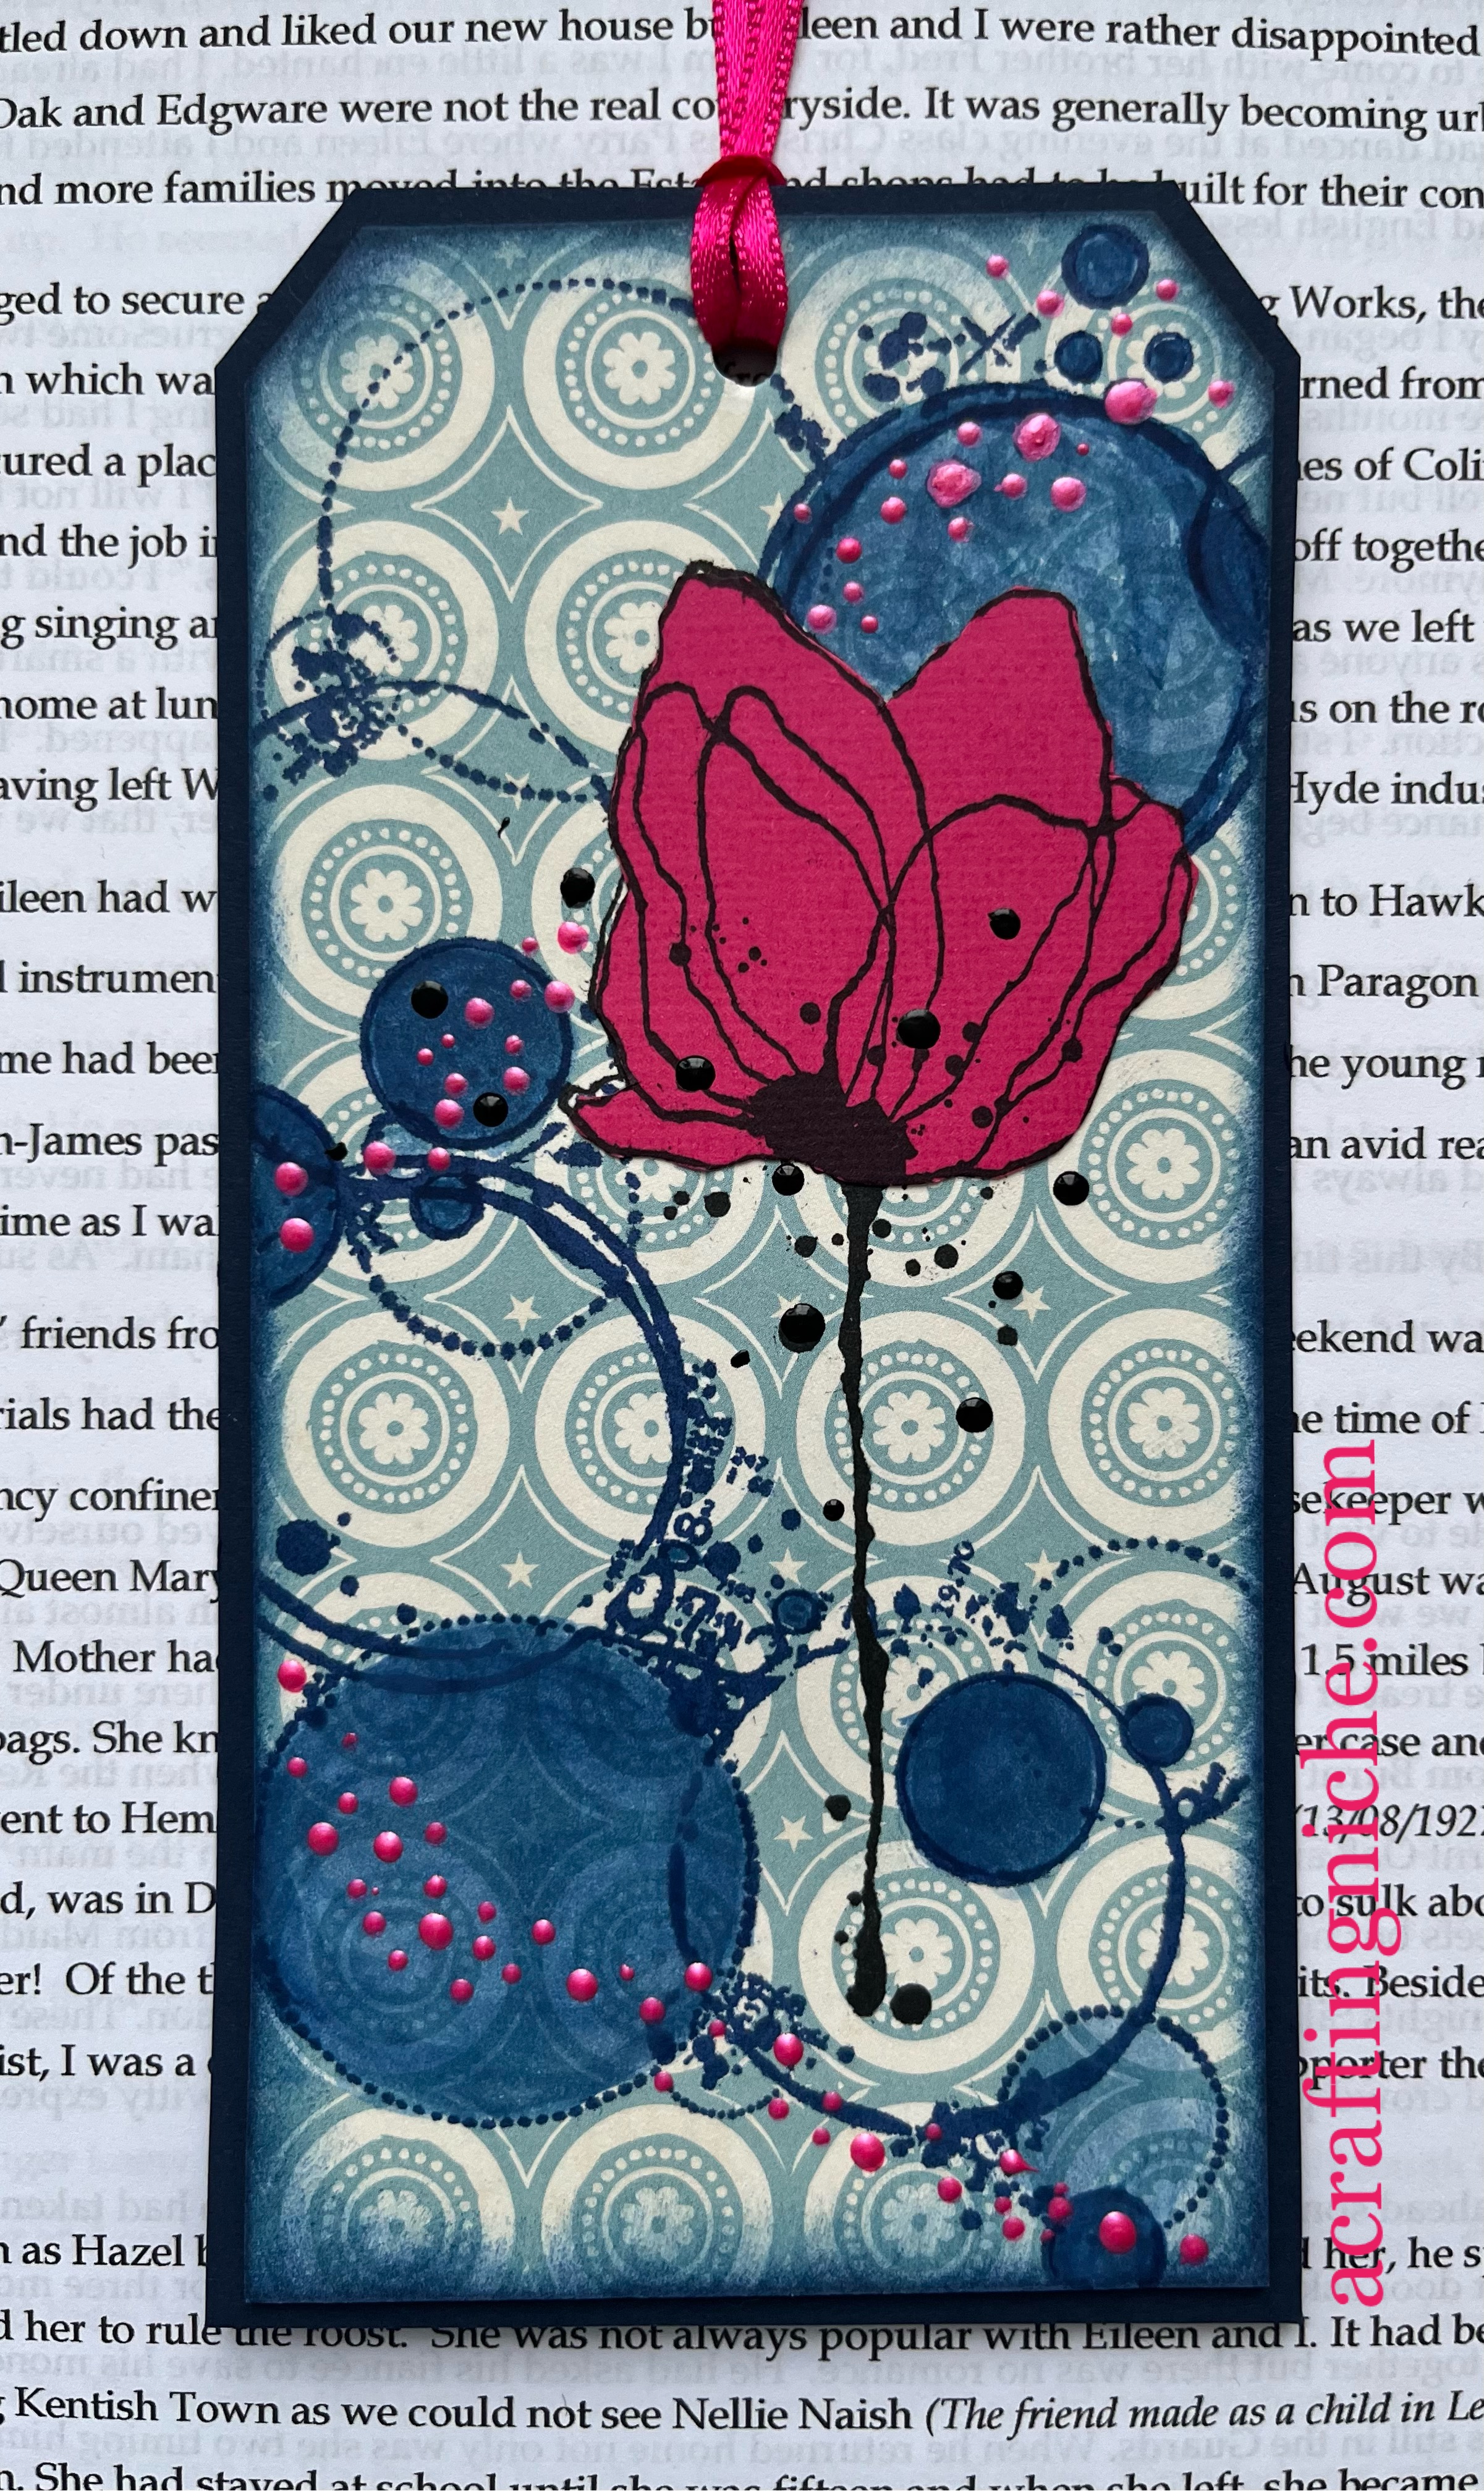
This is how I made my tag using the August 2023 prompt of circles.


In an attempt to stash bust - using up things floating around the craft room, I found a piece of patterned paper with a circular design on it.  I cut it down to size and stuck the patterned paper on to my tag base using double sided sticky tape.

I used Versafine Clair "Nocturne" black ink to stamp the Visible Image flower from their "Creative Chaos" stamp set.  I then stamped the flower head only on an off cut of cerise coloured card.  I fussy cut the flower head and set aside till later.

Next, using the Versafine Clair "Blue Belle" ink, I stamped the collection of mixed circles twice across the tag, going over the upper part of the flower head too. The circles are part of the Visible Image stamp set called "Butterfly Effect". I used a Derwent Inktense Pencil (called Denim), to paint the colour within the circles, chosing to cover some in a lighter and some in a darker shade of blue. At this stage and while the ink was out, I inked up the outer edges of the tag too.

Once the surface of the tag was dry, I then stuck the cerise flower head over the top of the one on the tag, I used a wet glue for this so that I could slide it into position with ease.

Finally, I added some extra black dots using Ranger "Enamel Accents".  I then added a trail of pink dots using some Liquid Pearls called "Dazzle.

Once everthing was fully dry, I then mounted the tag on to a piece of blue card.  This is because I like the finished look the tag has.  It also provides a bit more strength to the tag.

Wednesday, 19 July 2023

Lavinia Stamps "Large Key" new home card


So back to a quieter looking card with a clean and simple design which was quick to make too!

I used an anti-static bag (filled with French Chalk) across the surface of the card before stamping, in an attempt to keep any stray embossing granules from sticking where they shouldn't be.

Using the Wow! Embossing Clear ink pad I stamped the new Lavinia Stamps "Large Key" in the middle of the card.  I then coated the stamped image with Wow! Rich Gold embossing powder and heat set.

Using Versafine Clair "Warm Breeze" ink, I stamped the Lavinia "Pixy Houses" along the top of the key.  I also stamped the "Welcome Home" sentiment, which is part of the Simon Says Stamps "Tiny Words" stamp set.

Next I used "Shadow Grey" Ranger Archival Ink, applied very lightly with a blending brush through the Lavinia Stamps "Waffle" stencil.

Finally, I added touches of metallic gold pen to the windows of the central house and added some smoke coming out of the chimney using a pencil.

Thursday, 22 June 2023

Sweet Poppy Stencils "Festive Phrases" Card


A quick stencil play making this card using Sweet Poppy Stencil products. 

I masked off the edges of a piece of 7x7" card using a low tack tape, to ensure they stayed clean.  I then positioned the Sweet Poppy "Aperture Circle Stencil".  

Over the top of that I lay the Sweet Poppy "Plaid Back Plate stencil" and applied Versafine Clair "Verdant" light green ink through the stencil.

I lifted and repositioned the Plaid stencil, applying Versafine Clair "Shady Lane" a mid green coloured ink, through the stencil to create a green tonal tartan look.

I lifted both the Plaid and circle stencil, then lay the Sweet Poppy "Holly Back Plate Stencil" over the card.  I used Versafine Clair "Rain Forest" dark green ink applied with a blending brush through the stencil.

Removing the stencil, I left the piece to dry before dragging an anti-static bag over the surface of the card.

I then used the "Merry Christmas stamp", part of the Sweet Poppy "Festive Phrases" stamp set, stamped in Versafine Clair "Chianti", which is a rich red colour.

I quickly coated the stamped image with Wow! Clear Embossing Powder and then heat set.

Finally, I removed the tape around the edge of the card and then added red to the berries of the holly using a Posca Pen.

Tuesday, 20 June 2023

Sweet Poppy Stencils "Ivy Flourish" Christmas Card


My order of the new Christmas "Botanicals" stamps arrived from Sweet Poppy Stencils, so I wasted no time in trying one of the new stamps out. 

I used Versafine Clair "Shady Lane" green ink to stamp the "Ivy Flourish" stamp, colouring it with four shades of Derwent Inktense pencils, applied with a brush.  I used Lime Green, Spring Green, Light Olive and Leaf green.  I then created a slight shadow for the lower leaves by going around the bottom edges of the leaves with a 2B pencil.  I then used a metallic gold gel pen for the veins of the leaves.

I lay the Sweet Poppy "Grid Plate" over the top.  Using a blending brush with "Old Paper" Distress Ink I created a quiet background for the ivy.

I didn't have any suitable Sweet Poppy sentiments, so I used one from a Simon Says Stamp set called "Tiny Words - Christmas", stamped in Versafine Clair "Shady Lane" green ink.

Tuesday, 29 October 2019

Lavinia Stamp New Stamp Preview, Fern Branch, Winter Berries and Silence Sentiment


Tracey Dutton of Lavinia Stamps has created thirteen fabulous new stamps to compliment the existing collection.  The new stamps will be available to purchase from 31st October 2019.

for this card, I used the "Tumbled Glass" Distress Oxide Ink with a paint brush to create a pale blue background wash.

Using Versafine Clair "Rain Forest" dark green ink, I stamped the new "Fern Branch" and the new "Winter Berries".

Using Versafine Clair 'Nocturne" black ink, I stamped the crow from the Lavinia "Crow Set" to perch on the branch.

I used Arteza Brush pens to colour the berries red and a white Signo pen to add highlights and snowflakes on the pale background.  

I then die cut the image into a circle.  I used an embossing folder with dots to replicate snow falling to emboss a piece of card.  At the base of the card I stamped the new "Silence" sentiment in Versafine Clair "Rain Forest" green ink.  I then adhered the circle image on top of the embossed background.

Sunday, 27 October 2019

Lavinia Stamps New Stamp Preview - Zuri and Berry Leaves


Lavinia Stamps will be releasing thirteen fabulous new stamps at the end of October, all of which will be a fabulous addition to the existing range of stamps.

For this card, I used a gelli plate print I had made a couple of months back using Colorbox Inks brayered onto the gelli plate with diluted Brusho paint sprinkled on to the gelli plate itself creating this mottled peach/orange pull.

I used "Dusty Concord" Distress Oxide Ink with a blender to colour from the edge of the gelli print to the edge of the card.

I used Versafine Clair "Monarch" purple ink to stamp "Zuri" one of the new unicorns.

For the hedghog, which is part of "The Wallace Family" I used Versafine Clair "Acorn" brown ink.

Using Versafine Clair "Monarch" purple coloured ink, I stamped the sentiment "Every Dream" and "Berry Leaves" which are also a brand new release stamps.

I used a white Signo Pen to highlight areas of the unicorn and the hedgehog along with a gold shimmer Sakura Gelly Roll Pen.


Saturday, 21 September 2019

Halloween Card using "Crooked Webs" stencil #funkyfossil

This is one of my first Design Team makes for Funky Fossil Designs:https://www.funkyfossil.co.uk/


To celebrate being part of the Funky Fossil new Design Team, Sarah has generously provided a discount code that I can offer to you.   A 15% off coupon code to be used from now, till midnight on Monday 23rd September 2019.  Quote the code "FFSAM15" to claim the reduction.

This was a nice quick card using Distress Oxide Inks in the shades of Picked Raspberry, Wilted Violet and Chipped Sapphire, through the Funky Fossil Designs "Crooked Web" stencil.

I die cut the web using a square die with a stitched detail around the edge.  I adhered the coloured square on to black card, using the next square die up in the nest I cut the shape and adhered it to the middle of the card.

Using Versafine Clair "Nocturne" ink, I stamped the "Happy Halloween" sentiment which is part of a Papertrey Ink stamp set (Tag-its #7).  Finally, using a small blob of silicon glue, I stuck the plastic spider to the front of the card.