I was inspired by something Eileen Godwin made to make something similar. This is my take on her card.
I have used Ranger Archival Inks (Chrome Yellow, Pink Peony, Orange Blossom and Sky Blue) through the Lavinia Stamps bird "Nature & Nurture Sticker Stencil" and their "Feather Leaf Stencil"
I have stamped the Lavinia Stamps in Versaifne Clair "Nocturne" black ink. The stamps I have used are:Spiral of Spells, Fairy Dandelions and the Balace Word stamp set. I have also used a 2B pencil, a silver glitter gel pen and some dots of white Liquid Pearls.
I enjoyed the gel plate technique Eileen Godwin shared on her "Live" last night that I decided to make another card using the same principles.
I used Versafine Clair "Avocado" green ink and a brayer to put a thin base layer of ink on the gel plate.
Then I used two shades of Ranger Archival Inks to stamp the Lavinia Stamps "Berry Leaves" multiple times in first and second generation stamping using "Periwinkle" blue innk and "Paradise Teal" a green coloured ink, direct on to the gel plate. I then placed a piece of card over the top of the gel plate and took the impression.
Round the top and bottom, I added extra foliage using the Lavinia Stamps "Arctic" blue ink with the "Wild Vines" stamp.
Next, I stamped the Lavinia "Dancing till dawn" ladies, using Versafine Clair "Twilight" dark blue ink. I used the same ink to stamp the "Vine Branch" at the top of the card, also to ink the edges of the card too.
Using Versafine Clair "Arctic" blue ink and a Lavinia Stamps "Hill Mask" I created the landscape behind the dancing ladies.
I then used a large Lavinia "Moon Mask" with "Rose Madder" Ranger Archival ink to create the impression of the pink dawn sun. I used the same ink through the Lavinia Stamps "Feather Leaf Stencil" too, within the sun area.
I used a 2B pencil to add shadows and a white and a gold gel pen for highlights. I used a white and coral coloured Posca Pen for the dots to create the impression of flowers.
Finally, I added the "Have an amazing day" greeting, which is part of the Funky Fossil Designs "Stripped Back Sentiments" stamp set, stamped in Versafine Clair "Twilight" ink.
Last night, I watched the super talented Eileen Godwin do a live tutorial. I was up early this morning, so decided to have a go myself. I didn't take any notes, so this is made by memory. I've used a couple of different stamps to Eileen too.
I used a brayer to put Versafine Clair "Sand Dune" ink on to a gel plate. Then I used the Lavinia "Maple Leaf" stamp to stamp leaves around the edge, using two shades of Ranger Archival Inks. The colours I used were "Cornflower Blue" and "Rose Madder". I then took a print from the gel plate.
Using Versafine Clair "Twilight" dark blue ink, I stamped the Lavinia fairy called "Mae" and also the "Small Lily Flourish".
I used "Rose Madder" Ranger Archival Ink with a Lavinia "Moon Mask" edging the moon with the pink colour. I then used the same coloured ink through the Lavinia "Laurel" stencil".
Next I stamped the Lavinia "Luna Lights" that hang on the top right of the card, in Versafine Clair "Twilight" dark blue ink. I used the same ink to edge the card too.
I used the Lavinia "Bubbles" stamp set, using the smallest bubble for the crystal ball, stamped in Versafine Clair "Arctic" and then given touches of 2B pencil and white gel pen.
I coloured the flowers using "Malibu" coloured Derwent Inktense pencil. I used a gold pen to colour in the "Luna Lights" and a gold shimmer pen to outline some of the leaves. I added "A Wink of Stella" to the wings of the fairy and then finally added some dots of white Ranger Enamel Accents round the moon.
I am still loving the Eileen Godwin paid workshop. Last night, I made this card, it's inspired by Eileen but other than the inks, I think I have changed all the stencils and stamps to what I had in my stash... I call it going off piste!
Once again, because it's a paid workshop, I'm not going to go into details about the process, but have detailed the products I have used for my card below:
I couldnt sleep so decided to get up and craft. I watched another of Eileen Godwin's on-line workshops and decided to try it myself. This is my take on Project 4 of Workshop 15.
As before, I won't go into the process of making this card as it is from one of Eileen's paid workshops. However, I will detail the products that I have used for this card (I didn't have everything that Eileen used, so have improvised).
Eileen Godwin has inspired me over the years in so many ways. I decided to book one of her on-line workshops that she had advertised recently, as I really liked the pieces she had made. The workshop I subscribed to was #15 - all about inky layers.
Because this was a workshop, I am not going to detail the process to make the card. I have swapped out the background script stamp and the main feature stamps that Eileen used as I didn't have them, so although the background is reasonably close to that of Eileen's sample, the over all finished card looks quite different.
I've been away again, home just in time to do one of Eileen Godwin's challenges of create something "Abstract".
I raided my backgrounds file and found a tag I'd made a while back using "Bundled Sage" and "Peeled Paint" Distress Oxide Inks on a cream coloured tag.
I used "Peat Moss' Archival Ink through the Clarity "Abstract Droplet" stencil.
Next I used "Library Green" Archival Ink through the Clarity "Circle Dots" stencil.
Using a fine tip black pen, I drew some vertical lines, then drew some boxes on them, adding dots inbetween the boxes. Some of the boxes I coloured with a gold shimmer gel pen, the others I filled using a black Posca Pen, edging some with a metallic gold pen.
I inked the edges of the tag using Versafine Clair "Nocturne" black ink before mounting it on to black card.
Finally, I added dots of black Ranger "Enamel Accents" and gold coloured Liquid Pearls.
Today, Tuesday 16th May, Eileen Godwin set a challenge to make a "Thank you" card. I've opted for the word "Diolch" which is the Welsh word for "Thanks".
I started by using shades of Archival Inks through the Lavinia Stamps "Words 1 Stencil" to create the floral background I used Leaf Green, Pink Peony, Violet and Cornflower Blue inks. I used the latter to blend the edges of the card.
Using Versafine Clair "Nocturne" black ink, I stamped the Lavinia "Fearn Heads" and the words "Diolch" which is part of the Lavinia "Welsh Words" stamp set.
Using Versafine Clair "Morning Mist" grey ink, I stamped the Lavinia "Texture 1" at the base of the card. Finally adding some white dots of Ranger "Enamel Accents".
Today, Wednesday 26th April, Eileen Godwin set a challenge of "Lots of white space". This is the card that I made, using the same products as the ones I used yesterday.
I used the Clarity Stamp "Stripes" stencil with "Prickly Pear" Archival Ink as the base layer, fading it out from the middle.
I then used the Clarity Stamp set called "Swallow Journaling" to stamp the text, using Versafine Clair "Verdant" light green ink and then the foliage in Versafine Clair "Shady Lane" mid green coloured ink.
I used a white Posca Pen to splatter across the card, adding a few dots of Ranger "Enamel Accents" too.
I deliberately left this free of a sentiment, as I thought this design could work well as an emergency card for several occasions.
Yesterday, Eileen Godwin set a "Red, White and Blue" challenge. I've only just had an opportunity to make a card and this is it.
I used the Clarity Stamps "Stripes" stencil with "Carnation Red" Archival Ink. I then lifted the stencil, shifting it one line up (to cover the red), then applied "Cobalt" Archival ink through the stencil to get the multi coloured stripe look.
I used two stamps from the Clarity "Swallow Journaling" stamp set, stamped in first and second generation Versafine Clair "Twilight" ink.
I added dots of red Posca Pen and Ranger "White Enamel Accents", giving a touch of colour to the bird using Derwent Inktense pencils.
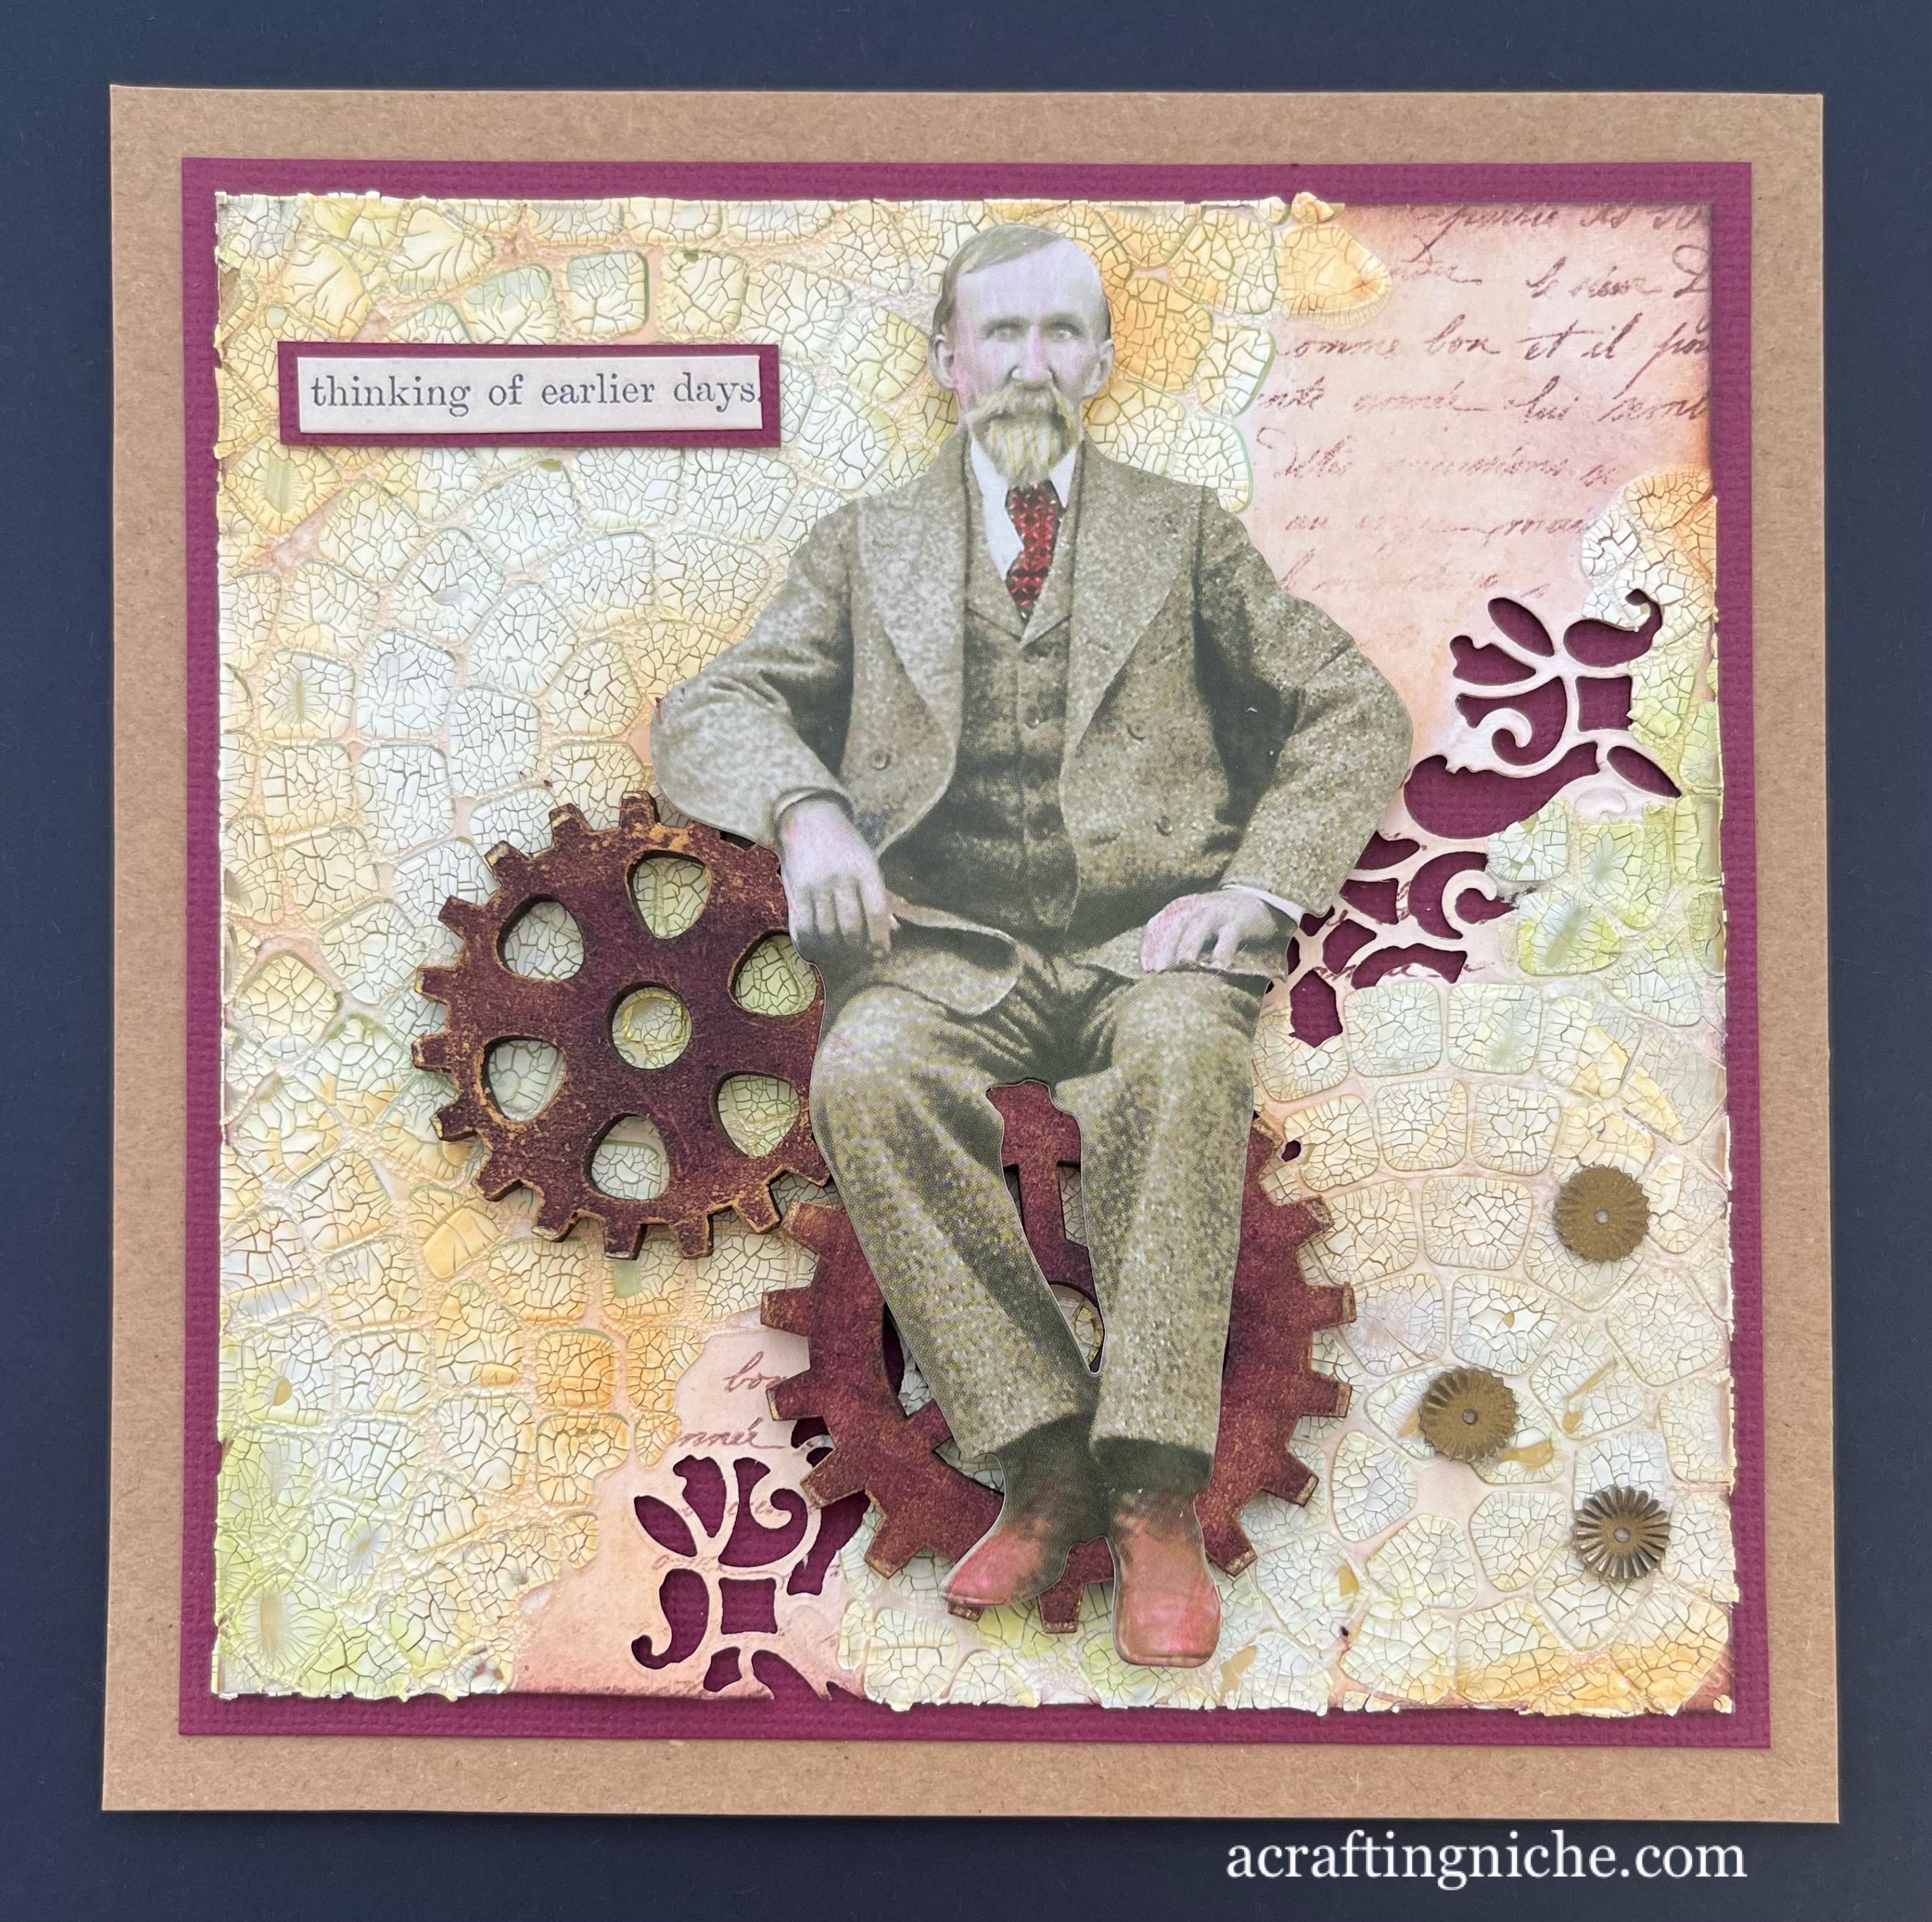
Today, Wednesday 19th April, Eileen Godwin set a challenge of "Texture". This is the card that I made. I was totally out of my comfort zone using the texture paste!
I started this card doing one thing but it morphed into something quite different as I wasn't sure how to use a product and winged it. Lesson learnt, check Google first.
I made a beautiful background thinking it would crackle, but it didn't as I'd used "Crazing" which was clear when I applied it. I then put the stencil back on and added the"Crackle" paste, which was very white when applied and stayed white, so I lost the nice background, which resulted in working with what I had left!
I decided to use the inks left on my blending brushes to provide colour to the crackled area. I'd used a Funky Fossil stencil called "Broken Mosaic" with the Tim Holtz "Crackle" Texture Paste. A small area of the base remained and that was where I had stamped the Funky Fossil "Vintage Script" using Versafine Clair "Acorn" brown ink.
I decided I would die cut a section of the surface, using a Sizzix Tim Holtz die, but due to the depth only some of it actually cut, which I actually don't mind as it is more informal.
I found some MDF cogs in my stash, so coated them with "Plum" Archival Ink and then added touches of gold gilding wax. I stuck them into position using Glossy Accents.
I used a Tim Holtz "Paper Doll" and gave the gentleman a bit of colour by using felt tips pens and rubbing off the surface ink, which left just a suggestion of colour. I used double depth foam pads to adhere the upper body of the paper doll and Glossy Accents for the legs, positioning him as if he were sitting on the cogs.
I found a Tim Holtz/Stampers Anonymous "Sticker Word" which was suitable, mounted it on dark red card and cut to shape. Finally, I had some little dark gold looking metal embellishments which I thought worked well, so added these by using some dots of Glossy Accents.
Today, Tuesday 18th April, Eileen Godwin has set a challenge of "Black and White". This is the card that I have made for this prompt using a selection of Visible Image products.
I stamped the main image, called "Behind Every Mask" in the middle of the card using Versafine Clair "Nocturne" black ink. With the remaining ink on the stamp, I stamped the image on a post-it note then fussy cut the shape to create a mask.
With the mask in place, I used Versafine Clair "Morning Mist" grey ink through the Visible Image "Strobes" stencil, fading it out towards the edges.
Using Versfine Clair "Nocturne" black ink I stamped one of the Visible Image "De-stressed" stamps multiple times around the edge of the card. I then did the same using Versafine Clair "Morning Mist" grey ink.
I then used the Visible Image "Free Your Imagination" stamp set for the feather and the sentiment, stamping both in "Nocturne" black ink.
Finally, I mounted the card on to a piece of black paper then on to a card blank. Around the edge of the black paper, I drew a line in a white gel pen. The last thing I did was to add dots of white Ranger "Enamel Accents" below the flight of the bird.
I'm playing catch up with the challenges I have missed, while I was away. The Friday Eileen Godwin challenge prompt was "Butterflies", this is the card I have made.
The central image is actually the mask I used for the "glitter" challenge a few days ago. I couldn't bring myself to throw it away as it was so pretty - just as well I didn't!
The mask is a stamped image from the Visible Image stamp set called "Butterfly Effect", stamped in Versafine Clair "Nocturne" black ink. It's got lots of different Archival Inks and splatters on it.
In the background, I have used a stencil called "Butterfly Wreath" by Funky Fossil Designs, with "Shadow Grey" Archival Ink, using more ink in the central area and blending out so it is lighter on the edges.
I used foam pads to adhere the butterfly over the wreath. Then stamped the sentiment, which is part of the Simon Says Stamp set called "Tiny Words - Birthday", stamped in Versafine Clair "Monarch" purple ink.
I then mounted the card on to a piece of grey paper and then on to a card blank. Finally adding some dots of Ranger "Enamel Accents" to complete the card.
I'm home again after a few days away. How I have missed my crafting!
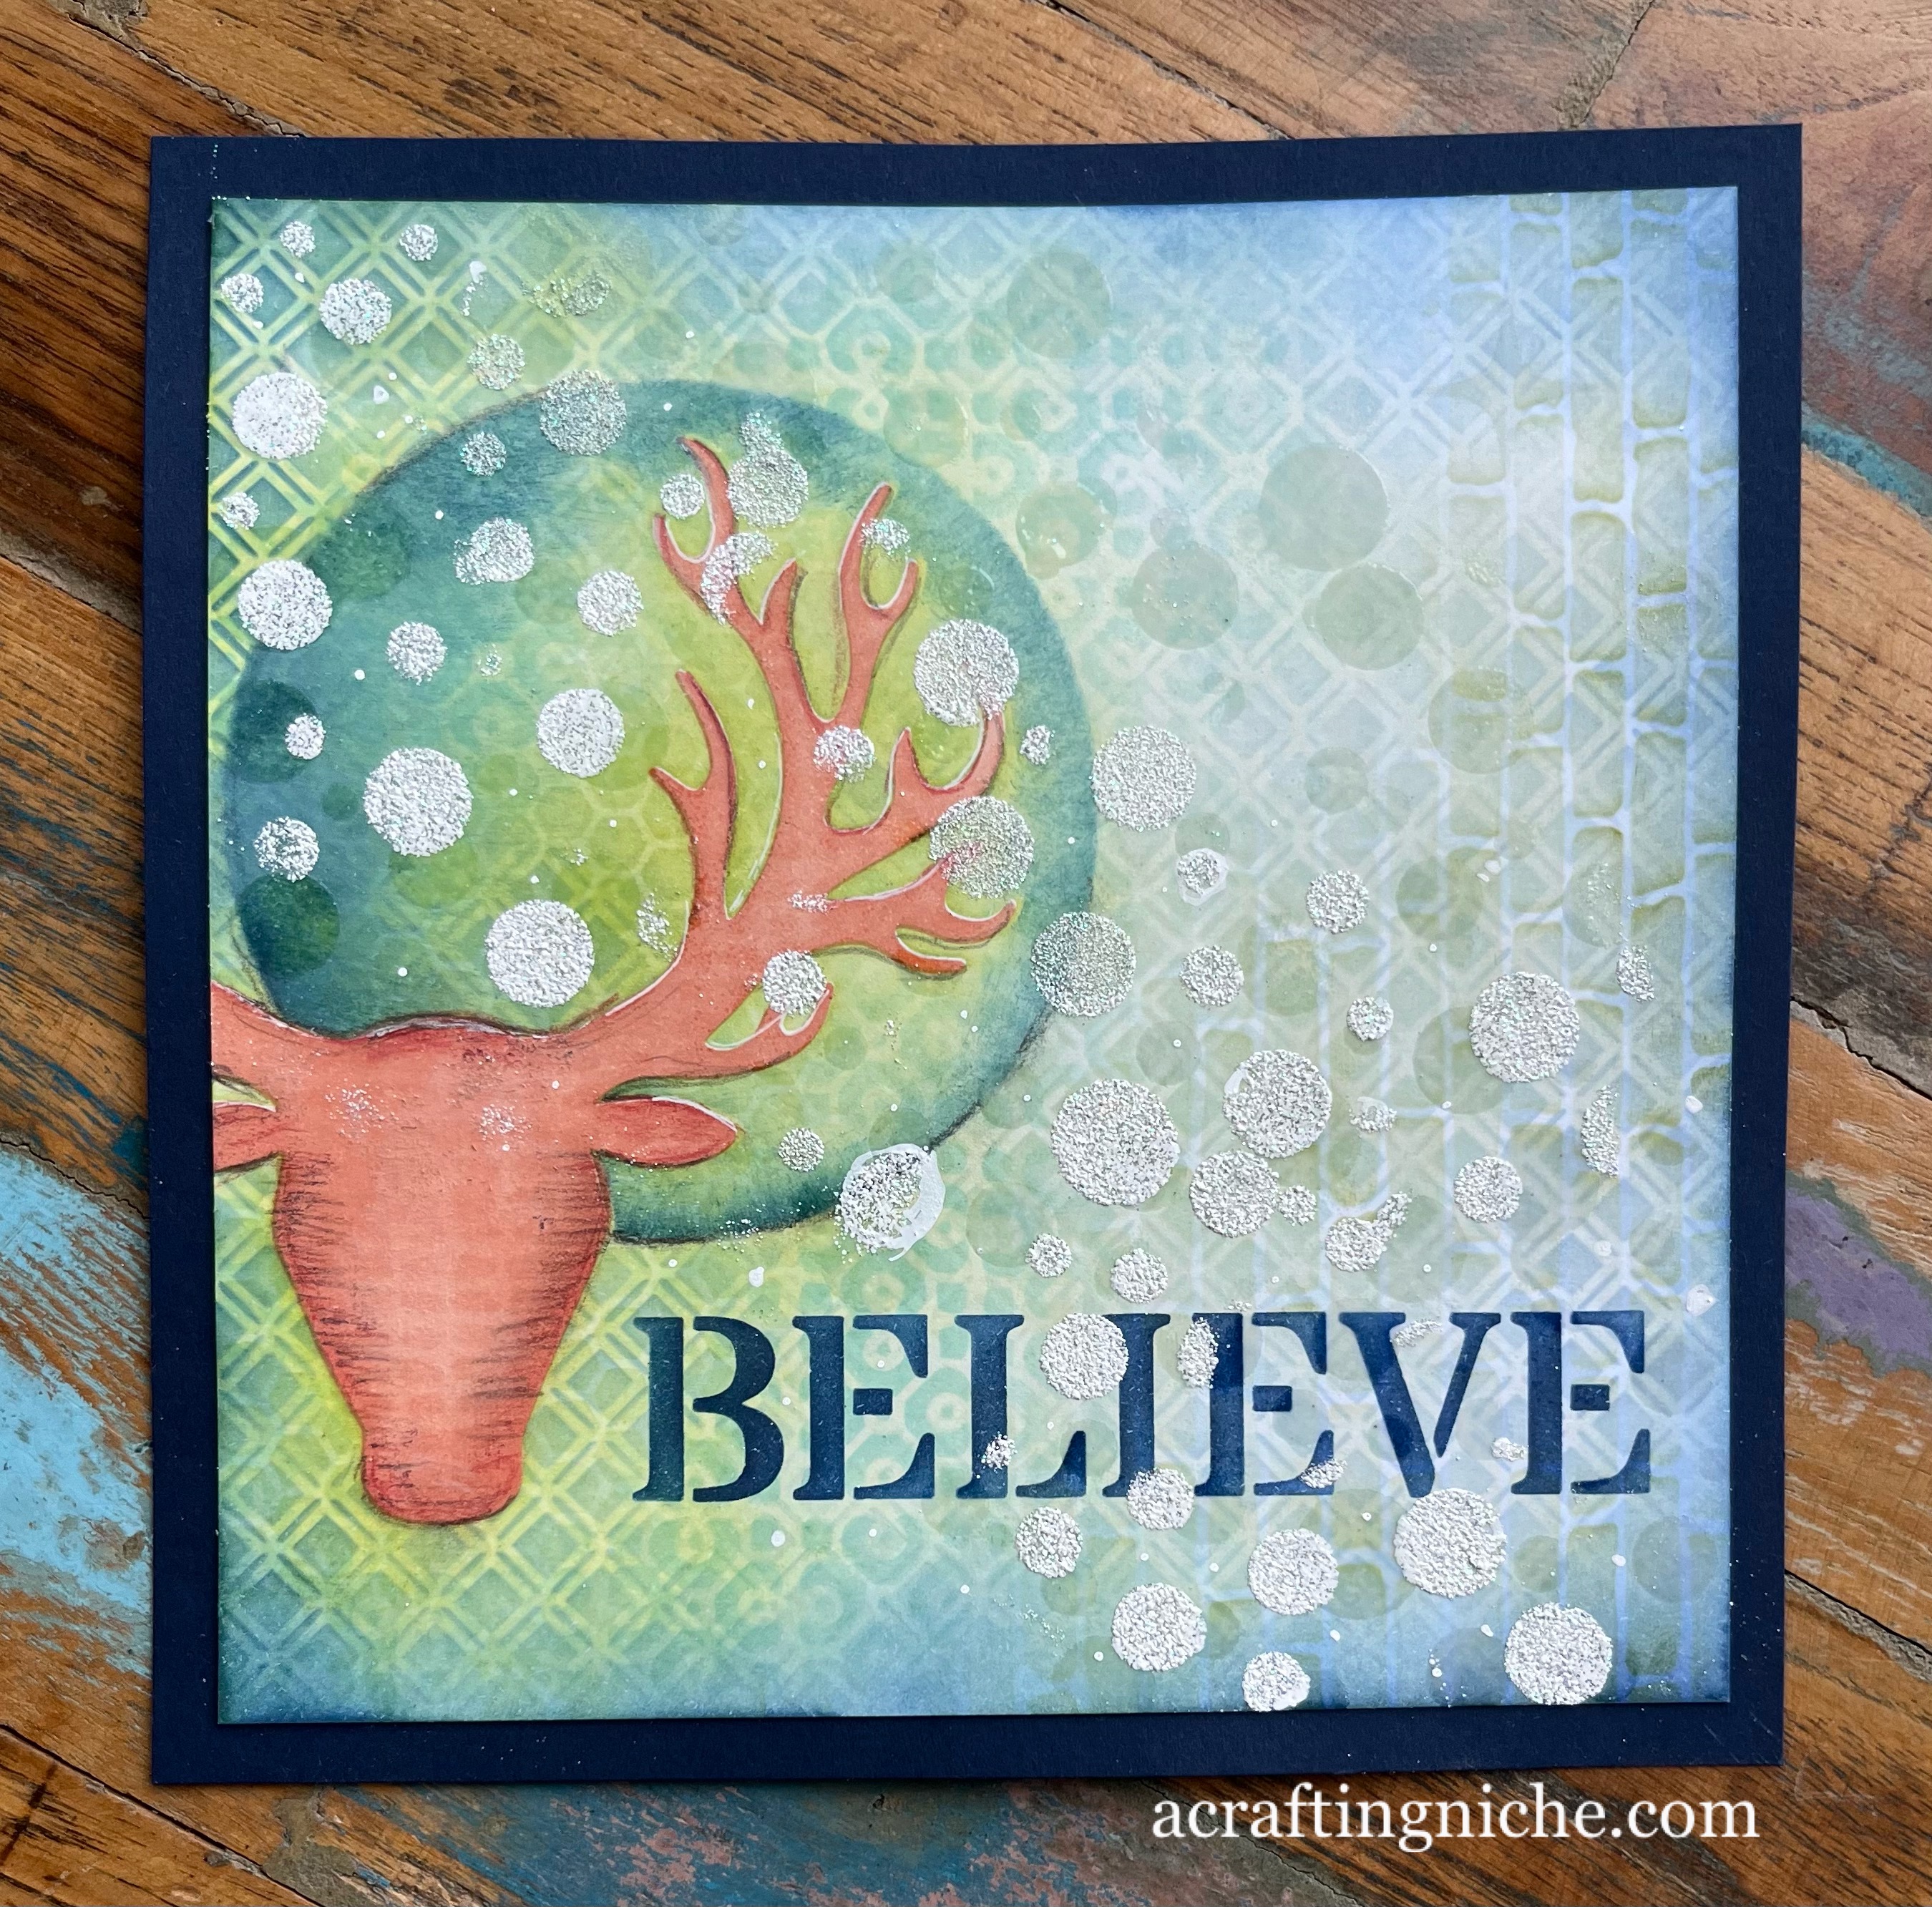
Yesterday, Monday 17th April, Eileen Godwin set a challenge of using only stencils to make a card. This is what I made. It is totally out of season, but actually quite nice to do something festive for a change.
I used a whole host of stencils by Lavinia Stamps along with Archival Inks and Wow! Embossing Powders.
I started the card by using the Lavinia "Stag" Sticker Stencil from set 4 using "Tea Rose" Archival ink go colour the stag head. I then used the same ink through the Lavinia "Cryptic" stencil.
I used "Prickly Pear" Archival Ink around the stag head, then used the same ink and some "Leaf Green" Archival Ink through the Lavinia "Honeycomb" stencil.
I then used "Sky Blue" Archival Ink through the Lavinia "Divine" stencil.
Next I applied "Fern Green" Archival ink through the Lavinia "Red Brick" stencil.
I moved on to "Cobalt" Archival Ink with the Lavinia "Moon Mask" to create the partially shaded moon in the background.
While I had the "Cobalt" ink out, I then used it through the the Lavinia "Faith" stencil to create the "Believe" word. Using "Cobalt" again to darken the edges of the card.
I used Wow! Embossing Ink and Wow! Clear Embossing Powder through the Lavinia "White Orbs" stencil from the top left to the bottom right and heat set.
Once the clear embossing was cool, I dusted the surface with an anti-static bag and used the same stencil with Wow! White Puff Twinkle Embossing Powder in the same area and heat set.
I added a few pencil details around the head of the stag using "Van Goch Pastel Pencils" to add some shadow to the head.
Here's a little video clip to share with you, in the hope you can see the embossing detail a little better.
Today, Thursday 13th April, Eileen Godwin set a challenge of creating "A background of vibrant colours'. I think I have fulfilled the brief with this card.
I have used a selection of colours of Archival Inks through the Clarity Stamps "Abstract Squares" stencil in the background.
I then used Versafine Clair "Nocturne" black ink through the Funky Fossil Designs stencil called "Ava". I used the same ink to stamp the "Happy Birthday" sentiment, which is part of the Clarity stamps set called "Christmas & Celebration Words".
When I showed the completed card to Hubby, he said "that's not at all your style", which is true it isn't my normal, but I enjoyed making it all the same. I guess that is what taking part in challenges is all about!
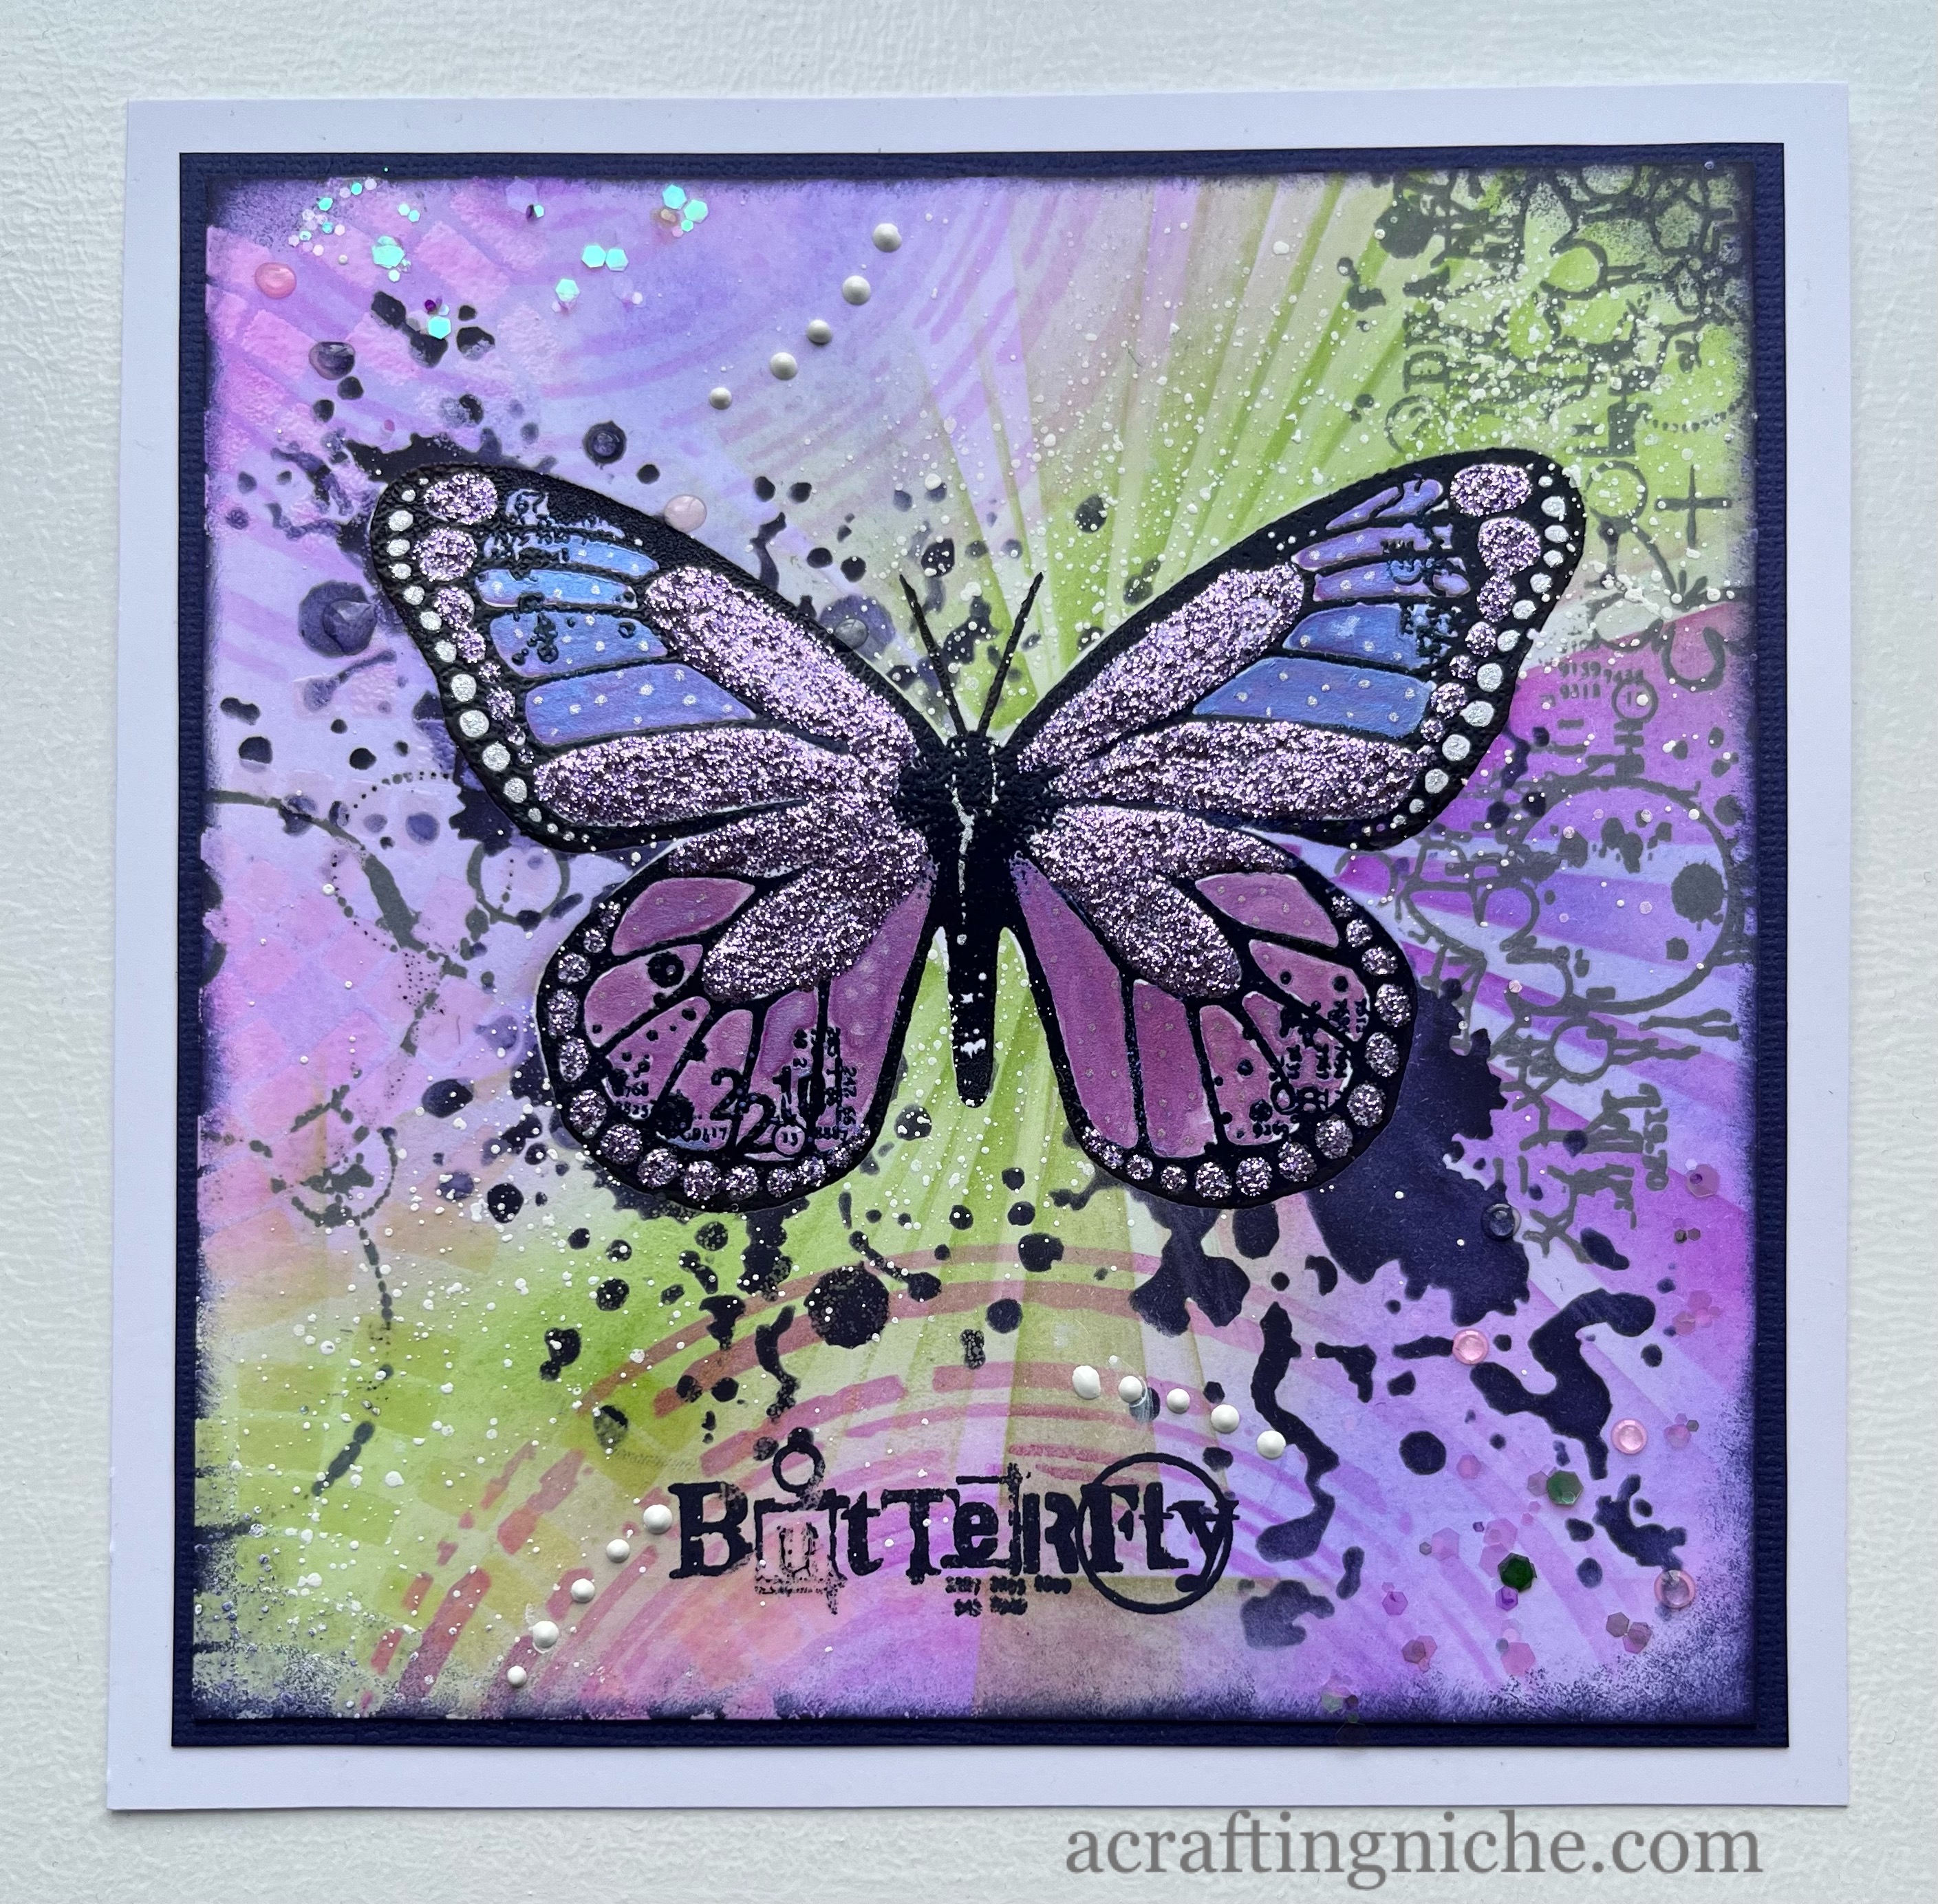
Eileen Godwin set a challenge today (12th April 2023) to use glitter. This is the card that I have made.
Starting with a plain piece of white card, I stamped the central butterfly, using the Visible Image "Butterfly Effect" stamp set, stamped in Versafine Clair "Medieval Blue" ink. I then coated it in Wow! Clear embossing powder and heat set.
I stamped the butterfly again on a piece of copy paper, then fussy cut the shape to use as a mask while I created the background. I used a small amount of repo glue to position the mask over the top of the card.
Using blending brushes, I applied two shades of Archival Inks: Vivid Chartreuse and Violet around the background.
I then used Cactus Flower and Vivid Chartreuse Archival inks through the Visible Image "Strobes" and "Supernova" stencils.
I then lay the Visible Image "Breakout" stencil in a couple of positions and applied "Wow! embossing ink" with a finger dabber through the stencil, then coated in Wow! Clear Embossing Powder and heat set.
I lay the Visible Image "Butterfly Ink" stencil over the butterfly and applied Versafine Clair "Medieval Blue" ink through the stencil to creats the dark splatters. I used the same ink to stamp the "Butterfly" sentiment which is also part of the "Butterfly Effect" stamp set.
Using Versafine Clair "Morning Mist" I stamped some rings on the left hand side of the butterfly and some random circular images on the top right, which are both part of the "Butterfly Effect" stamp set.
I used a white acrylic paint with a fan shaped paint brush to add fine white splatters, from the bottom left to the top right hand corner.
I then removed the paper mask from the butterfly, it looks so pretty with all the colours. If it didn't blend in so well with the background, I would have kept it in position!
I now turned my attention to decorating the butterfly itself. I used Creative Expressions Cosmic Shimmer Iridescent paints in a blue and purple shade. I then used "Lavender" coloured stickles for the four main sections of the wings, adding small dots of silver glitter signo pen to the dots at the ends of the wings.
In the background, I added dots of Ranger Glossy Accents and also some dots of White Enamel Accents.
Once everything was dry, I inked the edges of the card using Versafine Clair "Medieval Blue" ink, then layered it on to dark and then white card. Finally adding some very small sequins to the top left and bottom right hand corners.
We've had family staying over the Easter weekend, which has been lovely, but has meant I've not had a chance to get crafting. Today, my nest is empty and quiet, so an ideal time to play with some stamps.
I was behind on the Eileen Godwin "Two Colour" challenge, so decided to crack on with that. I used "Peat Moss" Archival Ink through two Lavinia Stamps stencils "Elegance" and "Honeycomb" .
Using Versafine Clair "Nocturne" black ink, I stamped the Lavinia "Faily Bells" and one of the sentiments from the "Blessings" sentiment stamp set.
I used the torn edge of a piece of copy paper, with the "Peat Moss" archival ink to create the landscape behind the flowers.
I've had half an hour free, so made another card for Eileen Godwin's Wednesday challenge of "Circles".
In the background, I used the Funky Fossil Designs "Bokeh Builder" stencil with four shades of Archival Inks: Pink Peony, Chrome Yellow, Prickly Pear and Forget Me Not.
Over the top of that I applied "Watering Can" Archival Ink through the Funky Fossil Designs "In The Groove" stencil.
Using Versafine Clair "Nocturne" black ink, I stamped the foliage and sentiment, using a Penny Black stamp set called "Serene".
I added a few dots of black Ranger "Enamel Accents" to elongate the foliage sprays.