52 Week Mini Art Card/Tag Challenge

Showing posts with label embossing folder. Show all posts

Sunday, 19 May 2024

52 Week Mini Art Card / Tag Challenge 2024 - Week 21


This is a weekly challenge. I provide you with a prompt/theme each Sunday morning through out the year.  The challenge is very relaxed.  You can do as much or as little as you like.  You can create cards, tags, Artist Trading Cards (ATC's) or index cards, the choice is yours. You just go with what ever is in your head at the time.  You can stamp, get inky, use patterned papers, texture, embellish it is all down to you.

There is a dedicated private Facebook Group, with a lovely bunch of people who are already sharing their makes from previous challenges.  You can find the group by clicking this link.  I'd love you to join in.

Week 21 prompt for The Crafting Niche "52 Week Mini Art Card / Tag Challenge 2024" is "TEXTURE".

***

This is the tag that I made for Week 21 with a prompt of "Texture".

I coated a plain tag with three shades of metalic sticky backed foil tape.  I used a mat copper, a shiny copper tape and a shiny silver tape.  You can buy these tapes from hardware stores, I believe plumbers and heating engineers use it.  I was fortunate that my Hubby had some from a previous job, so I nabbed the rest of it.  He won't see it again!

Anyway, once you have covered your tag, smooth the surface.  An old credit card or similar works well.  I then put the whole tag in an embossing folder.  I don't recall, who made it but it had lovely wavy lines on it.  I then ran it through the Big Shot.  I realised I had put the tag in the wrong way round, with the wavy lines being concaved, rather than sitting high/embossed, so I worked with what I had - a happy accident.

I then covered the whole tag with a black sharpie.  Once the tag was covered, I rubbed the surface of the tag with a piece of kitchen roll, to reveal the original colours of the tape, but with the wavy lines being black.  Then with scissors, I cut along one of the wavy lines, so I then had two pieces, one for future use (see below).  


Setting the two pieces to one side, I moved on to work on the dark side of the tag.  I covered a plain tag with black card, then put it through a Crafters Companion/Gemini Embossing Folder and popped it through the Big Shot.

This embossing folder has quite a deep design, so I decided to apply some Cosmic Shimmer "Platinum Gilding Wax" over the top, applied with my finger, which highlighted the design.  I then glued the left hand side of the metalic tape tag on to the tag.

Because the tag was quite thick, I went around the edges with a black Sharpie Pen.  I then mounted the tag on to a piece of black card, trimming to tag shape.

Finally, I raided my crafting embellishments.  I found a Tim Holtz / Idea-ology word sticker, with the word "Feel" which I thought was appropriate.  I popped it on to the tag, then outlined the word with a white gel pen.

I then added some small circular embellishments, following the wavy line.

Sunday, 17 March 2024

Tiffany Johnson Creative #100daysartplay Challenge - Day 29


Today is Day 29 of the Tiffany Johnson creative #100daysartplay challenge.  It's also the start of Week 4, so there is a new theme.  The theme for Week 4 is "Texture".

I thought I would kick this theme off with a clean and simple design, using a Gemini/Crafters Companion deep embossing folder that screams texture to me.

I mounted the card on to a piece of dark blue paper and then on to a white card blank.

Using Versafine Clair "Twilight" dark blue ink, I stamped the Simon Says Stamp sentiment, which is part of their set called "Tiny Words - Birthday" on to white card, trimmed and then mounted it on to matching dark blue paper.

Thursday, 5 January 2023

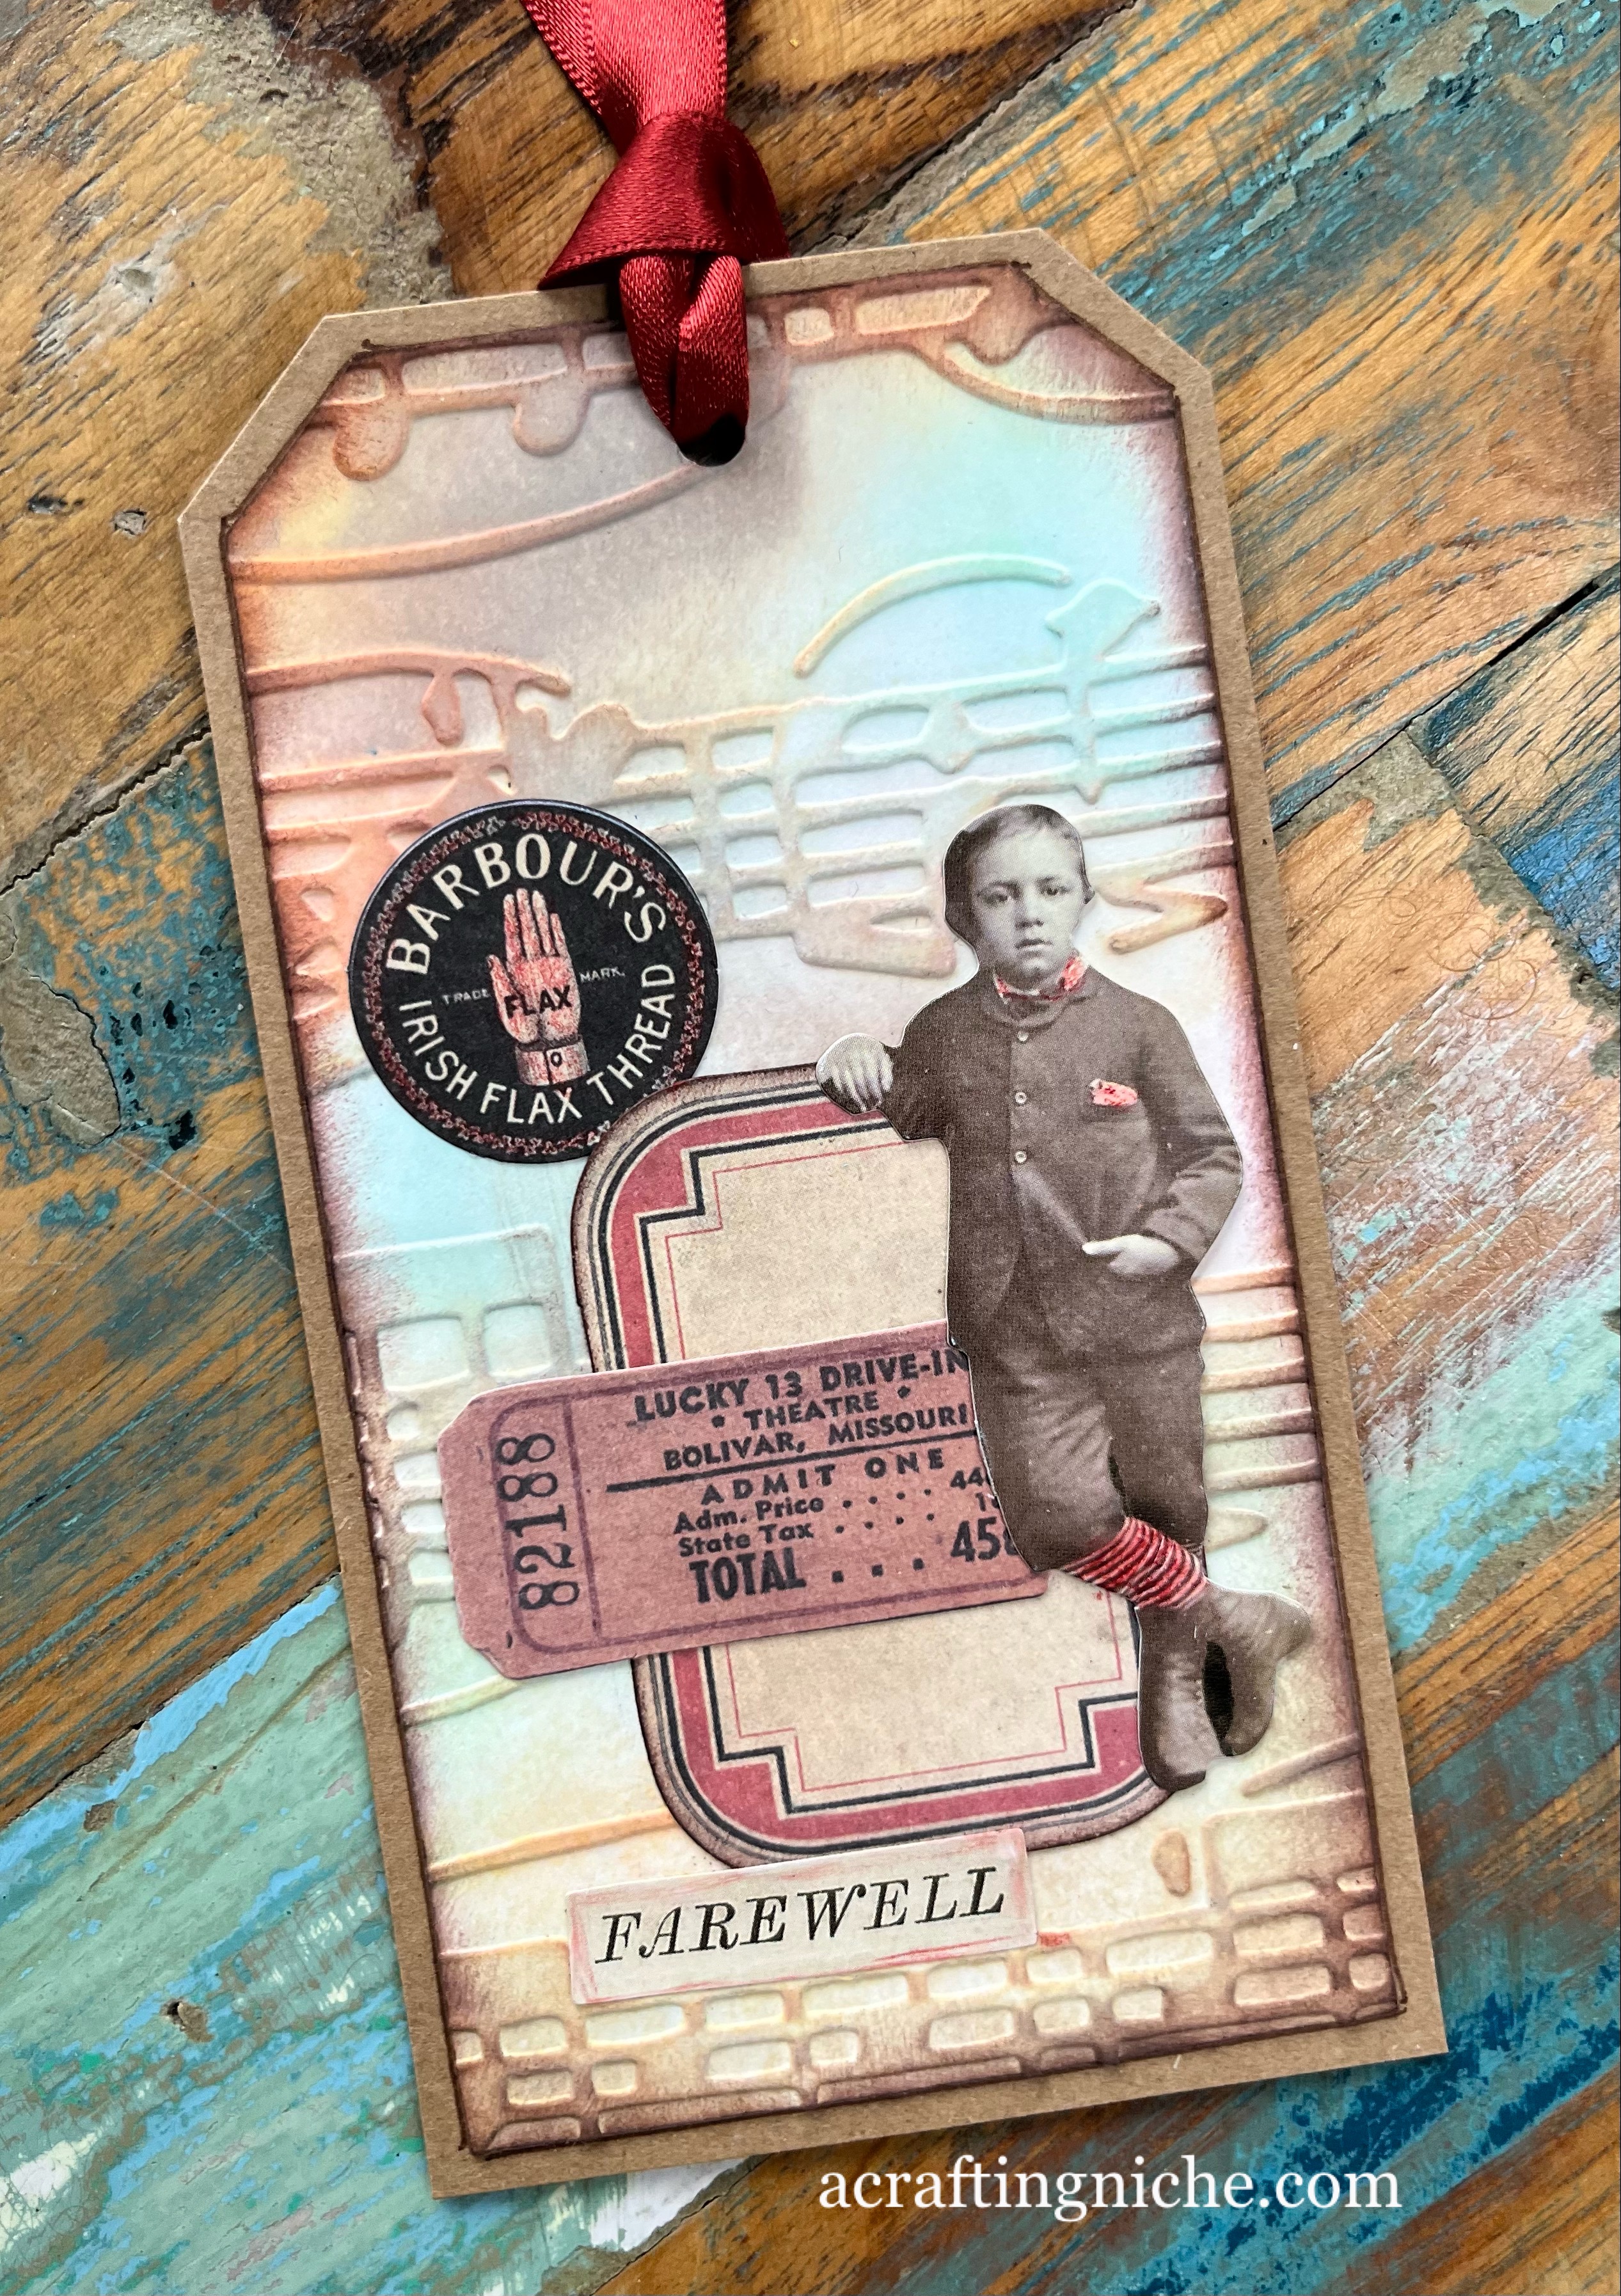
Tim Holtz Idea-ology Paper Dolls Tag


You may remember yesterday the tutorial for Karen Telfer's "24 Days of Tags 2022" was creating a background using Distress Inks and an embossing folder, (you can see the video here). 

While I had everything out to make my tags, I made a few extra backgrounds, as they will always come in handy in the future. I used one of these backgrounds for this tag.  Inking the edges in Versafine Clair "Acorn" brown ink and arranging some Tim Holtz "Idea-ology" stickers and a paper doll too, to create this vintage looking tag, mounted on to a piece of kraft cardstock.

Monday, 5 December 2022

Lavinia Stamps "Fir Cone Branch" embossed card


Well, I seem to be on a bit of roll with my card making today.  Here's another one! 

For the central image, I've used the Lavinia Stamps "Fir Cone Branch", stamped in Versafine Clair "Acorn" brown ink.  I have used the same ink to stamp the "Just For You" sentiment, which is part of the "Heartfelt Verse Stamp Set".  I used a water colour pencil to colour the fir cones and then die cut into a stitched edge square.

I had a rummage through my basket of embossing folders which I sadly don't use often enough.  I cam across one with holly leaves, which I think came free with a magazine, that I thought would be a suitable background.  I die cut a larger square, again with a stitched edge.  Popped it in the embossing folder and ran it through the Big Shot.  I then assembled the card.  I used foam pads to elevate the central fir cone area and also added some gold shimmer to the fir cones and branches using a gold gel pen.

Wednesday, 24 November 2021

Day 9 of "24 Days of Tags 2021" challenge with Karen Telfer


It's Day 9 of the "24 Days of tags 2021" challenge with Karen Telfer.  Today we use embossing folders. I've made two different tags.

For the first, I have used a Crafters Companion embossing folder called "Scandinavian Xmas", which I then covered in "Festive Berries" Distress Oxide ink.  I then used a small Cuttlebug embossing folder for the central image which I die cut into a circle and then layered on top of a disc of Funky Foam to create a 3D look to the tag.


For the second tag, I used another Crafters Companion embossing folder, with Cosmic Shimmer gilding wax over the higher elements.  I then used a Clarity stamp word sticker.


Friday, 9 April 2021

Funky Fossil Designs New Stamp Set "Heartfelt Tree" Release Day


Today is the day when the five new stamp sets from Funky Fossil Designs are available to purchase.


For this card I have used the new "Heartfelt Tree" stamp set, designed by my friend Tina Ashton.

I've stamped the sentiment and the bird house in Versafine Clair "Glamorous" pink ink, colouring it with "Picked Raspberry" and "Tea Dye" Distress Oxide Inks.

I used an embossing folder that came free with a magazine some time back for the textured background, die cutting both the stamped area and the embossed area with a stitched edge die.

Monday, 16 March 2020

#thedailymarker30day colouring challenge - Day 16 using Funky Fossil "Whale of a time" stamp set


It is Day 16 of #thedailymarker30day colouring challenge.

Today, I have used the Funky Fossil Designs "Whale of a time" stamp set.  I stamped the whale using Versafine Clair "Warm Breeze" Distress Oxide Inks, coloured with Distress Oxide Inks and a Signo Silver glitter pen.

For the background I used an embossing folder and several shades of Distress Oxide Inks.

Friday, 29 November 2019

Day 29 - The Daily Marker Thirty Day Colouring Challenge #thedailymarker30day


It's the penultimate day of "The Daily Marker Thirty Day Challenge".

For my Day 29 card, I have used a Penny Black 2006 stamped image called "Snow Trot - 3540H", stamped in Versafine Ink.  I have coloured the image using water colour pencils and popped it onto an embossed bubble background, using a Crafter's Companion "Scattered Dots" embossing folder.


Sunday, 17 November 2019

Day 17 - The Daily Marker Thirty Day Colouring Challenge #thedailymarker30day


This is my Day 17 make for "The Daily Marker Thirty Day Colouring Challenge".

I've used Arteza Coloured Pencils to colour in a Penny Black stamped image (Squueze 'till I Squeak - 1664J).

I die cut the image into a circle and mounted it onto an embossed spotty background (Scattered Dots Embossing Folder by Crafter's Companion).

Saturday, 9 November 2019

Penny Black 'You're a Treasure" Wedding Card


I've used a Penny Black wood mounted stamp called "You're a Treasure".  I stamped the image in Versafine "Stormy Gray" ink and coloured the image with a mix of Distress Oxide Inks and water colour pencils.

Once the image was dry, I die cut the heart shape around the hedgehogs and stamped the "Wedding Day" sentiment, again in "Stormy Gray" Versafine Ink.

For the background, I used a Crafters Companion "Scaninavian Christmas" embossing folder.  I brayered  "Tattered Lace" Distress Oxide Ink over the embossed detail.

Once dry, I cut the embossed detail into a square and mounted it onto grey coloured cardstock.  Using foam pads, i mounted the hedgehog/heart image on to the embossed background.

Friday, 18 October 2019

Funky Fossil Designs New Stamp Preview October 2019 (Sew Lovely)


Funky Fossil Designs have some exciting new stamps that will be available to purchase from 9am on Saturday 19th October 2019. 

Make sure you check back here on the 19th October, when I will be sharing information about a fabulous give away. 

I have been fortunate to have a play with the new stamps before the release date.  This is the "Sew Lovely" set.


If you have a minute to spare, please do pop over to see the other makes of my Design Team colleagues:

For this card, I have used the "Sew Lovely" set of clear stamps.  I wanted to keep it relatively CAS (clean & simple) so deliberately only added colour to the stamped area, so that the eye is drawn there.

I used an embossing folder which i think came free with a magazine some time ago for the background.

Using Versafine Clair "Morning Mist" ink, I stamped the image and the sentiment, both are part of the "Sew Lovely" stamp set. I coloured the pins and pin cushion area using Arteza Brush Pens.

Once adhered on to the card blank, I embellished by adding three buttons to the bottom corner of the card.

Friday, 28 June 2019

Design Team make for "My Time To Craft Challenge Blog" #400 "Seaside"


It's time for another challenge on the "My Time To Craft Challenge Blog" which has a theme of "Seaside" for challenge #400.

If you have a moment, please do pop across to the blog to see the other fab makes by my fellow Design Team members.

I decided to do something a bit different for this make by using lots of little bits and bobs I had floating around my work desk.

I had a piece of stamped card with a woodgrain effect, which I had given a grey wash to make it look like weathered wood, so decided to use that as a base.

I knew the colours that I wanted for the sea, so used Distress Oxide Inks in the shades of:  Twisted Citron, Tumbled Glass, Stormy Sky, Broken China and Salty Ocean and roughly applied it to card, filling the white areas using a paint brush.  

Once it was dry, I ran it through a Crafters Companion embossing folder which gave a nice wave look texture.  I ran a clear embossing ink pad across the surface then covered with a white/silver embossing glitter so that the raised areas sparkle like the sun catching the raised waves, then heat set.

In my embellishment stash, I found a balsa wood sentiment saying "Sun, Shells & Sand" so decided to colour the sea weed and star fish using my Arteza brush pens and then added some Stickles glitter glue to give it a bit of sparkle.

I tore a piece of cardboard box to add a colour and texture like wet sand. 

Finally, I assembled all the components and added little pearl like beads to the sand and small shells,  I also added a handful of clear sequins to the card to give added sparkle.

Friday, 19 April 2019

Design Team Make for "My Time To Craft Challenge Blog" #395 Spring Flowers


It is time for another challenge on the "My Time To Craft Challenge Blog".  This time the theme is "Spring Flowers".  If you have a minute to spare, please do pop over and take a look at the creations by my fellow Design Team members and maybe take part in the challenge yourself.

I decided to go for a clean and simple (CAS) look.  For this card I used an embossing folder that came free with a magazine a couple of years ago.  

The bucket of flowers is also a free stamp from the "Crafts Beautiful Magazine", March 2018 issue.  I used Tim Holtz Distress Marker pens to stamp the image in the following shades:  Wilted Violet, Hickory Smoke and Twisted Citron.

I decided against using a sentiment for this card, as I thought it would be handy plain for several different occasions.


Sunday, 6 January 2019

Engagement Congratulations Card


I've been going through my magazines today.  Pulling articles out for keeping and putting the rest in the recycling.  While doing that, I came across a number of freebies, so with some of them, I made this card.

The trellis background, the birds and the sentiment were all free with issue 186 of Simply Cards and Papercraft.  The trellis was a stencil which I put Distress Inks through.  

I stamped the birds onto the trellis and also onto a piece of plain card.  On the trellis piece of card, I coloured the branch that the birds are sitting on in a brown Promarker.

Returning to the stamped image of the birds on the plain piece of card, I coloured the birds using a moist paint brush and water colour pencils.  I then cut the bodies and heads of the birds out (I didn't cut the branch or the bird feet).  I then went around the edges of the cut out birds with a black felt pen.  Using foam pads to elevate the image, I stuck the birds on top of the earlier stamped bird image on the trellis to provide a puffed up 3D body effect.

I then punched a little heart and added it above the birds and mounted the image onto the same pinky/red background, trimming to size.

I found an embossing folder which came free with and earlier issue of Simply Cards and Papercraft (issue 170) and ran it through the Big Shot and trimmed to size.  I mounted the bird image onto the embossed background. Digging around my pre cut die cut box, I found the two green foliage pieces that I thought would work and added these to each side of the card.


Sunday, 30 December 2018

Week 1 - 52 Week Art Card / Tag Challenge 2019

Hello and welcome to a brand new year of the 52 Week Art Card / Tag Challenge for 2019.

For those of you new to this challenge, you will find all the info you need here.  

There is a Facebook Group for this challenge, where you are more than welcome to join, chat with others taking part and upload images of your creations to the weekly albums. This is a very relaxed challenge for all abilities.

So now down to business.


The prompt for Week 1 is "Celebrations"

We celebrate many things, birthdays, an anniversary, Christmas, new babiesm passing a test and so on.  I've based my tag on new year, but you can of course chose any form of celebration.

I started my tag by making the background using various shades of Distress Oxide inks.  I used a Stampin' Up stamp for the "Celebrate" sentiment.

Using a round punch and an old dictionary I have had since school, I punched circles of text and stuck them on top of the Oxide background.  I then ran the whole thing through the Big Shot in an embossing folder with concentric circles. I then inked the edges of the tag with a grey and black ink.

I die cut the numbers and coloured them with Versafine Clair ink in a shade of "Blue Belle".  Using a silver glitter Signo pen, I added dots onto the blue numbers. Then stuck the numbers to the tag.

Finally I mounted the tag onto a dark blue card and added sequins across the surface of the tag.

Sunday, 9 December 2018

Week 50 of 52 Week Mini Art Card / Tag Challenge 2018


The prompt for Week 50 is "Stripes"

For my tag, I decided to give it a Scandi feel, by using mainly red and white.

For the stripes, I used Stamper's Anonymous "Ornate Trims" to create the stripes, stamped in Versafine Clair "Tulip Red".

The trees are part of the Stampin' Up "Festival of Trees" set, stamped in Versafine Clair "Rain Forest".  I used a snow fall embossing folder that came free with a magazine to create the snow at the top of the tag.

The I die cut the deer, Using a die and stamp set that came free with a magazine and then backed the tag in red, stamped the deer face and then added a sentiment from the "Festival of Trees" set used in the other tag.  

Finally to both tags I added some touches of silver Sakura Gel glitter pen.

~~~

This challenge will continue through 2019.  If you are interested in joining in with the challenge, click here for all the info you may need.

There is also a Facebook Group for this challenge where you can add images of the tags to the weekly albums and chat to other members.  The group is really relaxed and you are more than welcome to join.  Sam x

Wednesday, 21 November 2018

Yey, I'm a winner! Hope and Chances Blog - Wednesday Spellbinders Giveaway


Today has been a day for Happy Post.  I received a Spellbinders embossing folder, courtesy of Hope and Chances blog giveaway run by Spellbinders Ambassador, Christine Emberson.

Now I just need to play.

Monday, 12 February 2018

Embossed Valentine's Card

Well Valentine's Day has really crept up on me this year, so I thought I had better make a card.  Hubby would never forgive me if I purchased one, as I have so much craft stuff about!


I prefer to make a smaller size card and quite often go for a clean and simple look.  For this card, I used a "Tri-boss" embossing folder to get the textured background.

I die cut two hearts.  Stuck one to the card and then added sticky gems to the other.  I mounted them on top of each other using a foam pad to provide a 3D look.

Finally, using a Papertrey Ink stamp from their "Love Lives Here" set, I stamped the sentiment using a "Black Cherry" StazOn ink.

The embossed detail doesn't show too much, so I have made a little video clip which is on the Facebook page:  https://www.facebook.com/ACraftingNiche/videos/398711857244827/   

Tuesday, 6 February 2018

Wooden Hearts Valentine Card

I've been putting off making Valentine cards, but today I submitted and made one.


I've used a dry embossed background using a Sizzix embossing folder.  The hearts are Papermania wooden hearts which I have coloured using a Promarker pen in "Poppy Red" and stuck in a circle.  I then die cut the word "love" using a Stampin' Up die from their "Sunshine Wishes" set.  Finally, I added a tiny pearl to cover the drilled hole in the heart.


Friday, 10 November 2017

Spellbinders "Four Seasons Silhouettes" Cards

Another die from my "happy post" the other day is this set of four season dies + a frame which I purchased from Hope & Chances website - they specialise in Spellbinders die sets and are often the first to have them in the UK.This set comprises of five dies in total.  One for each of the four seasons and then a frame.


The first card that I made was the one for Spring.  I wanted to create quite a fresh feel, so opted for an embossed white background (using a Sizzix embossing folder).  I then mounted the white die cut seasonal square on a mint coloured card,  The sentiment is from a Penny Black "Garden Friends" set.


For Summer, again I opted for a white embossed background (using a Cuttlebug embossing folder).  I used pastels with a paintbrush to apply the colour to the square die cut and then mounted it onto a pink card.  The sentiment on this card is from a Stampin' Up set called "Good Greetings".


For the Autumn season card, I went for warm shades of orange and brown.  The background of the card is a piece of craft card.  I randomly stamped different leaves onto the card (using Stampin' Up Vintage Leaves stamps).  I cut the square die in brown card this time and mounted it onto an orange shade.  The sentiment is something I have had for a while and may have come free with a magazine. Finally I added some little gem stones for interest to the background.


The Winter season is a personal favourite and I've stripped the card right back to having a plain white background, with the die cut square being mounted onto a grey coloured card.  The stamped sentiment is from a Papertrey Ink set called "Winter Hills".  For me the simplicity of this card works.  It's a quick make too, so I may make a few of these for Christmas.