52 Week Mini Art Card/Tag Challenge

Saturday, 4 March 2023

Lavinia Stamps "Winged Heart" Steampunk card


Today, I received delivery of my new Lavinia Stamps goodies.  A few days ago, they released eleven new stencils and twenty-three new stamp sets.  The stamps are on a steampunk theme.  The stencil designs are fabulous and I'm sure they will be appearing in lots of my future makes.

Here's a short video clip of the card, as the photograph doesn't really show the clear embossing of the cogs to the side of the wings.


On a gel plate, I brayered Lime Punch and Bermuda Elements Inks.  Using a fan paint brush, I splattered some water on to the plate.  I then added some "Confetti" elements inks to my glass mat, added a little water then used the fan paint brush to splatter coloured droplets of water on to the plate.  I popped a piece of white card on to the gel plate, smoothing the surface of the card so that it had full contact with the gel plate, then lifted the card to reveal the image.


I used the heat gun to dry the surface of the card, then cut the piece of card down to size as it was an odd shape.

I stamped the text in the middle of the card using the Lavinia Stamps "Steampunk Script" stamp with Versafine Clair "Charming Pink' ink.

I used the new Lavinia Stamps "Honeycomb Stencil" with "Pink Peony" Archival Ink in a few areas around the text. I then used another new stencil called "Waffle" with "Vibrant Fuchsia" and "Plum" Archival Ink in other areas.


Next I stamped the central "Small Heart" over the text using Versafine Clair "Morning Mist" grey ink, to get my placement for the wings.  I then coated an off-cut of card in "Peat Moss" Archival ink, ran an antistatic bag across the surface, then stamped the heart using Wow! Clear Embossing Ink Pad, I then coated the image with "Wow! Rich Gold Super Fine" embossing powder and heat set.  Once cooled, I fussy cut the heart, edging the heart with Versafine Clair "Charming Pink" ink and set to one side.

Returning to the card itself, I used Versafine Clair "Shady Lane" green ink to stamp the "Angel Wings Large", I quickly coated the stamped wings with Wow! Clear Embossing Powder and heat set.

I dusted the surface of the card with an anti-static bag again then usine Wow! Clear Embossing Ink and Wow! Clear Embossing Powder I stamped and heat set the cogs, from the "Cog Set 2" stamp set.

Using Versafine Clair "Shady Lane" green ink, I stamped the numer 4, which is part of the Lavinia "Numbers" stamp set.

I edged the card with Versafine Clair "Charming Pink" ink then a very thin edge of Versafine Clair "Glarmorous" pink ink.  I then adhered on to pink card and then on to a white card blank.

I added some touches of metallic gold to the wings using a gel pen. then added a few dots of glue to stick the chain in to position.  Returning to the heat embossed heart, I added some foam pads to the background and adhered over the grey stamped image of the heart.

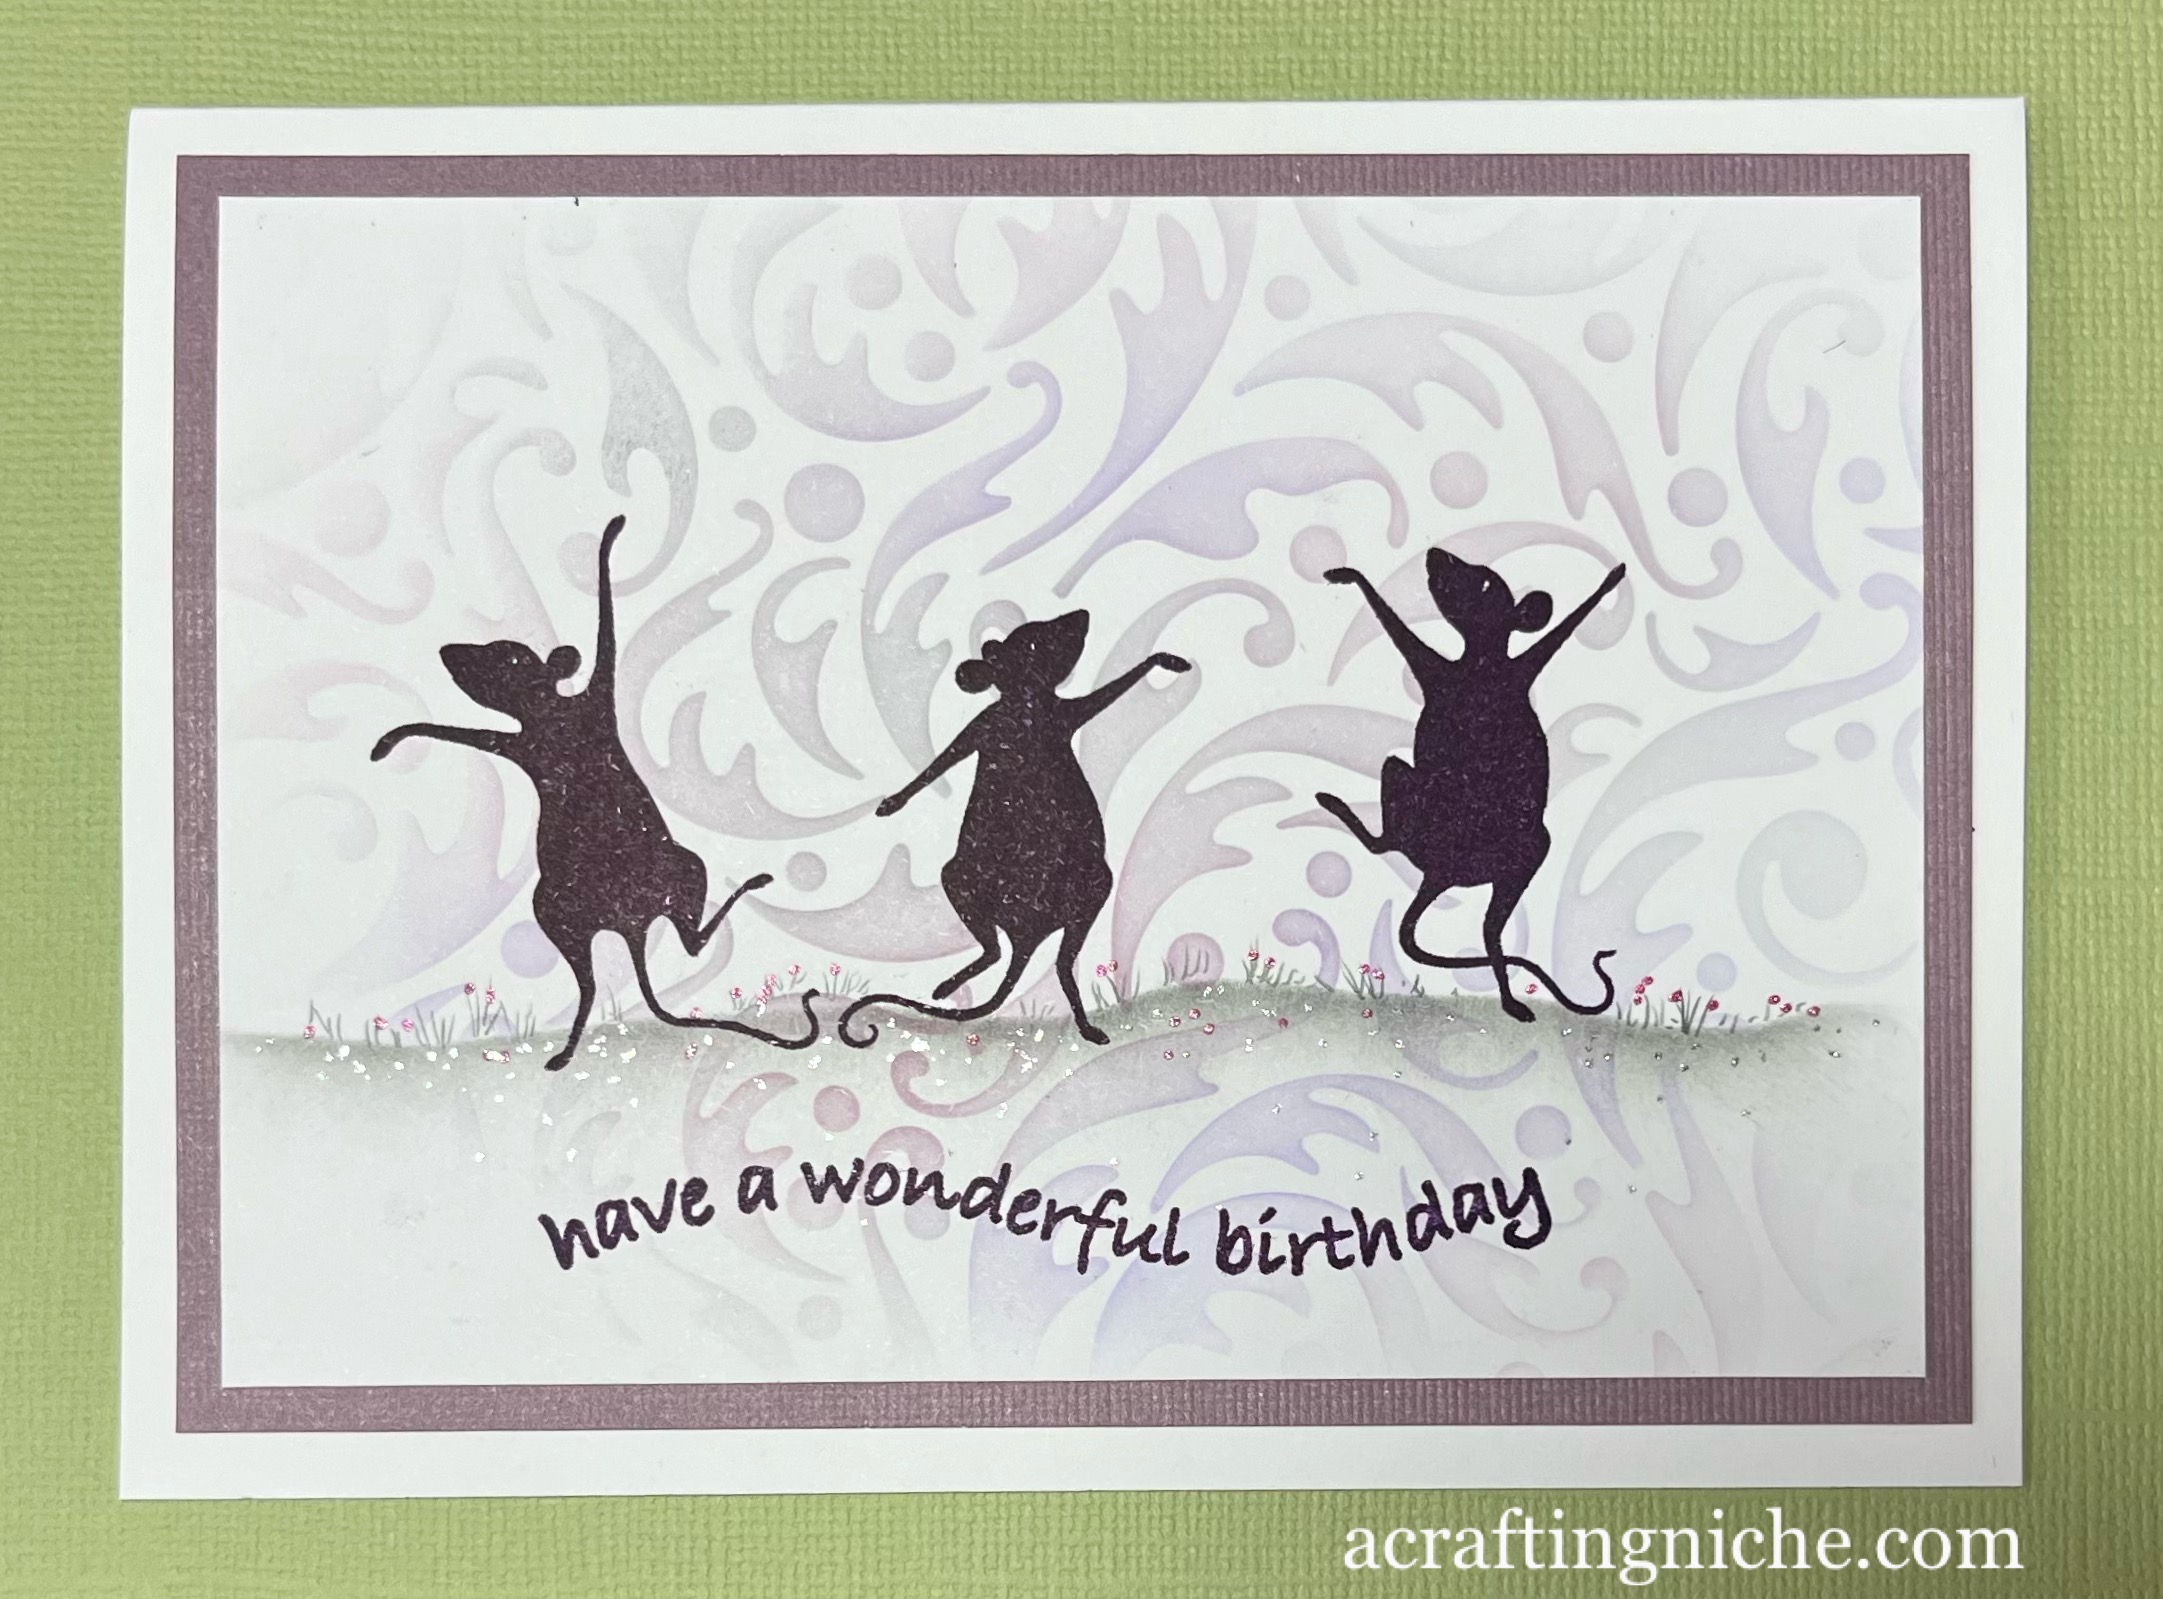
Lavinia Stamps Dancing Mice Birthday Card


This morning I made a card for a young lady that used to live across the road from us, but moved house recently.  She would be out in the garden in the summer dancing and singing like nobody was listening, she also attends dance school, so I thought these dancing mice would appeal to her.

In the background of this card, I have used the Lavinia Stamps "Dynamic Stencil" with three shades of Archival Inks:  Pink Peony, Violet and Watering Can.

I used the Lavinia Stamps "Hill Mask" with Versafine Clair "Morning Mist" grey ink to create the ground that the mice dance upon.

I used two of the Lavinia Stamps mice stamp sets, the "Minnie and Moo" set and the "Tilly and Tango" stamp set, both stamped in Versafine Clair "Monarch" Purple ink.

The sentiment by Hobby Art Ltd, part of their "General Greetings CS016D" is also stamped in Monarch.

Finally, I used a 2B pencil to draw in grass and added some flowers using a pink and a silver gel pen.

Friday, 3 March 2023

Clarity Stamp "Leafy Swirl" Stencilled Card


Another quieter card, this time using Clarity Stamp products.

This card was a really quick make.  I used two shades of Clarity "Artistry Inks":  Wedgewood Green and "Fancy Fuchsia" through the Clarity "Leafy Swirls" stencil.

I used Wow! Clear Embossing Ink to stamp the anniversary sentiment, which is part of the Clarity "Entwined Sentiments" stamp set, coated in Wow! Silver Embossing Powder and heat set.  I then mounted the piece on white and then on a green card blank.

Funky Fossil Designs "Queen Bee" mixed media card


I've gone from a clean and simple card to a very busy mixed media style card in one day! 

I found a spray ink background in yellows and greens in my stash, so decided to use it as it's been in the file for ages.  I cut it to size then used a selection of products from Funky Fossil Designs to create this random piece of work.

I started with the Funky Fossil "Tie Dye Stencil" with two shades of Archival Inks:  Garden Patina and Blue Bird, fading the colours out to the edges.

Next, I used the Funky Fossil "Slimline Brick Wall Upright Stencil" with "Shadow Grey" Archival Ink around the edges of the card.

I then used the Funky Fossil "Vintage Script" stamp with "Warm Breeze" Versafine Clair ink over the brick wall stencilled area.

I then used another stencil called "Radius" with "Violet" Archival Ink, in several areas going off the edge.

I rubbed an anti-static bag over the surface of the card, then using Wow! Clear embossing ink I stamped the foliage wreath, which is part of the Funky Fossil "Queen Bee" stamp set.  I coated the ink with Wow! Opaque, Bright White Embossing Powder and then heat set.

I then stamped the crown (also part of the Queen Bee stamp set) in Versafine Clair "Monarch" purple ink, coated it with Wow! Clear embossing powder and heat set.I repeated the process with the sentiment in the middle of the card.

I inked the edges of the card using Versafine Clair "Monarch" purple ink.  Added a few white dots of Posca Pen around the wreath then mounted the card onto a white piece of card.  Finally, adding dots of Ranger Glossy Accents and sticky pearl gems to the crown.

Lavinia Stamps "Midnight Meandering" Easter Card


Today I've played with one of my older Lavinia Stamps to make this Easter card. 

I didn't have an oval stencil, so made one myself by die cutting an oval in a piece of card to use as a stencil.

I used a selection of colours of Archival Inks (Pink Peony, Vivid Chartreuse, Chrome Yellow, Shadow Grey and Cornflower Blue) through the stencil to create the impression of Easter Eggs.

I stamped the bunnies, a Lavinia Stamp called "Midnight Meandering" with Versafine Clair "Acorn" Brown ink.

I stamped the foliage in the background using the Lavinia Stamps "Foliage Set" with two shades of Versafine Clair ink:  Shady Lane and Verdant.

I used a Derwent Inktense pencil to add extra green below the bunnies and used a gel and Posca pen to add extra deail like the flowers.

Wednesday, 1 March 2023

Clarity Stamps "Wild Flower Spray Stencil" card


A softer more feminine looking card from me this time using a stencil. 

I found a background in my stash that I'd made some months ago using a selection of colours of Distress Oxide inks.  I'd splattered water from a fan paint brush to ge the bleached dots look and the background was just waiting to be used.

I decided to pair the background with a Clarity Stamps stencil called "Wild Flower Spray". I used low tack tape to secure the stencil over the background then used three shades of Versafine Clair inks (Charming Pink, Shady Lane and Warm Breeze) through the stencil.  I then moved the stencil and filled in a few empty spaces with more detail.

After lifting the stencil, I added extra detail to the flowers and foliage by using Van Goch Pastel Pencils, gel pens and a 2B pencil.

I stamped the sentiment by Simon Says Stamp (part of their "Tiny Words - Birthday" stamp set) using Versafine Clair "Charming Pink" ink.  I used the same ink to edge the card using a finger dabber.

Darkroom Door "African Trees" Birthday Card


Once again, I am back after a few days away and decided I needed to get a wiggle on and get a card made for next Monday. As you can see from the photo below, the first attempt didn't go to plan as I forgot to use acetate to stamp the reflections, so had to start again! 


It just goes to show that it doesn't matter how experienced you are, mistakes are still made.  I did try to rescue the top half of the card, by cutting it in half.  It didn't look right so it got binned.

So to make this card, I used the Sweet Poppy "Aperture Circle Stencil" over a piece of square white card, held into place with a piece of low tack tape.

Within the circle I used the following Element Inks in the order typed (so lighter first, finishing in the darker shade):  Sundance, Russet Orange, Confetti, Emperor Red and Mulberry.

Keeping the stencil in position, I lay a piece of low tack tape slightly about the central line.

Using the tree and giraffe from the Backroom Door "African Trees" stamp set, I stamped the tree image in Versafine Clair "Morning Mist" grey ink on to a piece of acetate.  I then pressed the inked image on the acetate below the line of tape.  I repeated the process for the other tree and for the giraffe.

Removing the tape along the middle of the card, I then stamped the trees and the giraffe slightly higher than where the central line of tape had been, using Versafine Clair "Nocturne" ink.

Using a torn piece of copy paper and a finger dabber with Versafine Clair "Nocturne" black ink, I created the landscape, making the area at the bottom lighter (where the land would be reflected).

I added a touch of extra pink and yellow to the sky using Van Goch Pastel Pencils.

Using Versafine Clair "Morning Mist" grey ink and a sentiment from the Lawn Fawn "Simply Sentiments" stamp set, I stamped the Happy Birthday, then mounted the card on to red card and then a white card blank.