52 Week Mini Art Card/Tag Challenge

Sunday, 1 October 2023

Country View Crafts "October - Autumn Magic" challenge entry card


Country View Crafts are now holding their challenges on a dedicated Facebook group rather than their blog.  October is the first challenge on the group and has a theme of "Autumn Magic".  This is my challenge entry.

I started by using a gel plate background. using a 4" round gel plate with Lavinia "Sundance" and "Olive" Element inks. I splattered water droplets across the surface of the gel print which bleached the area where the droplets were and dabbed dry with a piece of kitchen roll and then used my heat gun to completely dry the surface.

I ran an anti-static bag over the surface of the card before stamping the leaf over the gel print.  The leaf is part of a Tim Holtz / Stampers Anonymous cling stamp set called "Pressed Foliage - CMS376".  I stamped in Versafine Clair "Acorn" brown ink, then coated the stamping with Wow! Embossing "Metallic Rich Gold" embossing powder and heat set with the heat gun.

I used assorted gel pens and two Derwent Inktense pencils to add colour to the leaf area.  I also added gold dots to the gel plate area too.

In the background, I used two Tim Holtz/ Stampers Anonymous stencils.  I used Versafine Clair "Shady Lane" green ink through the "Stripes Layering Stencil - THS004" and "Rusty Hinge" Distress Ink through the "Dot Layering stencil - THS006".

I inked the edge of the card using Versafine Clair "Shady Lane" green ink and then added some gold gel pen too.

I mounted the card on to a piece of brown card, then on to a white card blank.  Finally, I added a Tim Holtz Idea-ology "Small Talk" sentiment sticker.


52 Week Mini Art Card/Tag Challenge - Taster Tag for October 2023


Well here we are on the 1st October.  I have no idea where these months are disappearing to.  As it's the first of the month, it means it is time for another prompt for the 52 Week Mini Art Card/Tag Challenge.

The Prompt for October is:  Vintage/shabby

Just a reminder, if you would like to take part in the challenge, check out the Facebook Group, where lots of lovely people are already sharing their tags and cards.  Here's the link to the group.

***

Here's how I made my tag:

I started by using a Stamping Up Scalloped Edge punch to create the decorative bottom of the tag.  I then coated the decorative edge with Versafine Clair "Glamorous" ink.

I found a scrap of patterned paper that I thought had a vintage vibe.  I used double sided sticky tape to stick it to the tag and cut it to size.  I then inked the edges of the tag with Versafine Clair "Glamorous" ink. Once dry, I went over the edges with a metallic gold pen, colouring the ring re-inforcer with the same colour too.

I used Versafine Clair "Warm Breeze" ink to stamp the Lavinia Stamps "Sacred Spells' text across the surface of the tag.

I then decided to distress the patterned paper a little more, by using Versafine Clair "Glamorous" ink through the Clarity Stamps "Stripes Stencil".  This look reminded me of 80's style wallpaper!

I used metallic gold paint and a fan paint brush to splatter the paint from the bottom left corner to the top right hand corner.

Once the paint was dry, using double sided sticky tape, I added a small piece of cream coloured braid along the join of the patterned paper and the tag. I then added gold dots to the middle of the scallops at the bottom.

At this stage, I mounted the tag on to a background of cream coloured card, as I knew it would be more tricky once the flowers were in place.

I die cut some leaves using two die sets (Sizzix "661206 Golden Greens" and Stamping Up "Botanical Blooms") using two shades of green cardstock.  I used a wet glue to stick them to the tag, as it allowed me a little movement into the correct position.

In my stash, I found some paper roses.  They were a bit too pink, so I toned them down by painting "Crimson" Derwent Inktense on to areas of the flowers.  I curled the metal stems around a pencil then stuck the flowers to the tag, using Ranger "Glossy Accents" to keep them in place.

Finally, I found a couple of Tim Holtz Idea-ology Clipping Stickers with words I felt that suited the tag:  "to keep" and "in my heart" and stuck them on to the tag.  I added a few small gold metal discs to the surface too.


Saturday, 30 September 2023

Sweet Poppy Stencils ""Winter Cottage" Christmas Card


A winter scene using stamps from Sweet Poppy Stencils.

I stamped the Sweet Poppy "Small Winter Cottage" in Versafine Clair "Morning Mist" grey ink. I used a heat gun to dry the surface, before I made a wash of Distress Oxide Inks for the sky and snowscape.  Initially, I used "Spun Sugar" soft pink, then used "Saltwater Taffy" for the sky and "Lost Shadow" for the snow in front of the cottage.  Again I used my heat gun to dry the surface.

Using Versafine Clair "Morning Mist" I stamped the sentiment, which is part of the Sweet Poppy "A6 Hugs & Kisses" stamp set.

I then used a black "Van Goch Pastel Pencil" to add extra depth of colour to the snowscape - before hand it just looked a bit wishy-washy.

I added small touches of colour to the fir trees using "Bundled Sage" Distress Oxide ink, applied with a paint brush.

I did the same for the stonework on the cottage, this time using "Tea Dye" Distress Oxide Ink.  

Finally, using a fan shaped paint brush, I added some splatters of white acrylic paint to replicate snow flakes.

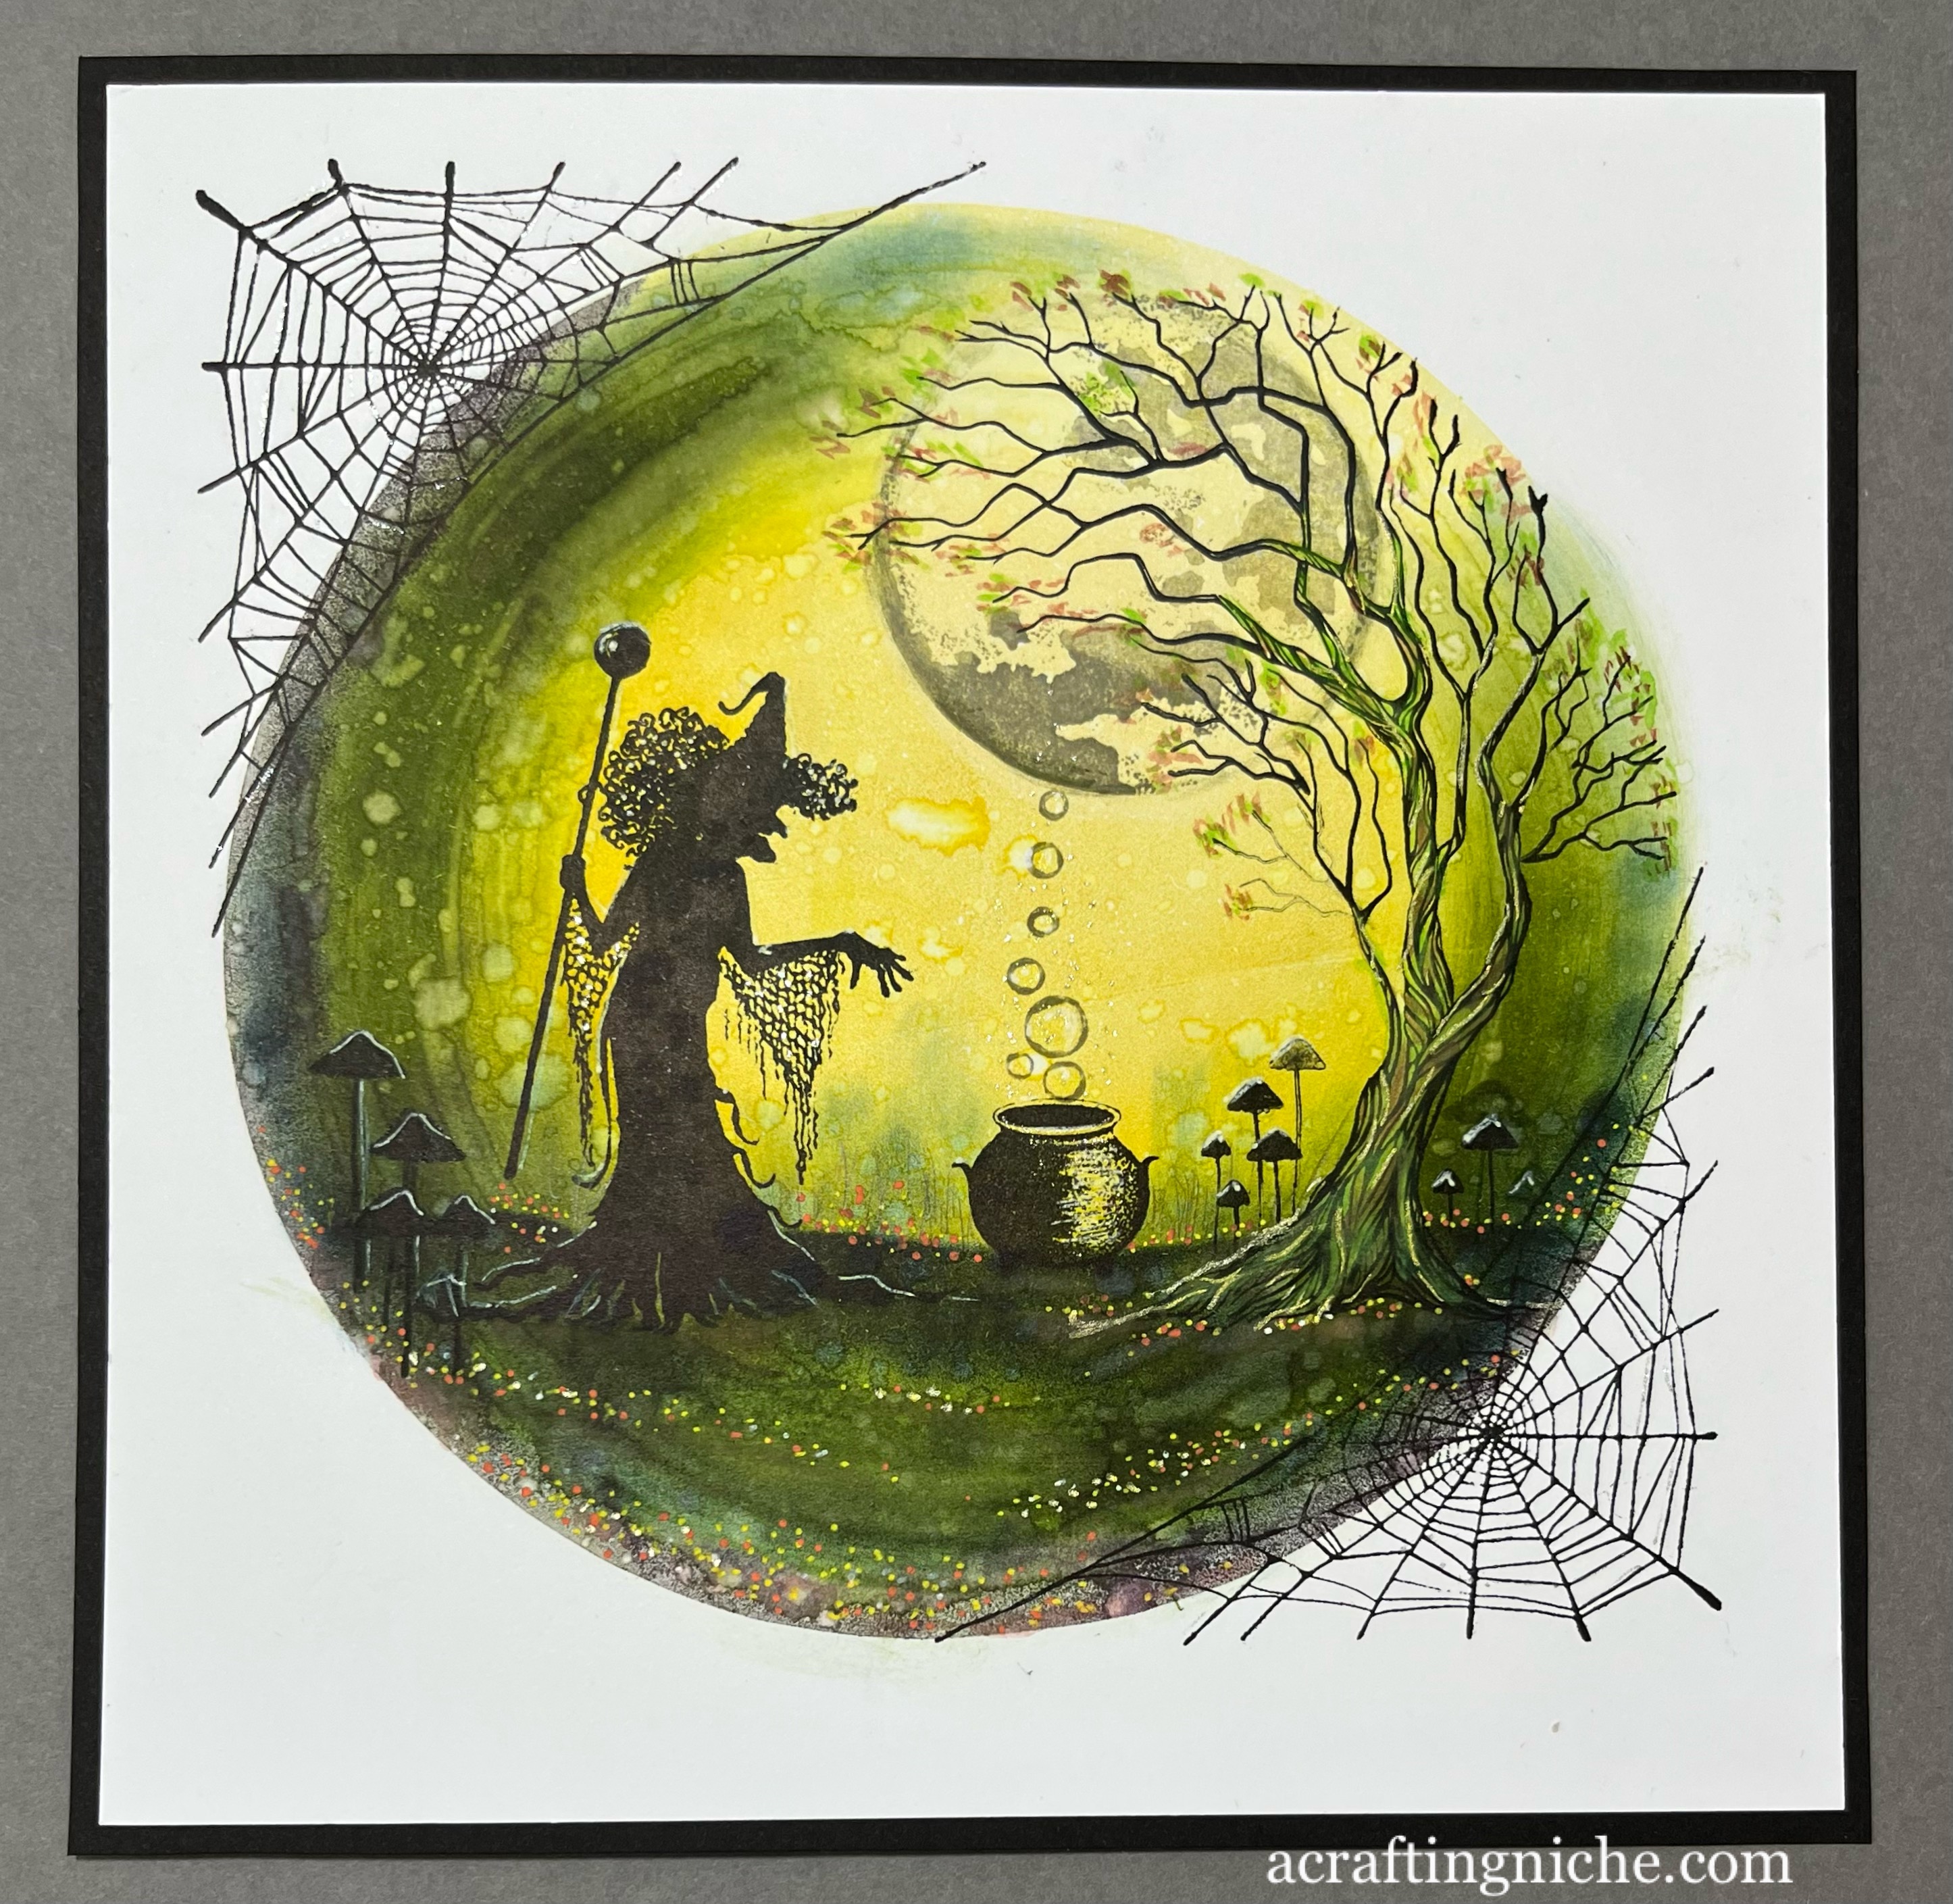
Lavinia Stamps "Willow the Witch" Halloween Card


I was up at a silly hour again this morning, so did some crafting making this Halloween card.

For the base, I used a gel plate, brayering on "Sundance Elements Inks" across the surface.  With a smoothie, I then added "Olive Elements Inks" around three quarters of the circle, leaving the top right hand corner free of green ink.  I popped a few splatters of water on to the gel plate, concentrating on the areas where I had added the green ink.  I then popped a piece of 7x7" card over the top to take the impression, smoothing my hand over the surface to ensure that the ink transferred to the card fully.

I used a heat gun to dry the surface and decided I wanted more green, so used a blending brush with the olive ink, using sweeping movements to get the look I was after.

In the top right area where there was less ink, I stamped the Lavinia "Moon" using Versafine Clair "Morning Mist" grey ink.

Using Versafine Clair "Nocturne" black ink, I stamped the Lavinia Stamps "Willow the Witch", her couldron, the "Tree of Hope" and the toadstools from the "Lamps" stamp set.  I then used Versafine Clair "Twilight" dark blue ink, with a blending brush and one of the Lavinia Stamps "Hill Masks" to create the landscape that the images sit on.

I coloured the tree trunk using Derwent inktense pencils, applied with a paint brush, using the following colours:  Apple Green, Red Oxide and Natural Brown.  I added a few leaves to the bare branches of the tree too.  While the brown pencil was out, I added some grounding to the witch, couldron and tree too.

I then stamped the bubbles, using part of the Lavinia Stamps "Sea Bubbles" stamp with Versafine Clair "Morning Mist" grey ink.

I used the Lavinia Stamps "Fairy Web" with Versafine Clair "Nocturne" black ink to stamp in the top left and bottom right corner.  I felt this allowed the eyes to settle diagonally across the card.

Finally, I added touches of yellow and orange Posca Pens to create the impression of flowers growing in the grass.  I used a white gel pen for highlights and a silver glitter pen and "A Wink Of Stella" to add some shimmer and sparkle .

Friday, 29 September 2023

Stampers Amonymous "Entomology" Lady Bird Card


I've felt a little different about my crafting since my return from holiday.  Nothing I can really put my finger on, but I know I'm not where I usually am with my crafting, so to address this, I have gone back to basics with this CAS card.

I started by using the Gummiapan "Trellis" (D210628) die to cut a white trellis, which I mounted on to a white card blank with a wet glue.

Below the trellis, I stamped a Simon Says Stamp sentiment "Just For You" which is part of their "Tiny Words" stamp set, stamped in Versafine Clair "Nocturne" black ink.

Using "Nocturne" again, I stamped the ladybird from the Tim Holtz/Stampers Anonymous cling stamp set called "Enomolog" CMS328 on to a piece of white card.  I then used a Derwent Inktense pencil to colour the ladybird, using a paint brush.  I used the matching Sizzix Tim Holtz/Stampers Anonymous die set (663068), to die cut the ladybird.  I went around the edges of the die cut with a black Sharpie pen, before sticking over the trellis.

Finally, I added some black dots of Ranger "Enamel Accents" and I covered the ladybird with Ranger "Glossy Accents" and set aside to dry... which takes ages!

Lavinia Stamps winter scene card


Another card, this time using Lavinia Stamps to make this winter scene.

I started by masking off the right hand and bottom edge of the card using low tack masking tape, to ensure I kept that area free of any unwanted ink.  

Using one of the Lavinia Stamps "Hill Masks" I used two shades of Distress Oxide Inks (Tumbled Glass and Blueprint Sketch) along with the remainder of ink on my purple ink blending brush, which together created the lovely snowscape.

Next, I moved on to the stamping, using the Lavinia Stamps Pixy Houses stamps with Versafine Clair "Morning Mist" grey ink.  Positioning the houses over a piece of paper, this provided the impression that the houses are just peeping over the snow.  I added a dots of yellow Posca Pen to the windows and used a 2B pencil to add the smoke coming from the chimneys.

I used the Lavinia "Gyp" stamp with Versafine Clair "Pine Cone" brown ink to stamp the branches on the right hand side of the card, using first and second generation stamping.

Next I stamped the bare bushes in the foreground, using the Lavinia Stamps "Small Branch" with Versafine Clair "Morning Mist" grey ink.  I added dots of red Posca Pen to give the impression of berries on the branches.

I then stamped the Lavinia sentiment in Versafine Clair "Twilight" dark blue ink.  Finally splattering some white Arcylic paint over the surface to replicate the snow fall.

Clarity Stamps "Bijou Art Nouveau" Card


Here's a card I made using a couple of Clarity Stamp goodies.

For the central image, I used one of the Clarity "Art Nouveau Collection" stamps, stamped in Versafine Clair "Morning Mist' grey ink.  I stamped the sentiment within the main image stamp using Versafine Clair ""Twilight" dark blue ink.

I coloured the image using the following colours of Derwent Inktense pencils:  Cadmium Yellow, Malibu, Spring Green, Felt Green and Poppy Red.  I then mounted the stamped image on to a piece of dark blue card.

On a card blank card, I placed the Clarity "Abstract Squares" stencil and used two shades of Distress Ink through the stencil (Lost Shadow and Tumbled Glass).

I then mounted the stamped topper on to the card blank.