52 Week Mini Art Card/Tag Challenge

Showing posts with label Brusho SprinkleIT. Show all posts

Tuesday, 6 December 2022

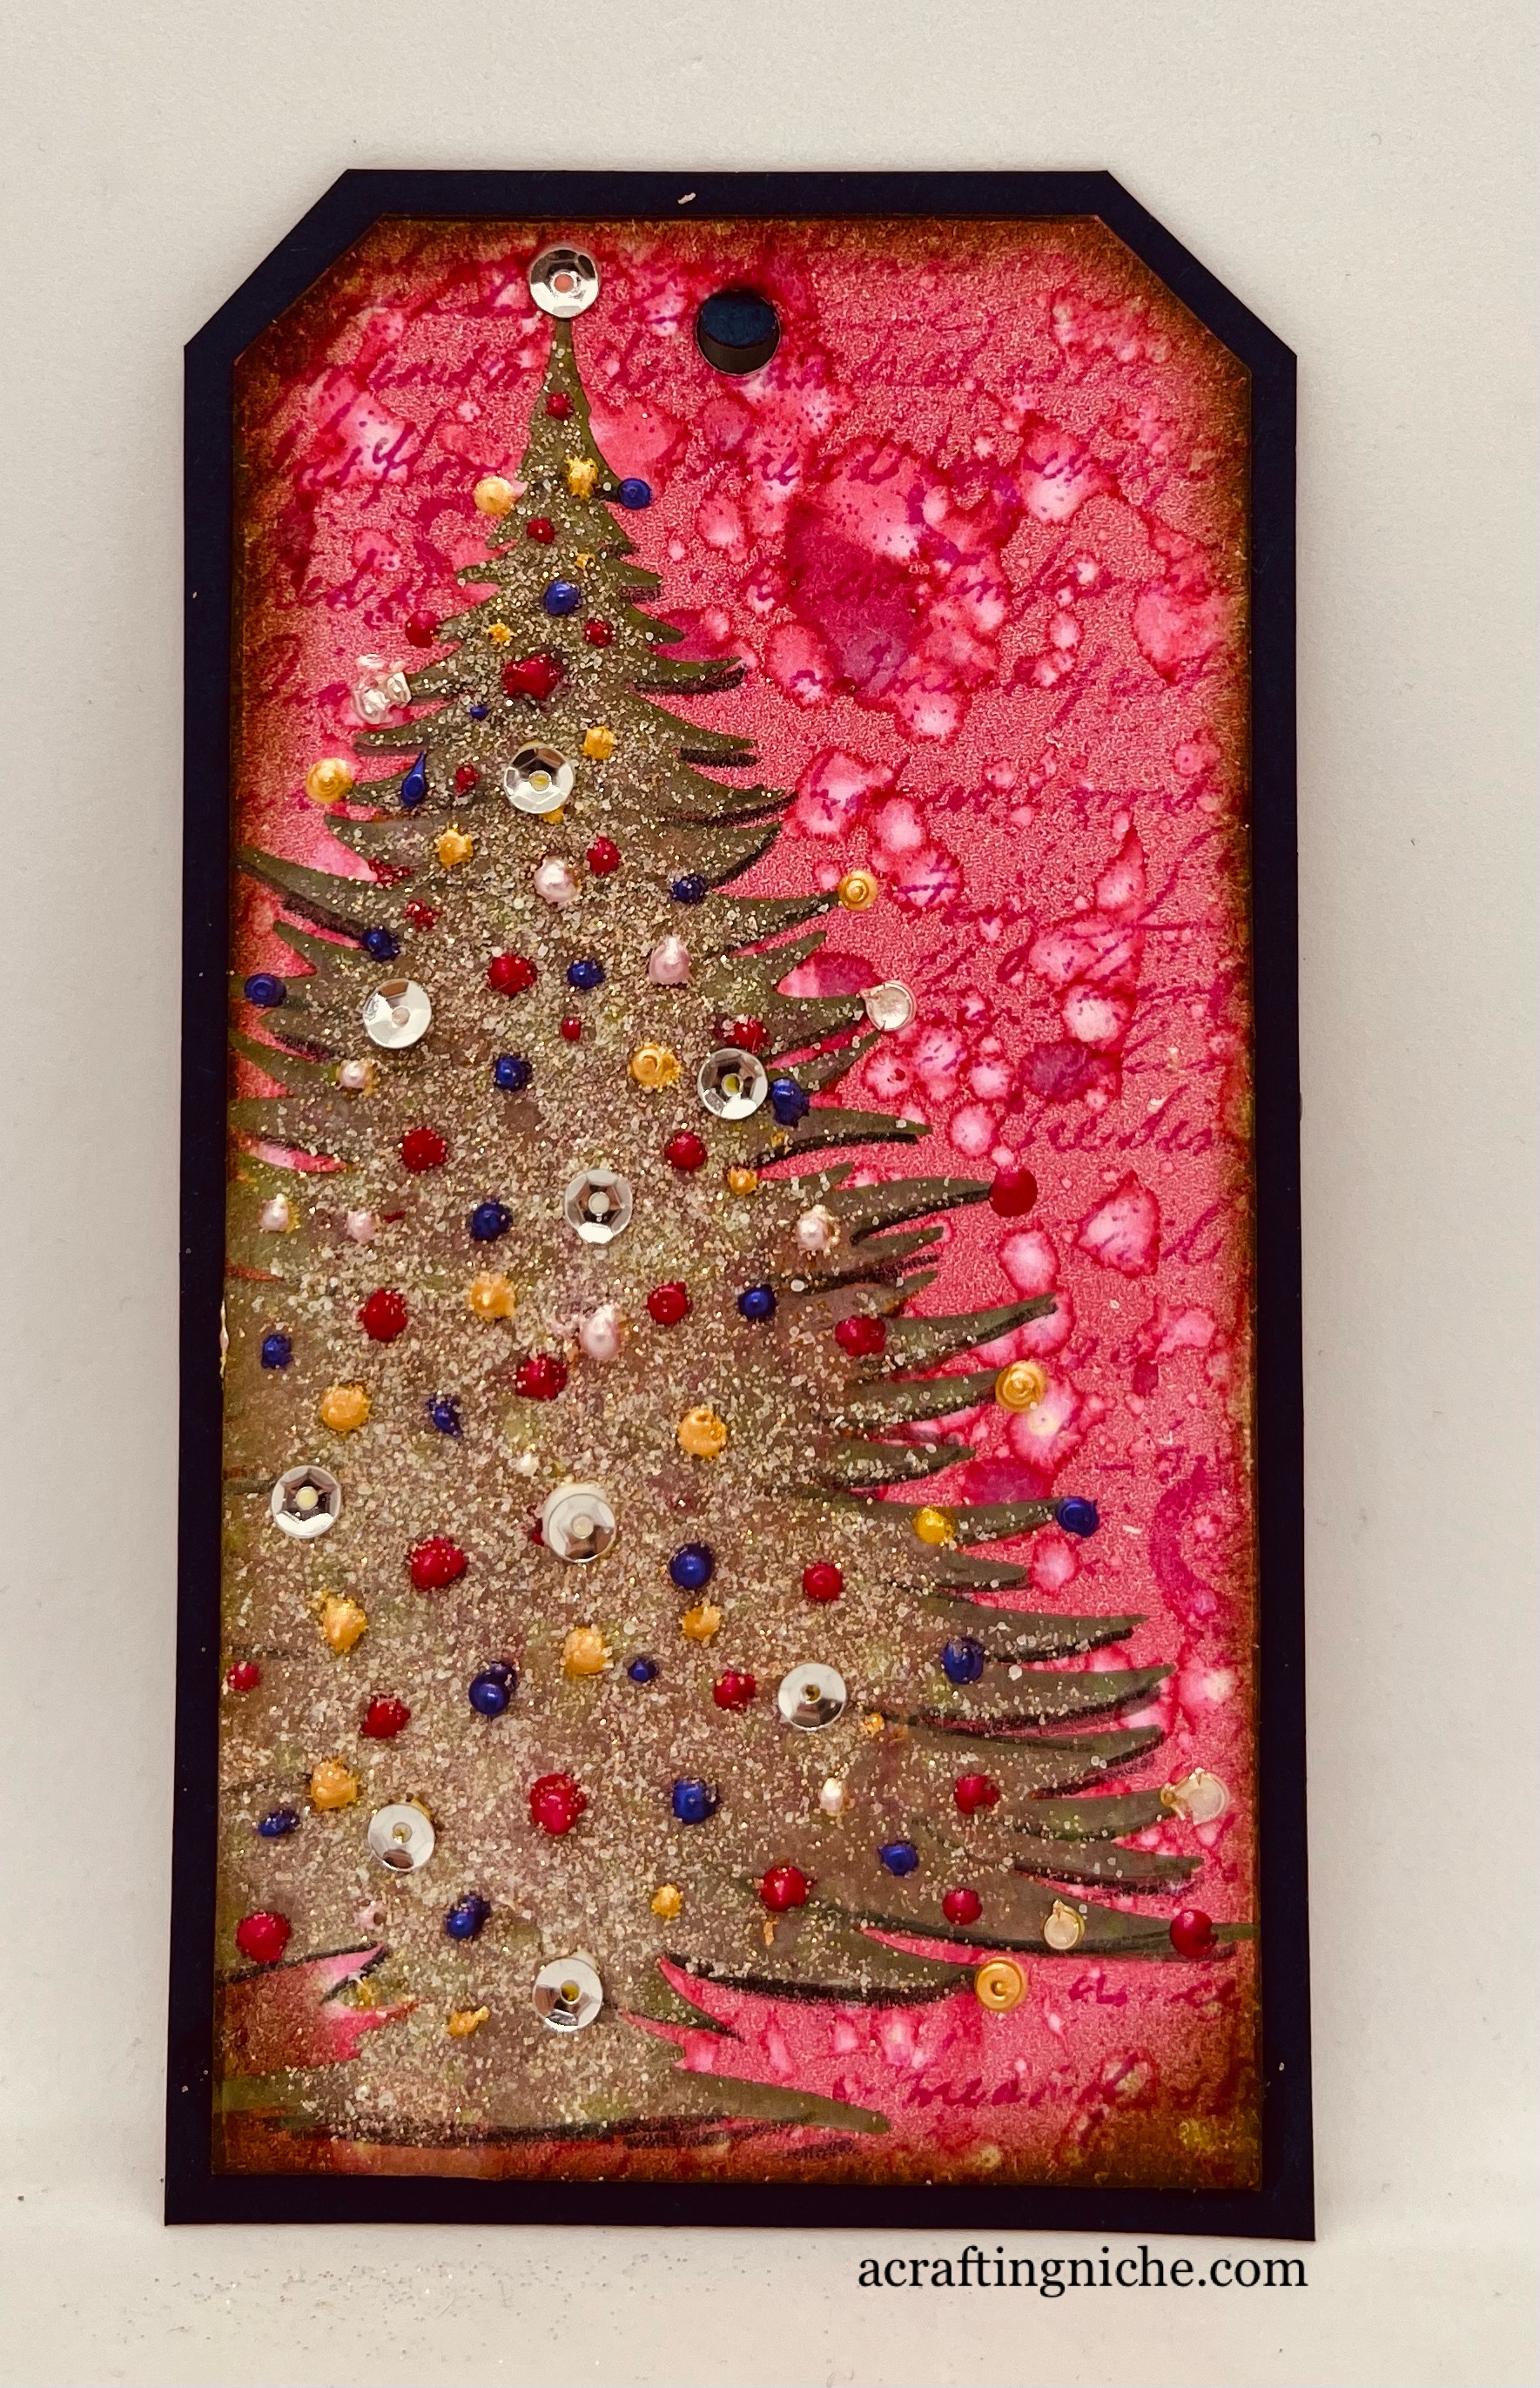
Day 2 of "24 Days of Tags 2022" with Karen Telfer


This is my Day 2 tag. Here's the link to Karen's demonstration. Using the gel plate, Element Inks, Brusho, Distress Oxide Inks and a Lavinia Stamps "Sticker Stencil" and the Lavinia Stamps "Background Script" stamp.


Here's a little vidoe so that you can see the glitter on the tree.

I followed Karen's instructions all the way to decorating the tree, when I went off piste by placing the stencil back in place, giving the tree a slight spritz of water then sprinkling some Irridescent Gold "SprinkleIt" over the area, then left to dry.  I then added sequins and dots of Liquid Pearls.

Sunday, 25 August 2019

Week 35 - 52 Week Mini Art Card / Tag Challenge 2019 (Crafty Individuals CI-265)


The challenge prompt for Week 35 is "Birds".

For my tag, I started off with a gelli plate background I had prepared a few weeks ago, using Colorbox Inks brayered on to the gelli plate and then sprinkled with wet Brusho, which creates the mottled look.

Using a Crafter's Companion script stamp I stamped across the tag using Versafine "Smokey Gray" coloured ink.

On a separate piece of card in the same gelli-plate colours I stamped the Crafty Individuals CI-265 in Versafine Clair "Warm Breeze" shade of ink.  I then cut the stamped image into three.  Using the same ink, I stamped the ferns, which are part of a Crafty Individuals set (CI-207).  

The mini dragonflies are from the same set, but I stamped them in Versafine Clair "Twilight".  I also inked the edges of the tag in "Twilight" and the edges of the stamped bird images too.

I mixed some Distress Oxide ink (Brushed Corduroy and Wild Honey) with some water, then added some Brusho SprinkleIT.  I mixed them together, then using a fan brush splattered across the tag.  This gives a subtle coloured sparkly look.

Using double sided sticky tape, I adhered the bird sections onto the tag.  I gave the birds some additional colour by painting Distress Oxide in shades of "Brushed Corduroy", adding white around the eyes and highlight areas using a white Signo pen.


Sunday, 11 August 2019

Clarity Stamps Chinese Lanterns Card


As soon as I saw the Clarity Stamps "Chinese Lanterns" die, I knew I had to get one, it was love at first sight.

The die measures 4"x4" (10cm x 10cm), so an ideal size to mount on card blanks a little larger.

I used Distress Oxide Inks for the background colour, using the following shades: Mustard Seed, Dried Marigold, Spiced Marmalade and Ripe Persimmon.

I spritzed the background with water then added some Brusho SprinkleIT in an iridescent gold to give some shimmer.

While the background was drying, I die cut the Chinese Lanterns, cut down the edges then adhered it over the background colour.

The sentiment is from the Clarity Stamp "Words Sticker Collection".  

I loved making this very quick card and really like the result too.


Saturday, 15 June 2019

Lavinia Stamps June 2019 Monthly Challenge (sample #3)


Every month, Lavinia Stamps hold a monthly challenge, where the winning name drawn wins £40 of vouchers to spend on lovely Lavinia goodies.

The theme for the month of June 2019 is:  "A Sprinkling Of Fairy Dust"

This is the third sample I have made as part of the Design Team to promote the challenge.

I made a batch of backgrounds using a gelli plate and Brusho inks a few weeks back.  I've used one of these for the base of this card.  Throughout this card, I have used Lavinia Stamps and Versafine Clair ink to stamp with.

I started by stamping the "Foxgloves" in the shade of Monarch Versafine Clair ink.  I then stamped the fairy called "Dust Silhouette" in the same ink.

I then moved on to the "Willow" hanging down, which was stamped in Versafine Clair ink in the colour of "Shady Lane".  I then stamped the "Wild Vines" in Versafine Clair ink in the shade of "Nocturne".

I inked the edge of the card and made a landscape for the fairy to sit on in Versafine Clair "Fantasia" ink.  I added touches of silver glitter to the fairy wings and created the dust droplets using Liquid Pearl droplets.  Finally, I gave the card a very light spritz and flicked on some Brusho "SprinkleIT" in "Iridescent Gold"


Sunday, 2 June 2019

Forget Me Not "Rabbit Stencil" Birthday Card


I have received a lovely selection of stamps and stencils from Sharon Everett from The Forget Me Not Kraft Kabin, so decided to play with a rabbit stencil.

I lay & taped the Forget Me Not "Rabbit" Stencil on top of a piece of card.  I sectioned off the bottom third of the card, colouring the top with a Distress Ink in the shade of "Coloured Straw".  I then taped a Tim Holtz stencil called "Rays" into position over the rabbit stencil and added another shade of Distress Ink in the shades of "Dried Marigold".  Closer to the rabbit shape, I added a darker shade of Distress Ink called "Spiced Marmalade".

I removed the rays stencil and tape, retaining the position of the "rabbit" stencil and rough painted Distress Oxiedes to replicate a grassy area, using the shades of: Shabby Shutters, Bundled Sage and Twisted Citron.  I then removed the outline shaped rabbit stencil and replaced with the outer shape of the stencil (this means only the plain rabbit shape itself is shown).

Using a small flower stamp from a Visible Image set called "Create It" I multiple stamped the flower within the shape of the rabbit body, using Versafine Ink in the shade of "Stormy Grey" ink.  I deliberatly stamped the eye area very lightly so that the eye is drawn to that area.

I removed the stencil and went around the outline of the rabbit using a pencil.  I coloured in the middle of the rabbit eye with the pencil too and then added an edge of white to the eye using a Signo Pen.  Then to add a little more interest added a touch of Glossy Accents to the eye to give it a more glassy look.

Finally, using a sentiment stamp set by "Forget Me Not" I stamped the "Happy Birthday" again using Versafine "Stormy Grey" ink.  I also added a touch of sparkle to the orange sunrays by using a wet paint brush with some Brusho SprinkleIT in "Iridescent Gold" shade.

Saturday, 20 April 2019

Lavinia Stamps Design Team Samples for Hochanda TV Arpil 23rd 2019 (Set 2 - 1)


Lavinia Stamps will be appearing on Hochanda TV on Tuesday 23rd April 2019 at 11am and 3pm.  This is a Design Team sample I have made for the show.

For this sample, I created a background of Distress Oxides Inks using shades of:  Squeezed Lemonade, Scattered Straw and Dried Marigold.

I stamped the beautiful Lavinia Stamps butterfly called "Indra" and the sentiment  called "Let Your Spririt Take Flight" in a Versafine Clair ink called "Fantasia".  I then coloured the butterfly with Promarker pens in the following shades:  Bluebell, Magenta, Cyan and Leaf Green.

Next I moved onto the flowers at the base of the card.  I stamped the "Fairy Buds" (the tall flowers), in two shades of Versafine Clair ink:  Verdant Green and Charming Pink.  I then stamped the "Dandelions" in Versafine Clair "Fantastia" shade of ink.  

Finally, I added some dots of Liquid Pearls to the Fairy Buds and to Indra.  I also added a touch of glitter to the trail of flight from the butterfly using the "Brusho Sprinkle It - Iridescent Gold"

Sunday, 31 March 2019

Week 14 - 52 Week Mini Art Card / Tag Challenge 2019


The prompt for Week 14 is "Splodge, Splash and Splatter".

This prompt takes me totally out of my comfort zone, I tend to do more constructed rather than informal crafting.  

I took three shades of acrylic paint, added a dob of each to the tag and smeared it  across the surface and left to dry. Using a gold coloured Brusho SprinkleIt (with water), I brushed some of the areas to give it a quiet sparkle.

I then splashed white Gesso across the surface of the acrylic paint with a fan paint brush.  Once this was dry, I added spots of three shades of Liquid pearls.

Finally, using a Versafine Clair ink pad called "Charming Pink" I stamped the words which are from a Visible Image stamp set called "Into The Woods".

~~~

Click here for more information on the challenge.

There is also a Facebook Group for this challenge, where members can upload thier images to weekly prompt albums and chat to other members.  It is a very informal group, you do as much or as little as you like.  I hope you will pop over and say hello.  The more the merrier.  Sam x